Epic Steel Power Mast Install
One of the first orders of business in outfitting my house and shop is bringing in some substantial power. The current service is only 100 Amps which will be quickly exceeded by adding all of the machine tools to the shop.
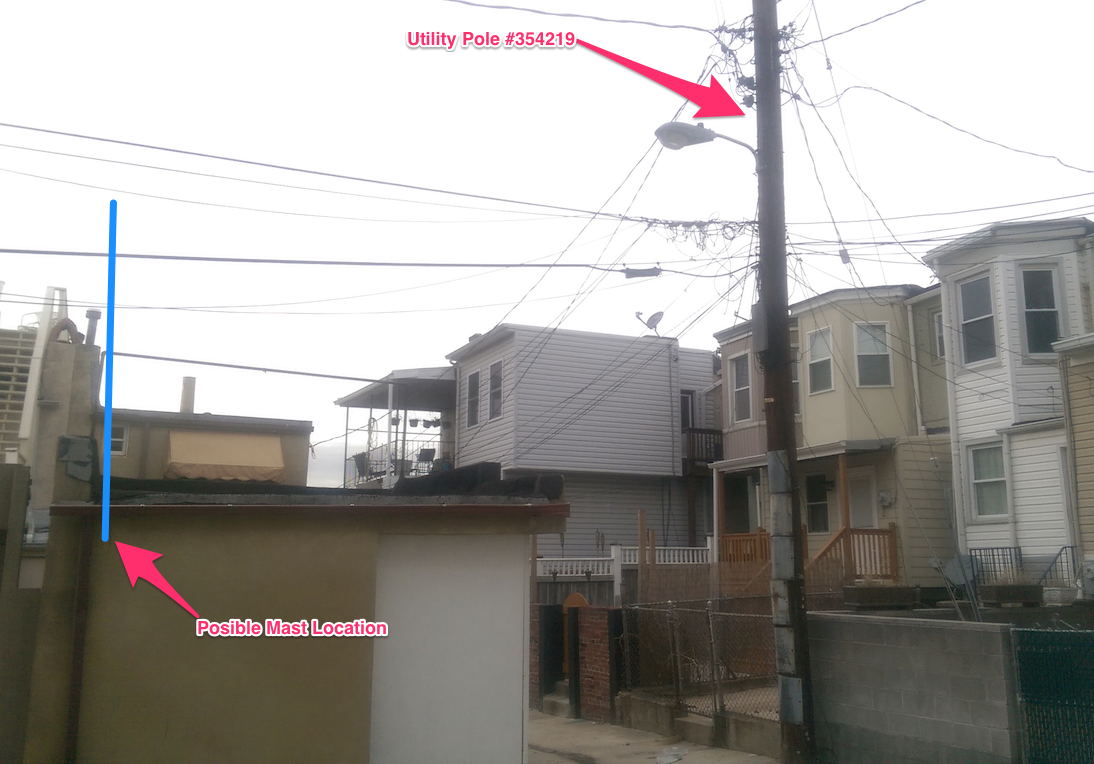
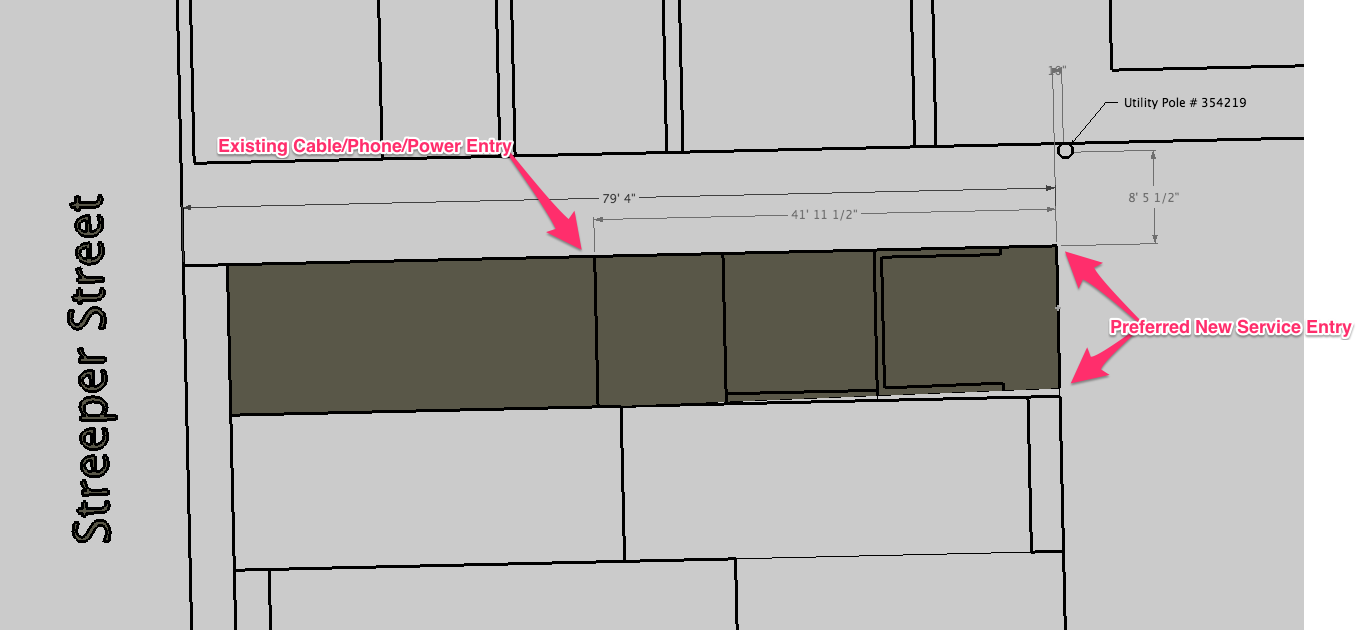
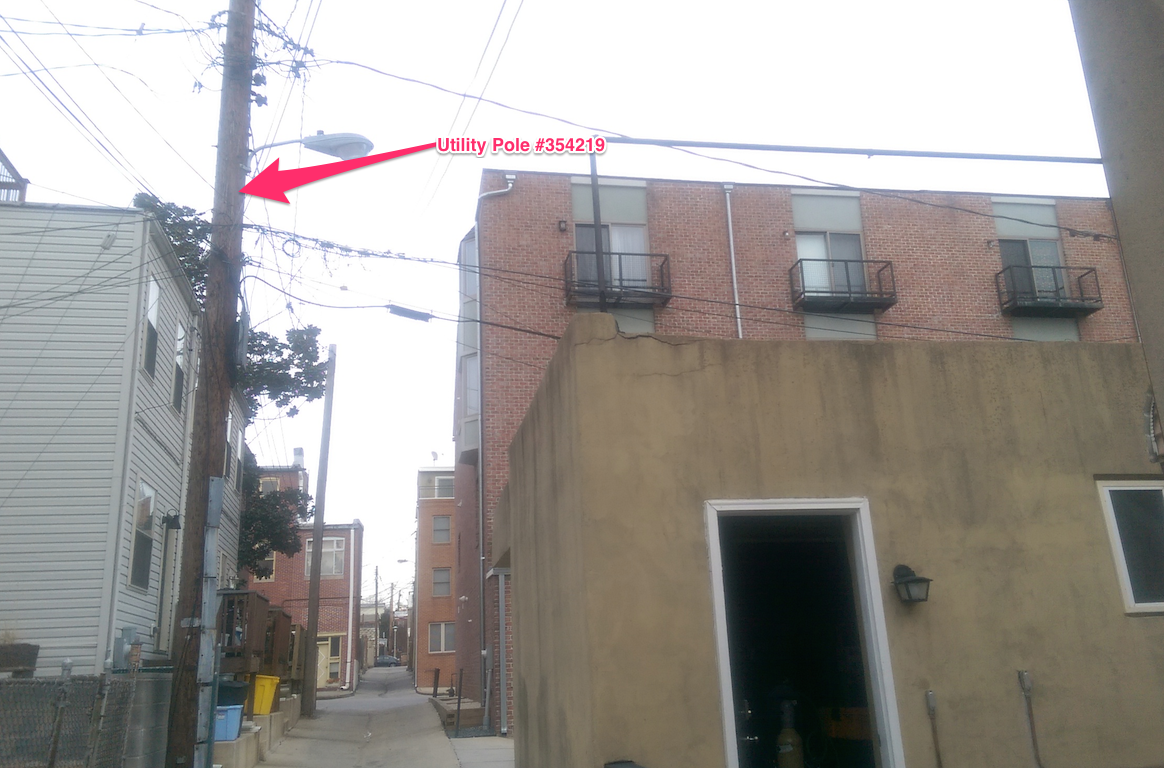
Some initial investigation made me hopeful that we could run a 3 phase power hookup from the utility pole right behind the house. Having dedicated 3 phase power would be great for scrounging up second-hand, heavy duty tools, and it would be just plain cool.
Coming up with a Plan
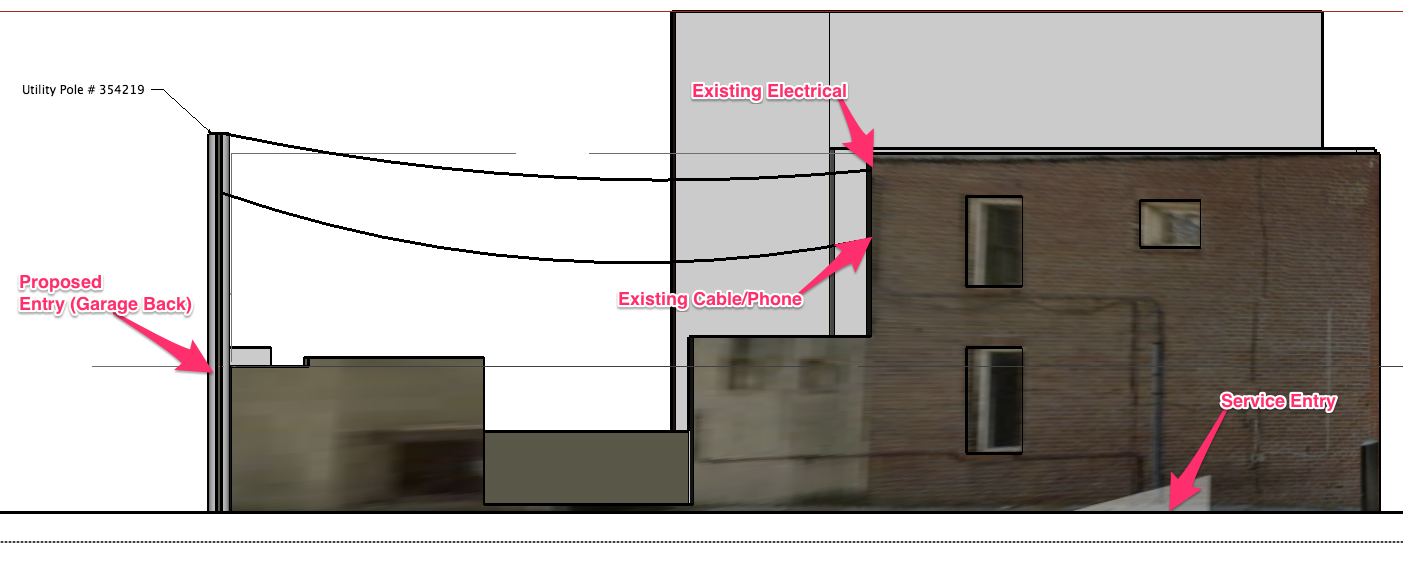
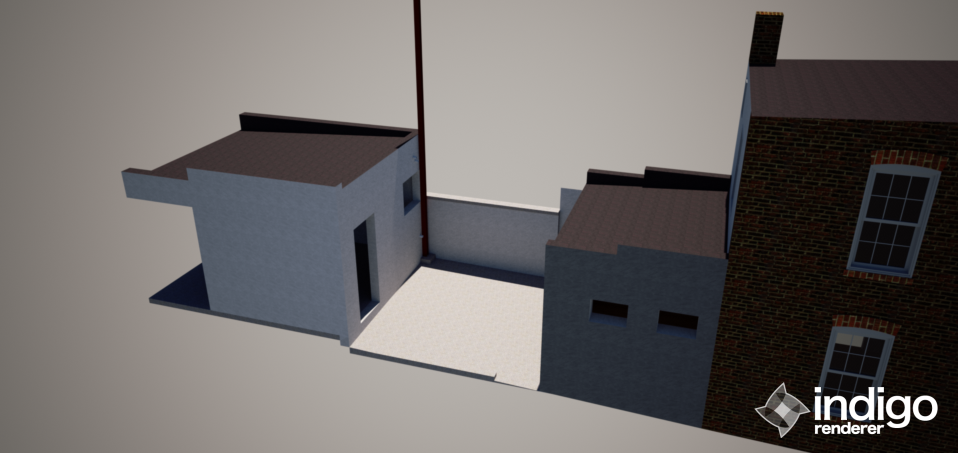
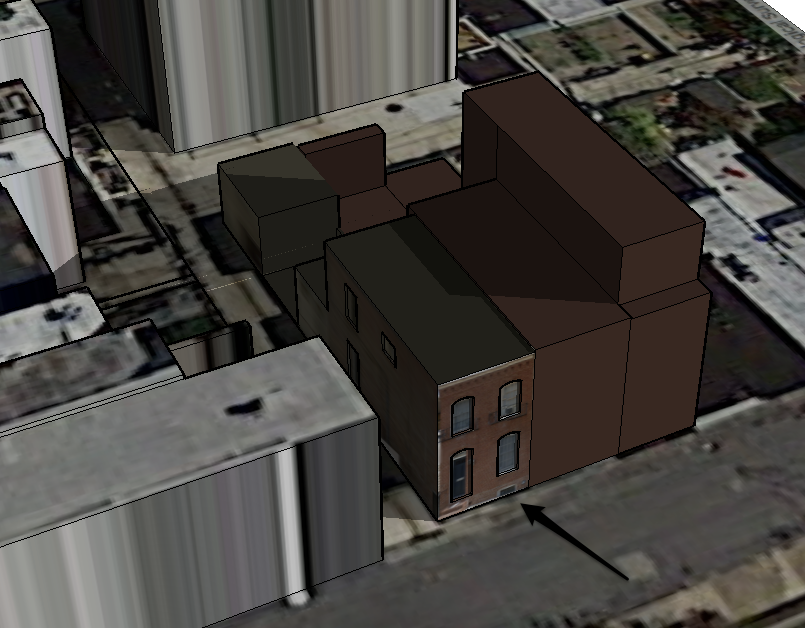
In order to ensure that what I was about to do was anywhere near code, I started by creating some 3D models of the project so I could run them by my electrician. These drawings were made several months ago, back when I was working with the utility company to come up with a feasible plan.
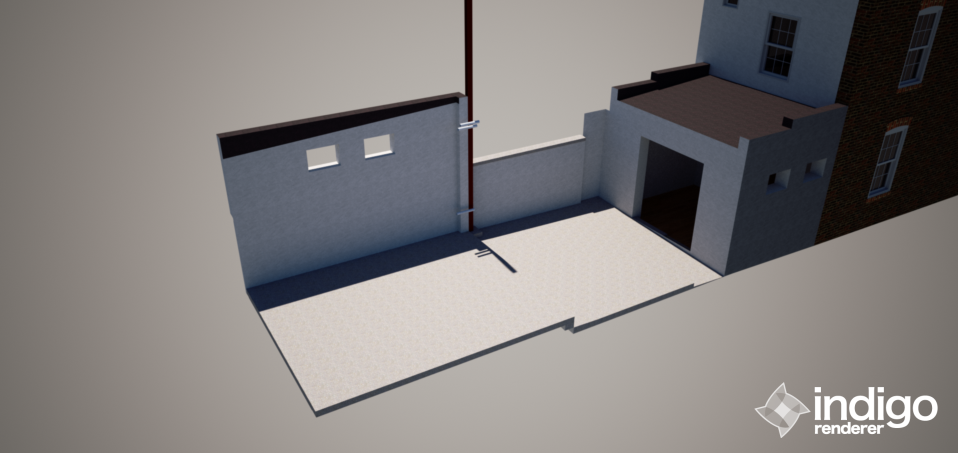
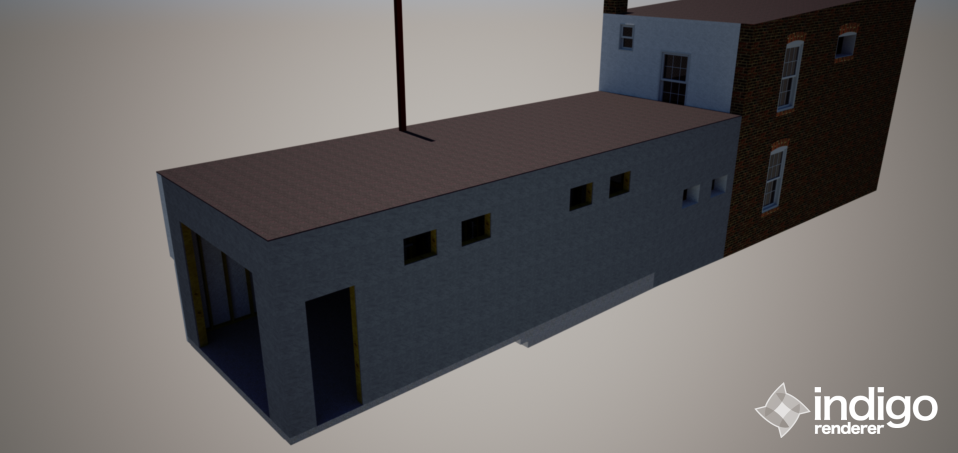
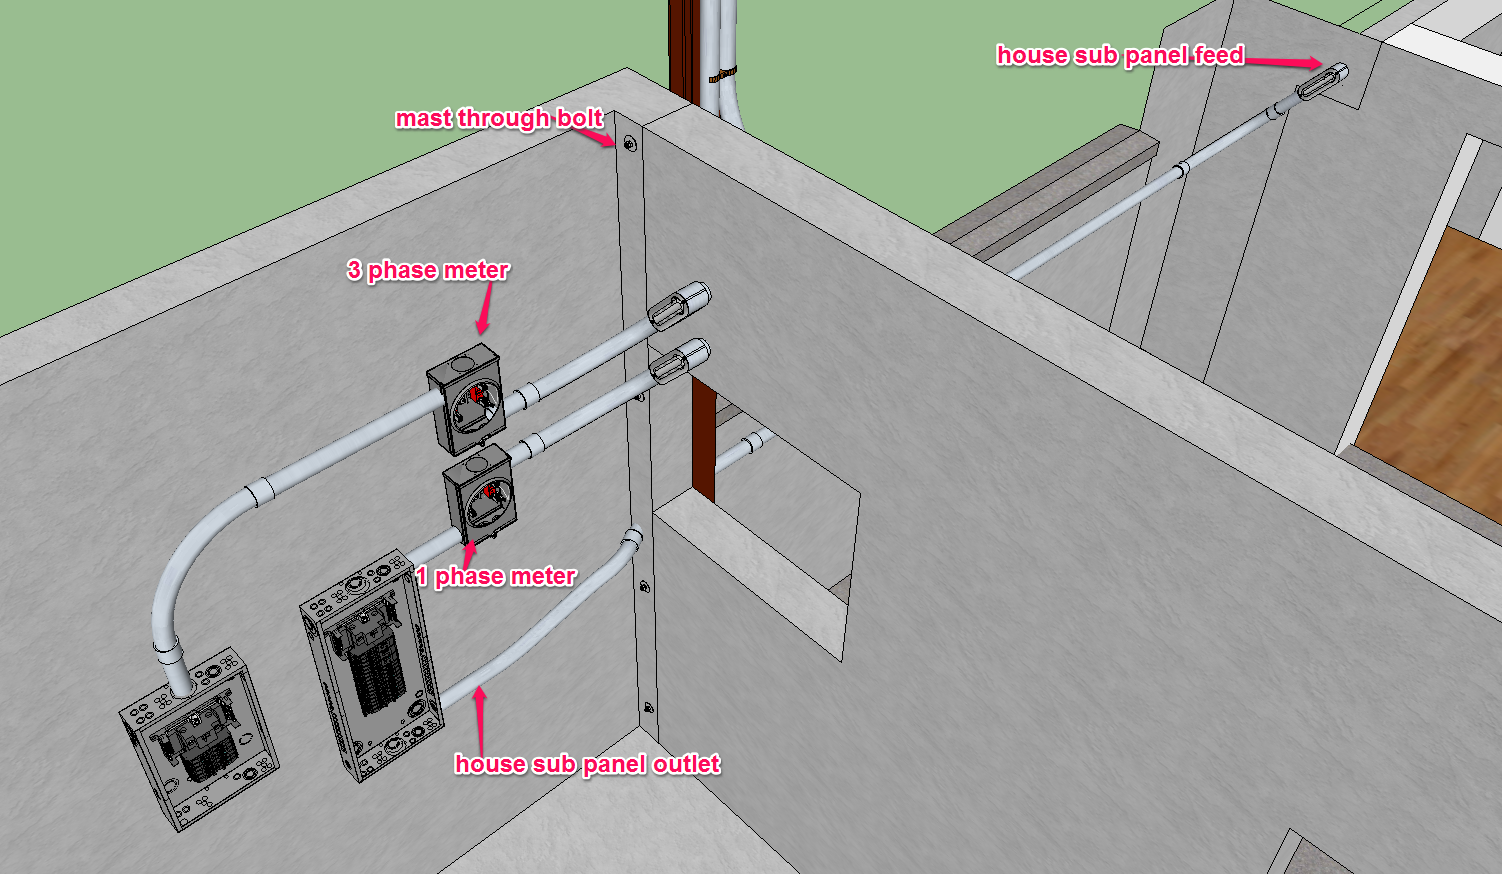
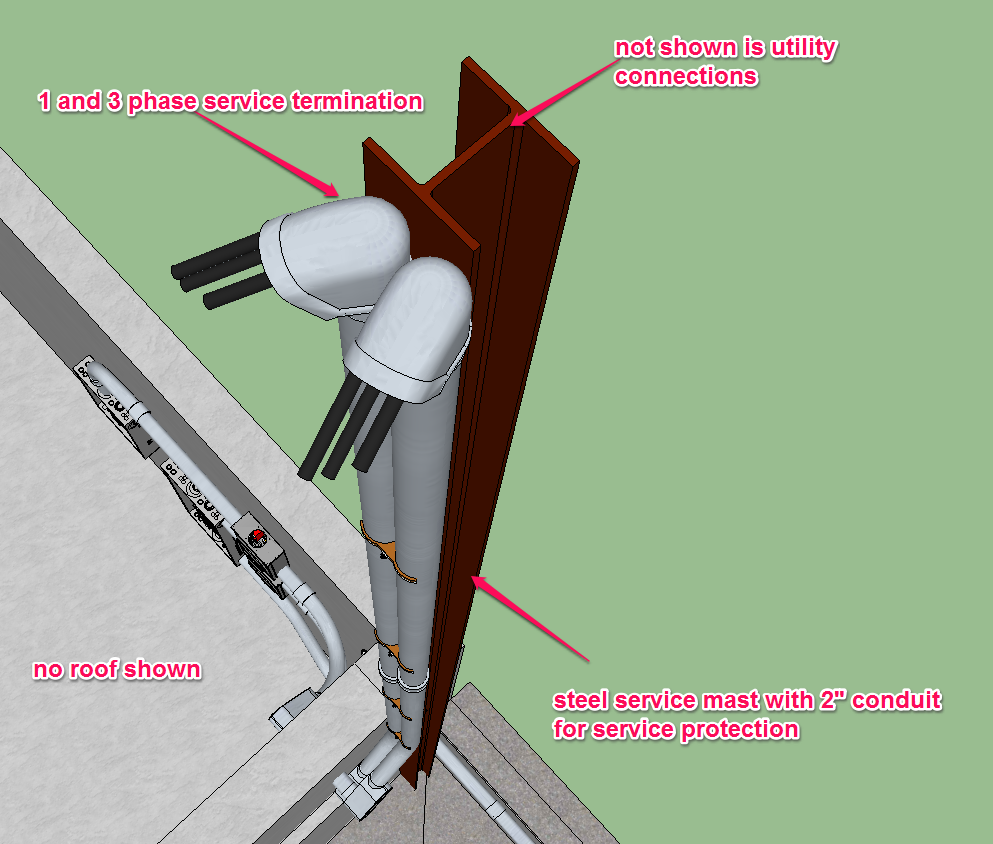
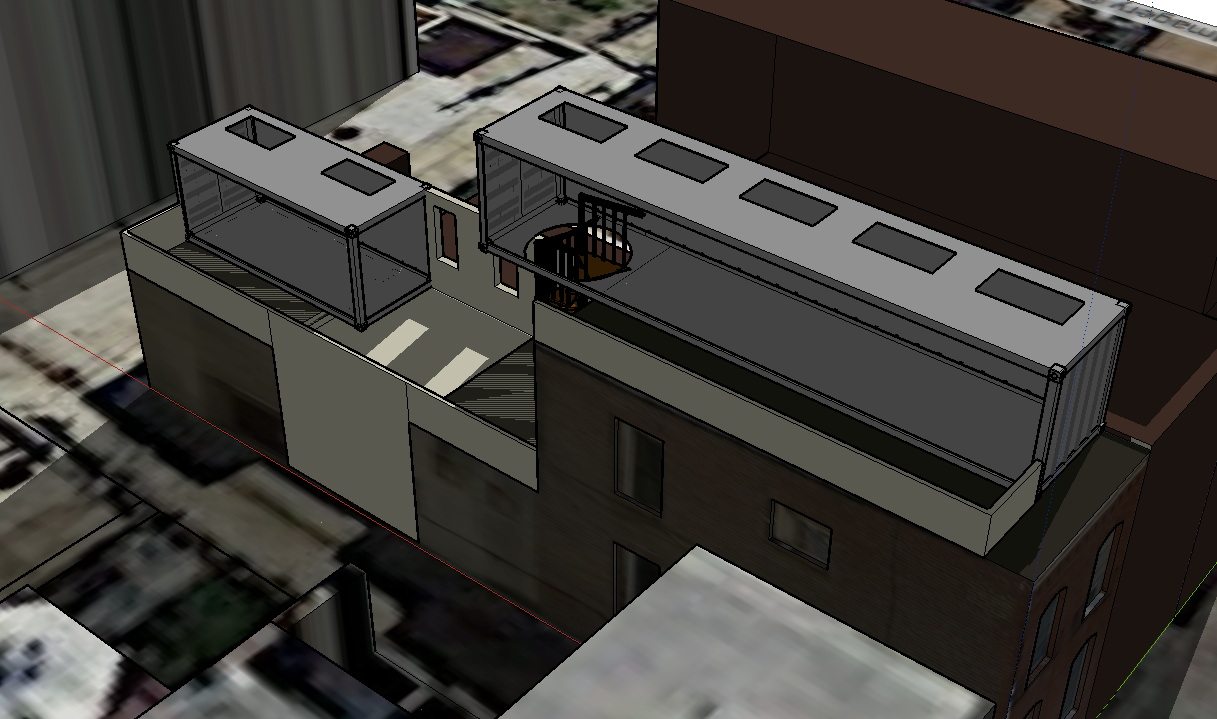
They required a large steel mast, rather than a wood one, as the mast would support two service drops. One contains the feed for the 3 phase service, while the other contains the single phase service that would power some things in the shop and the rest of the house. My design looked like this:

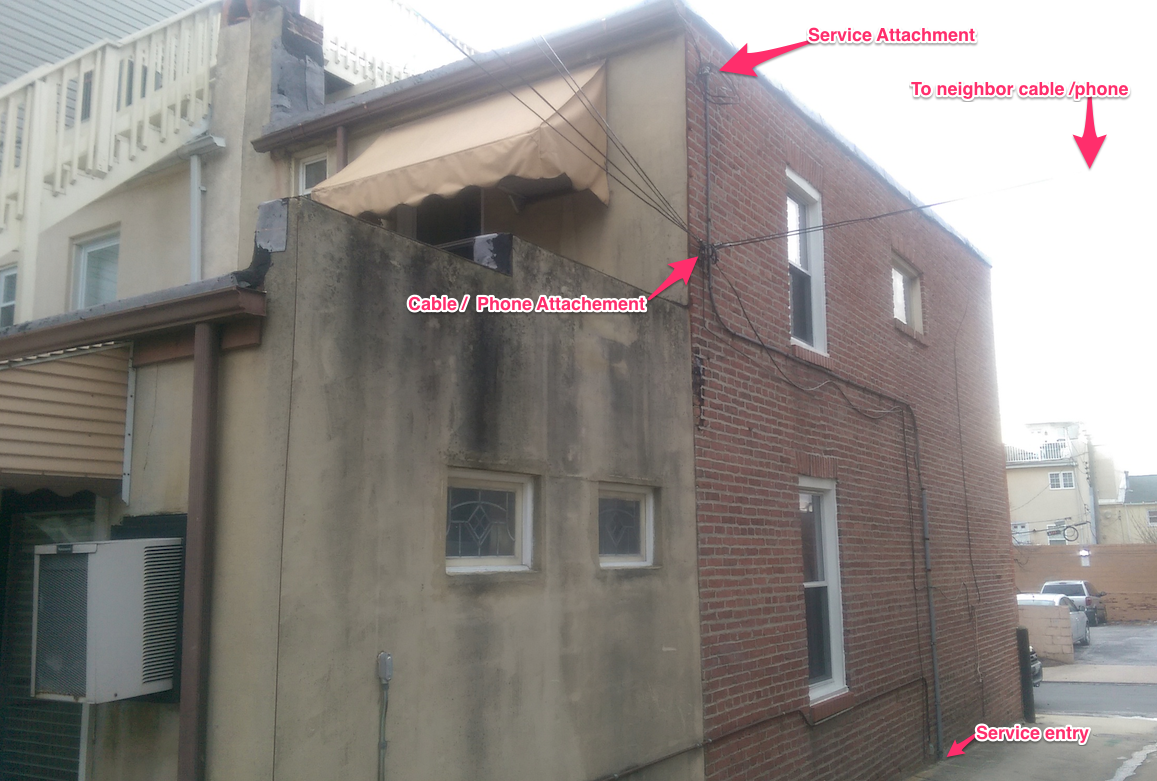
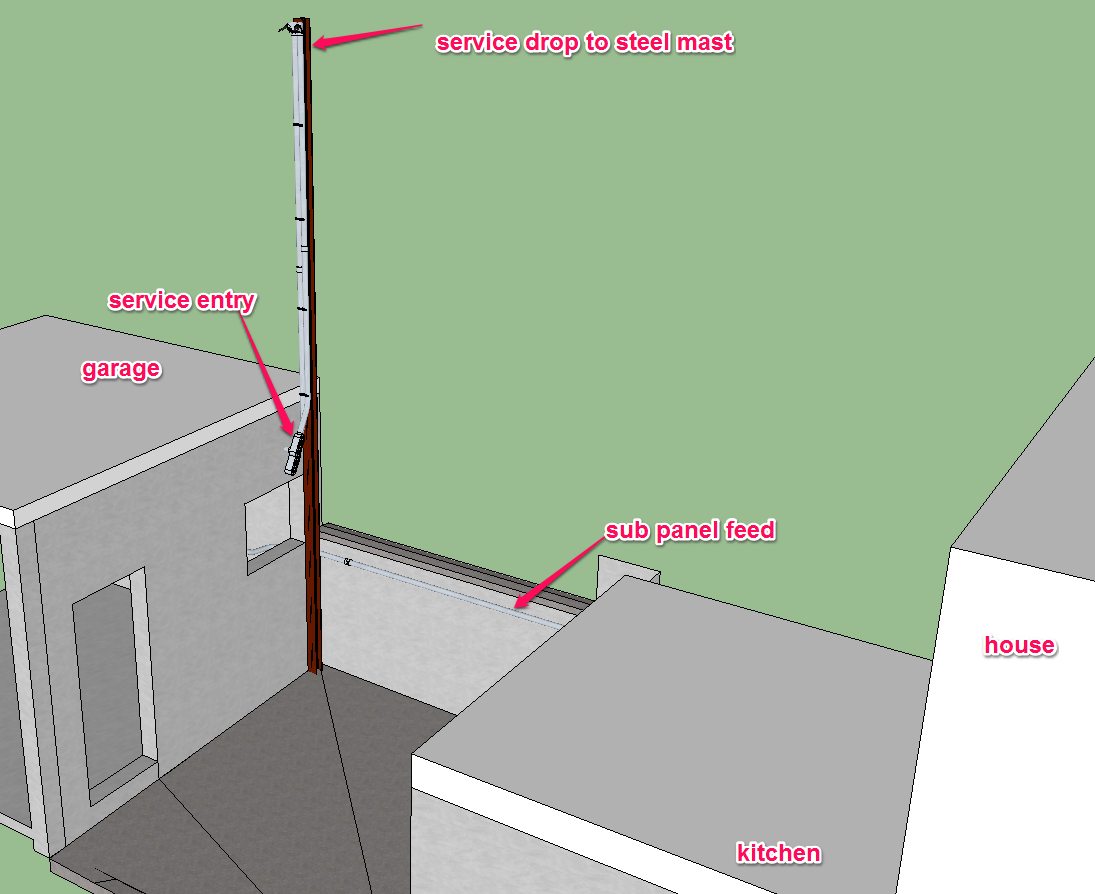
You can see here how the two service drops would be affixed to the mast:

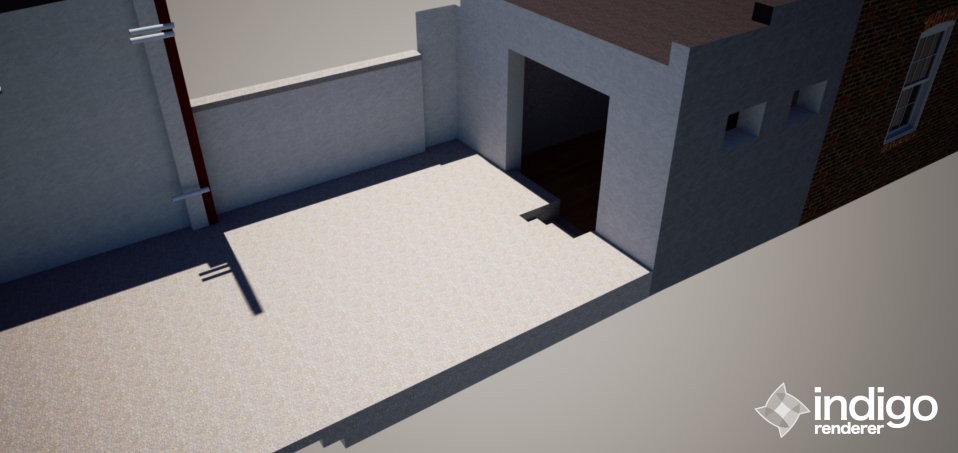
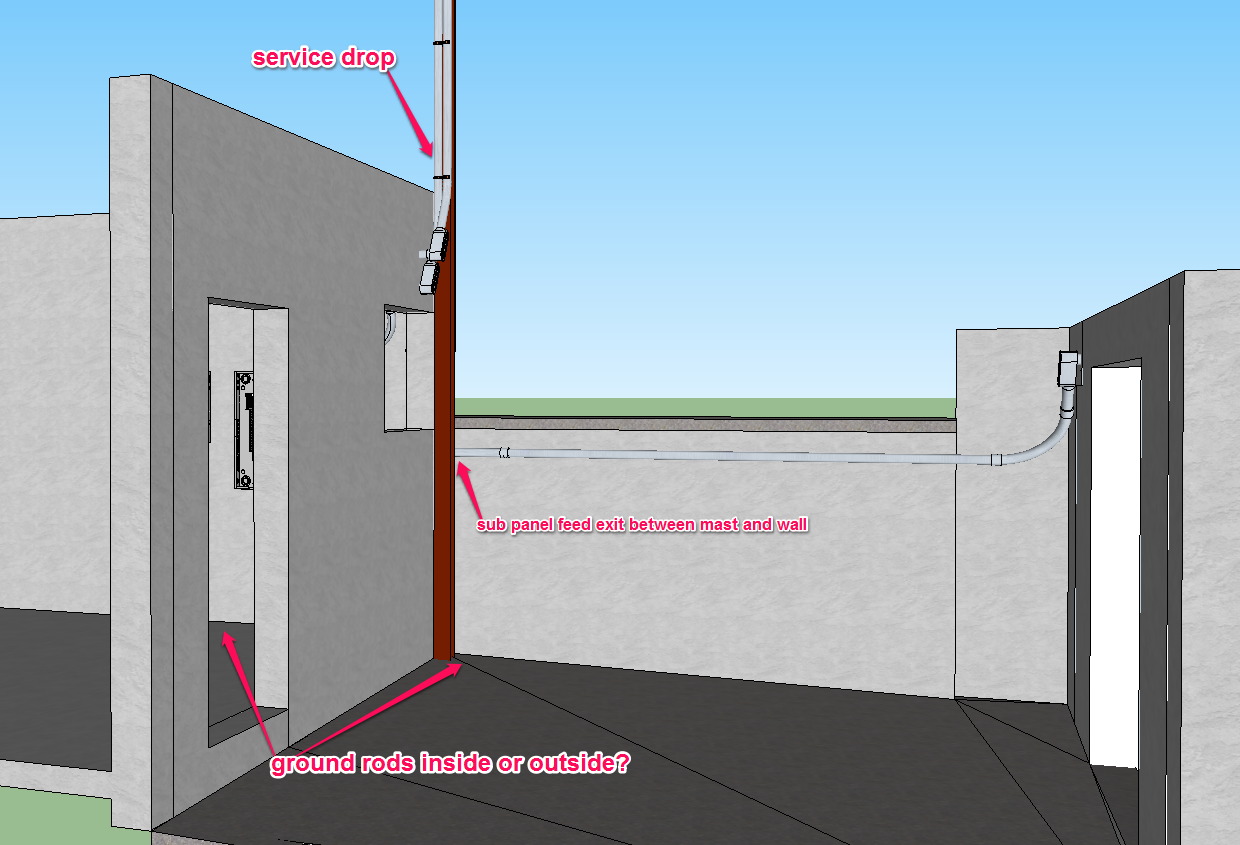
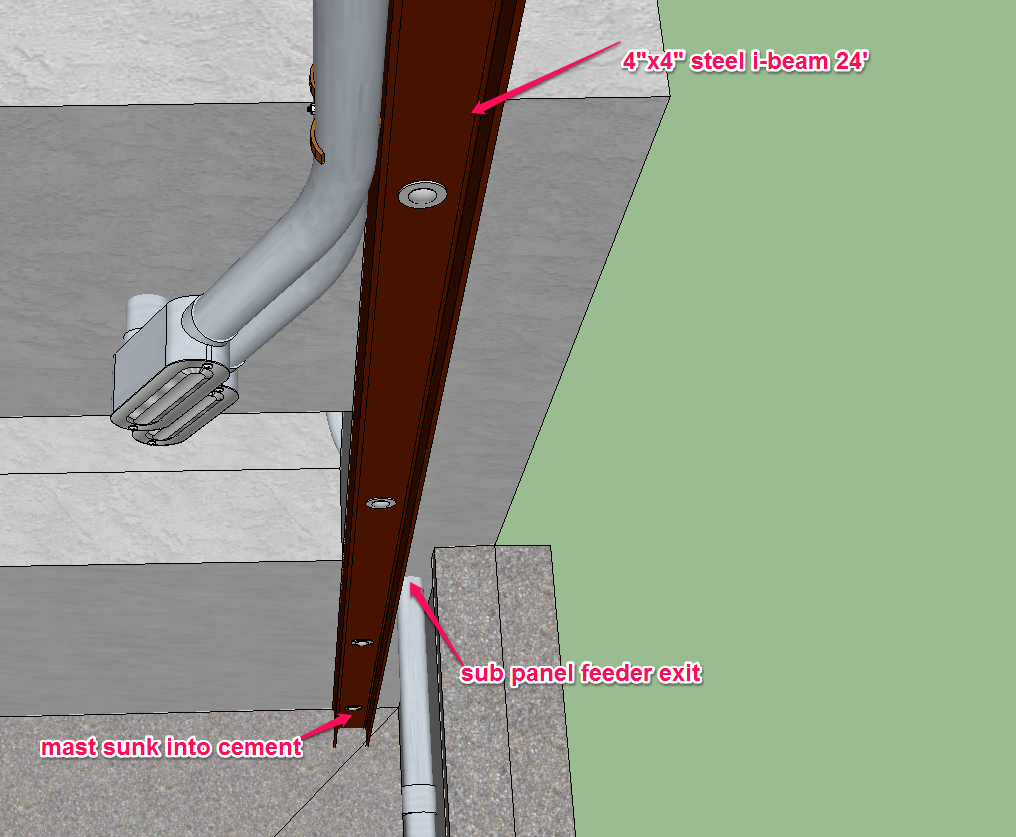
At the bottom of the mast, the power would enter the garage with two right angle connections:

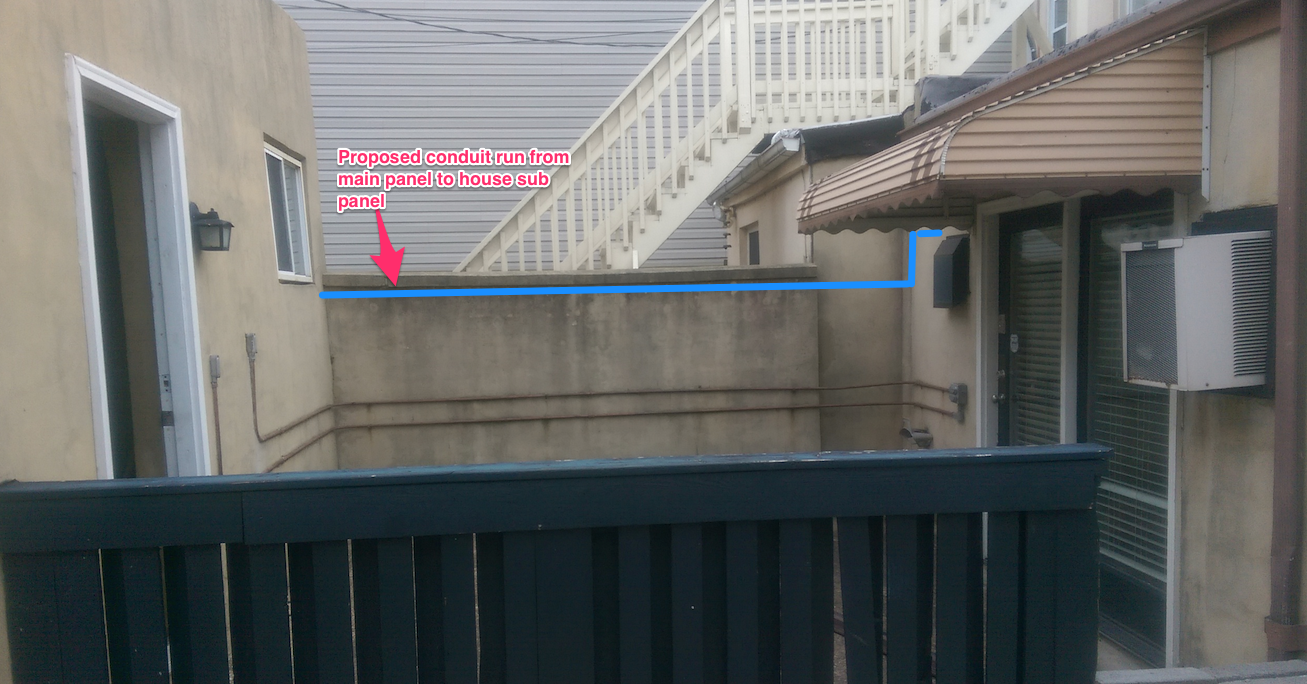
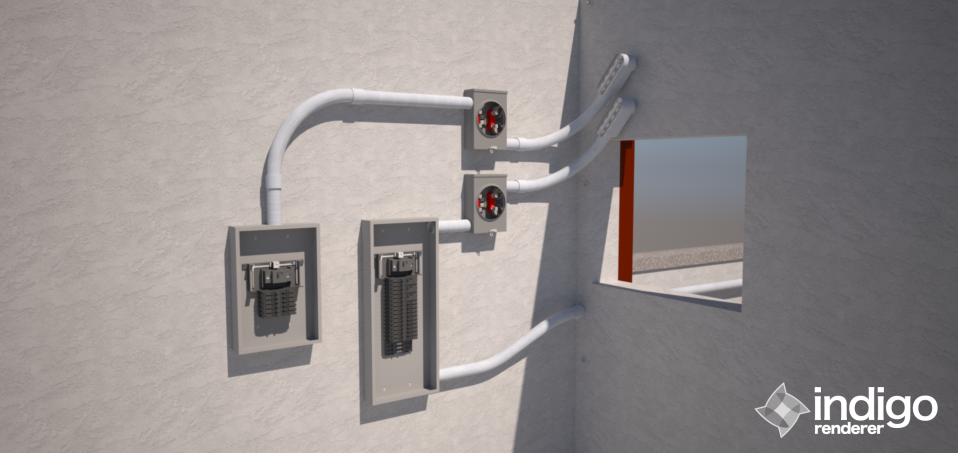
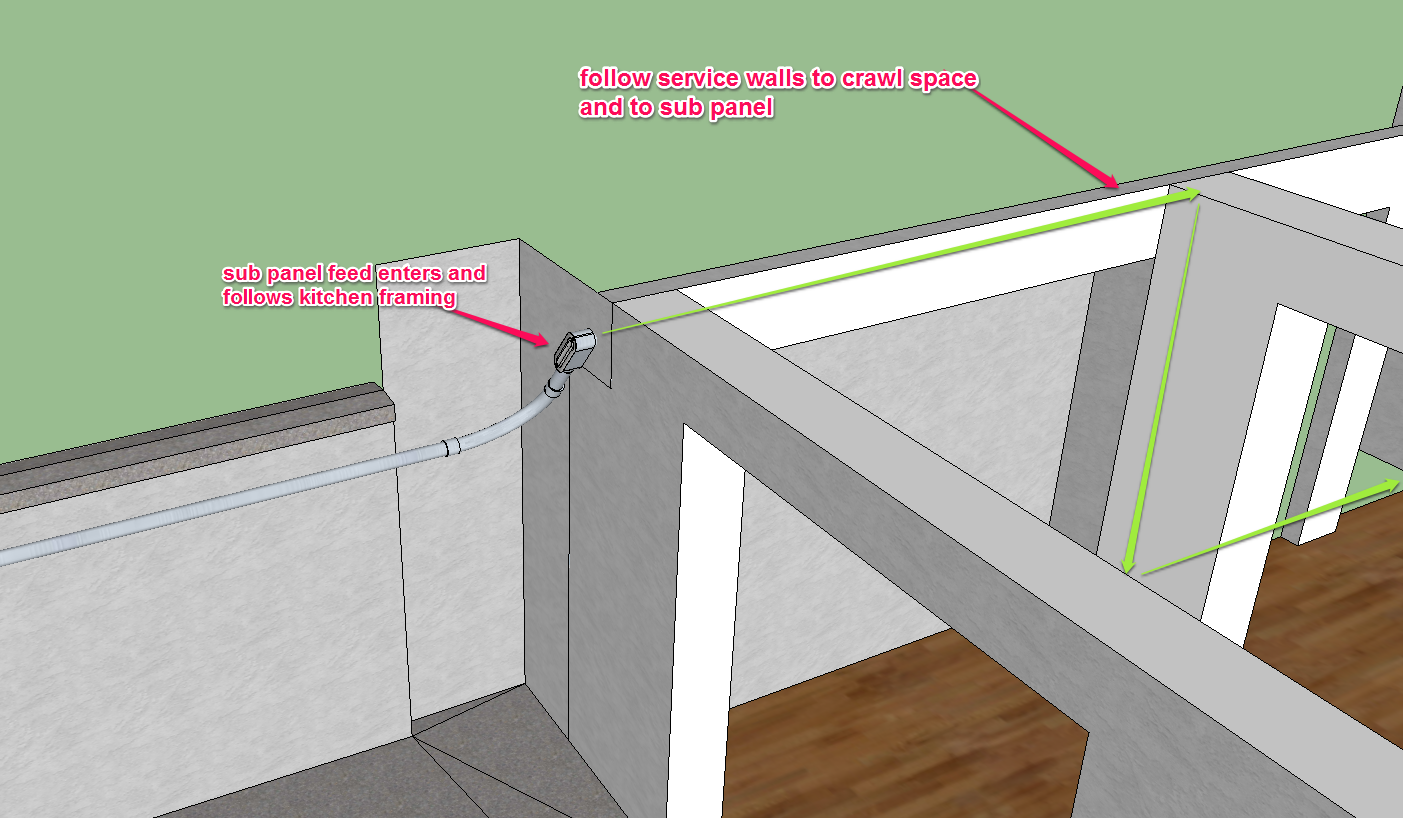
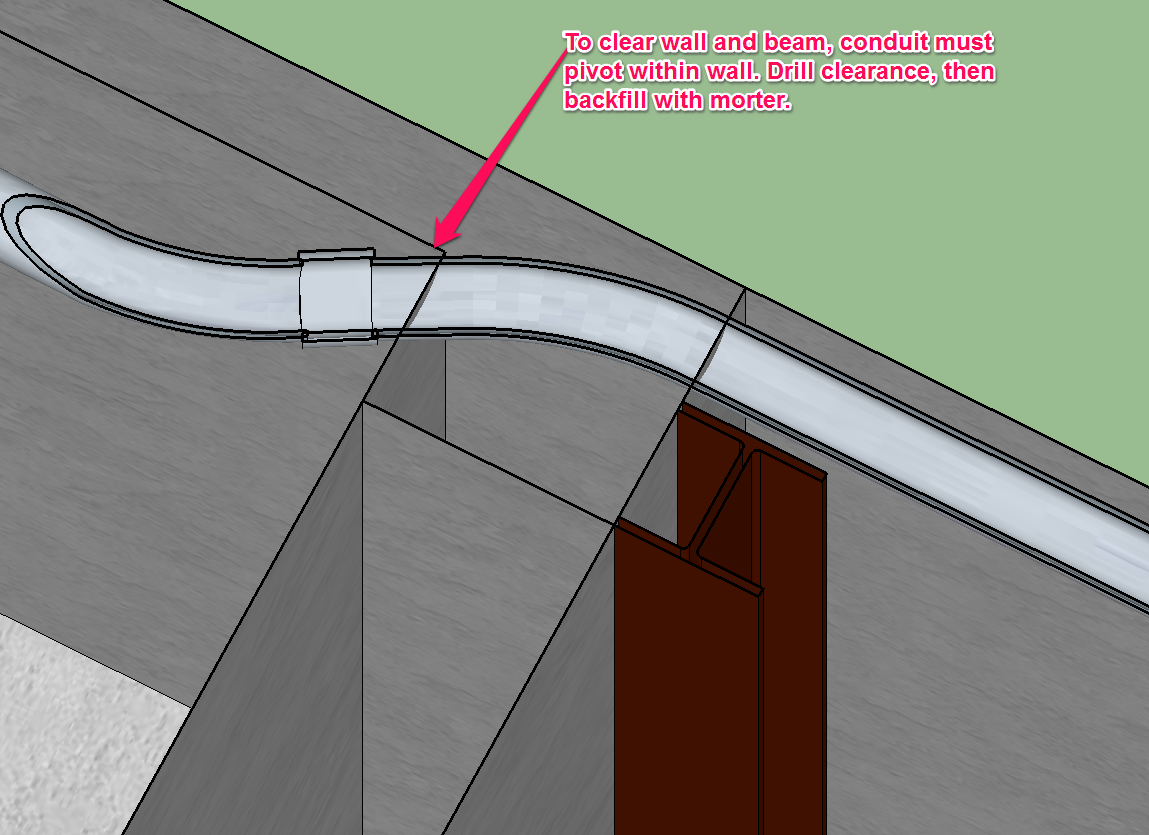
And then inside the garage, there would be some sort of transition to the two meters and the main panels. A large sub-panel feed would originate in the single phase breaker box, and then run back into the house. This part of the design is still a little up in the air; I'll probably wait to have the electrician finish out this part.
Installation
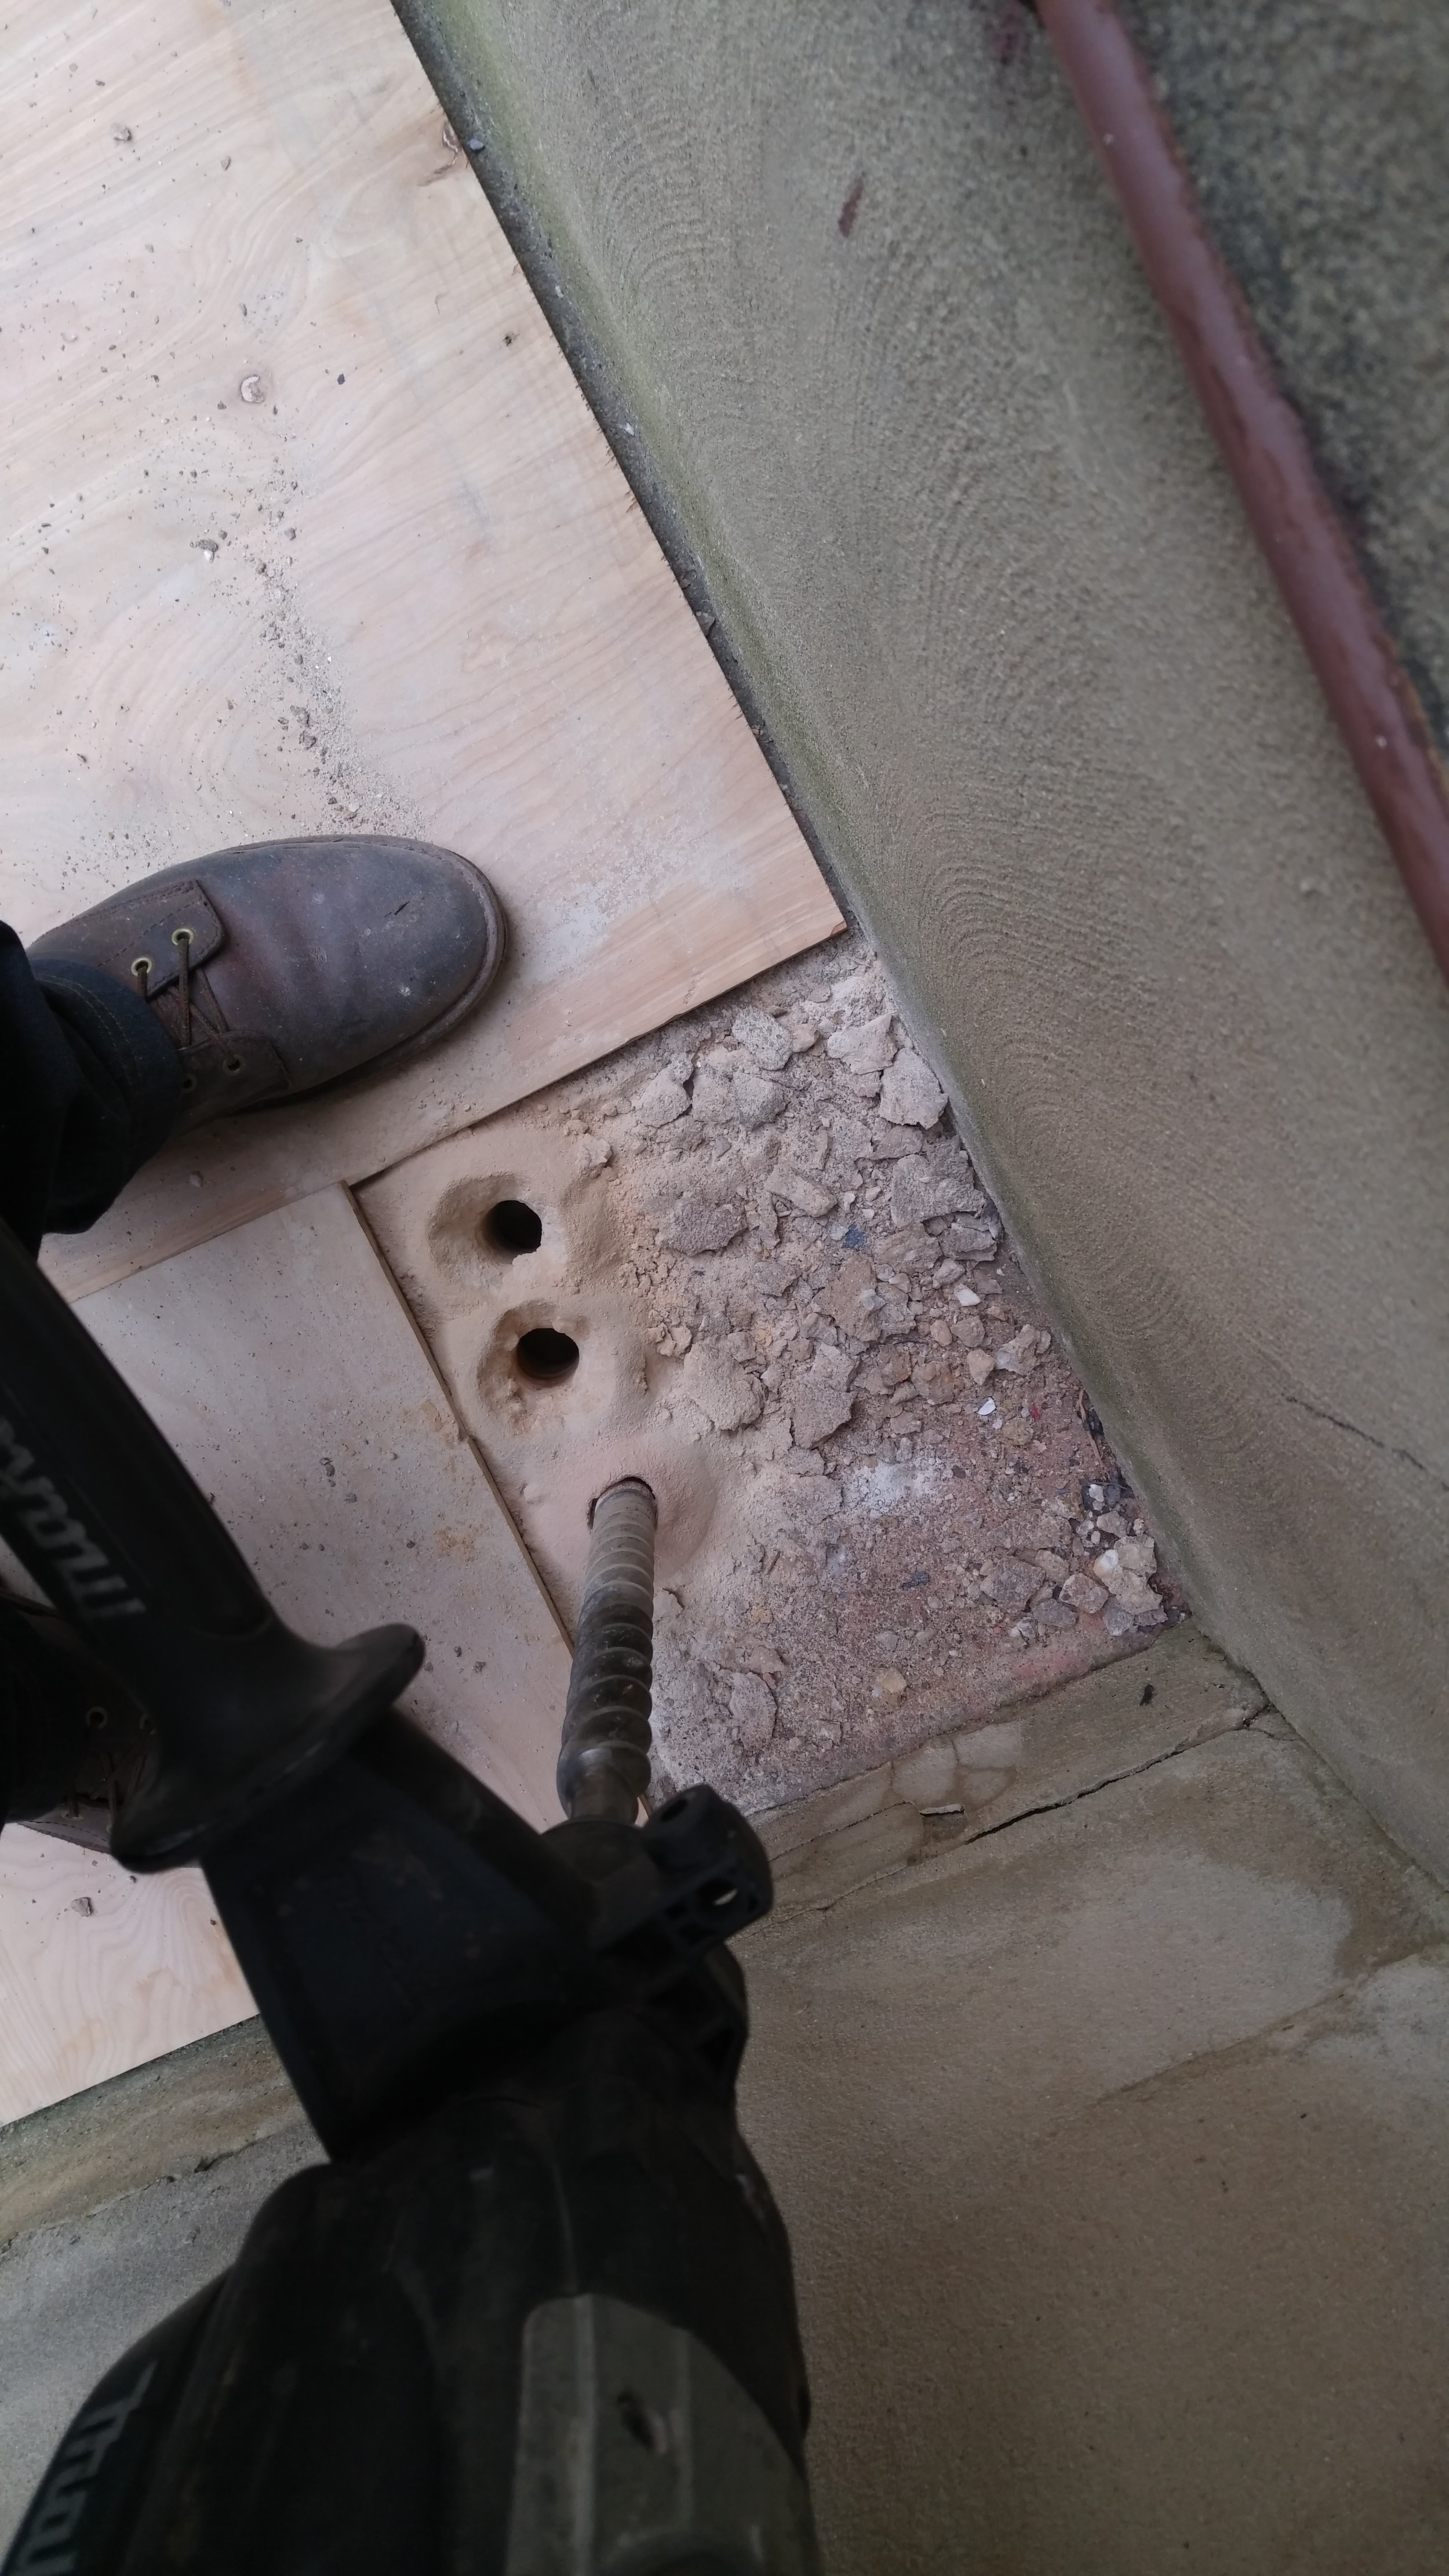
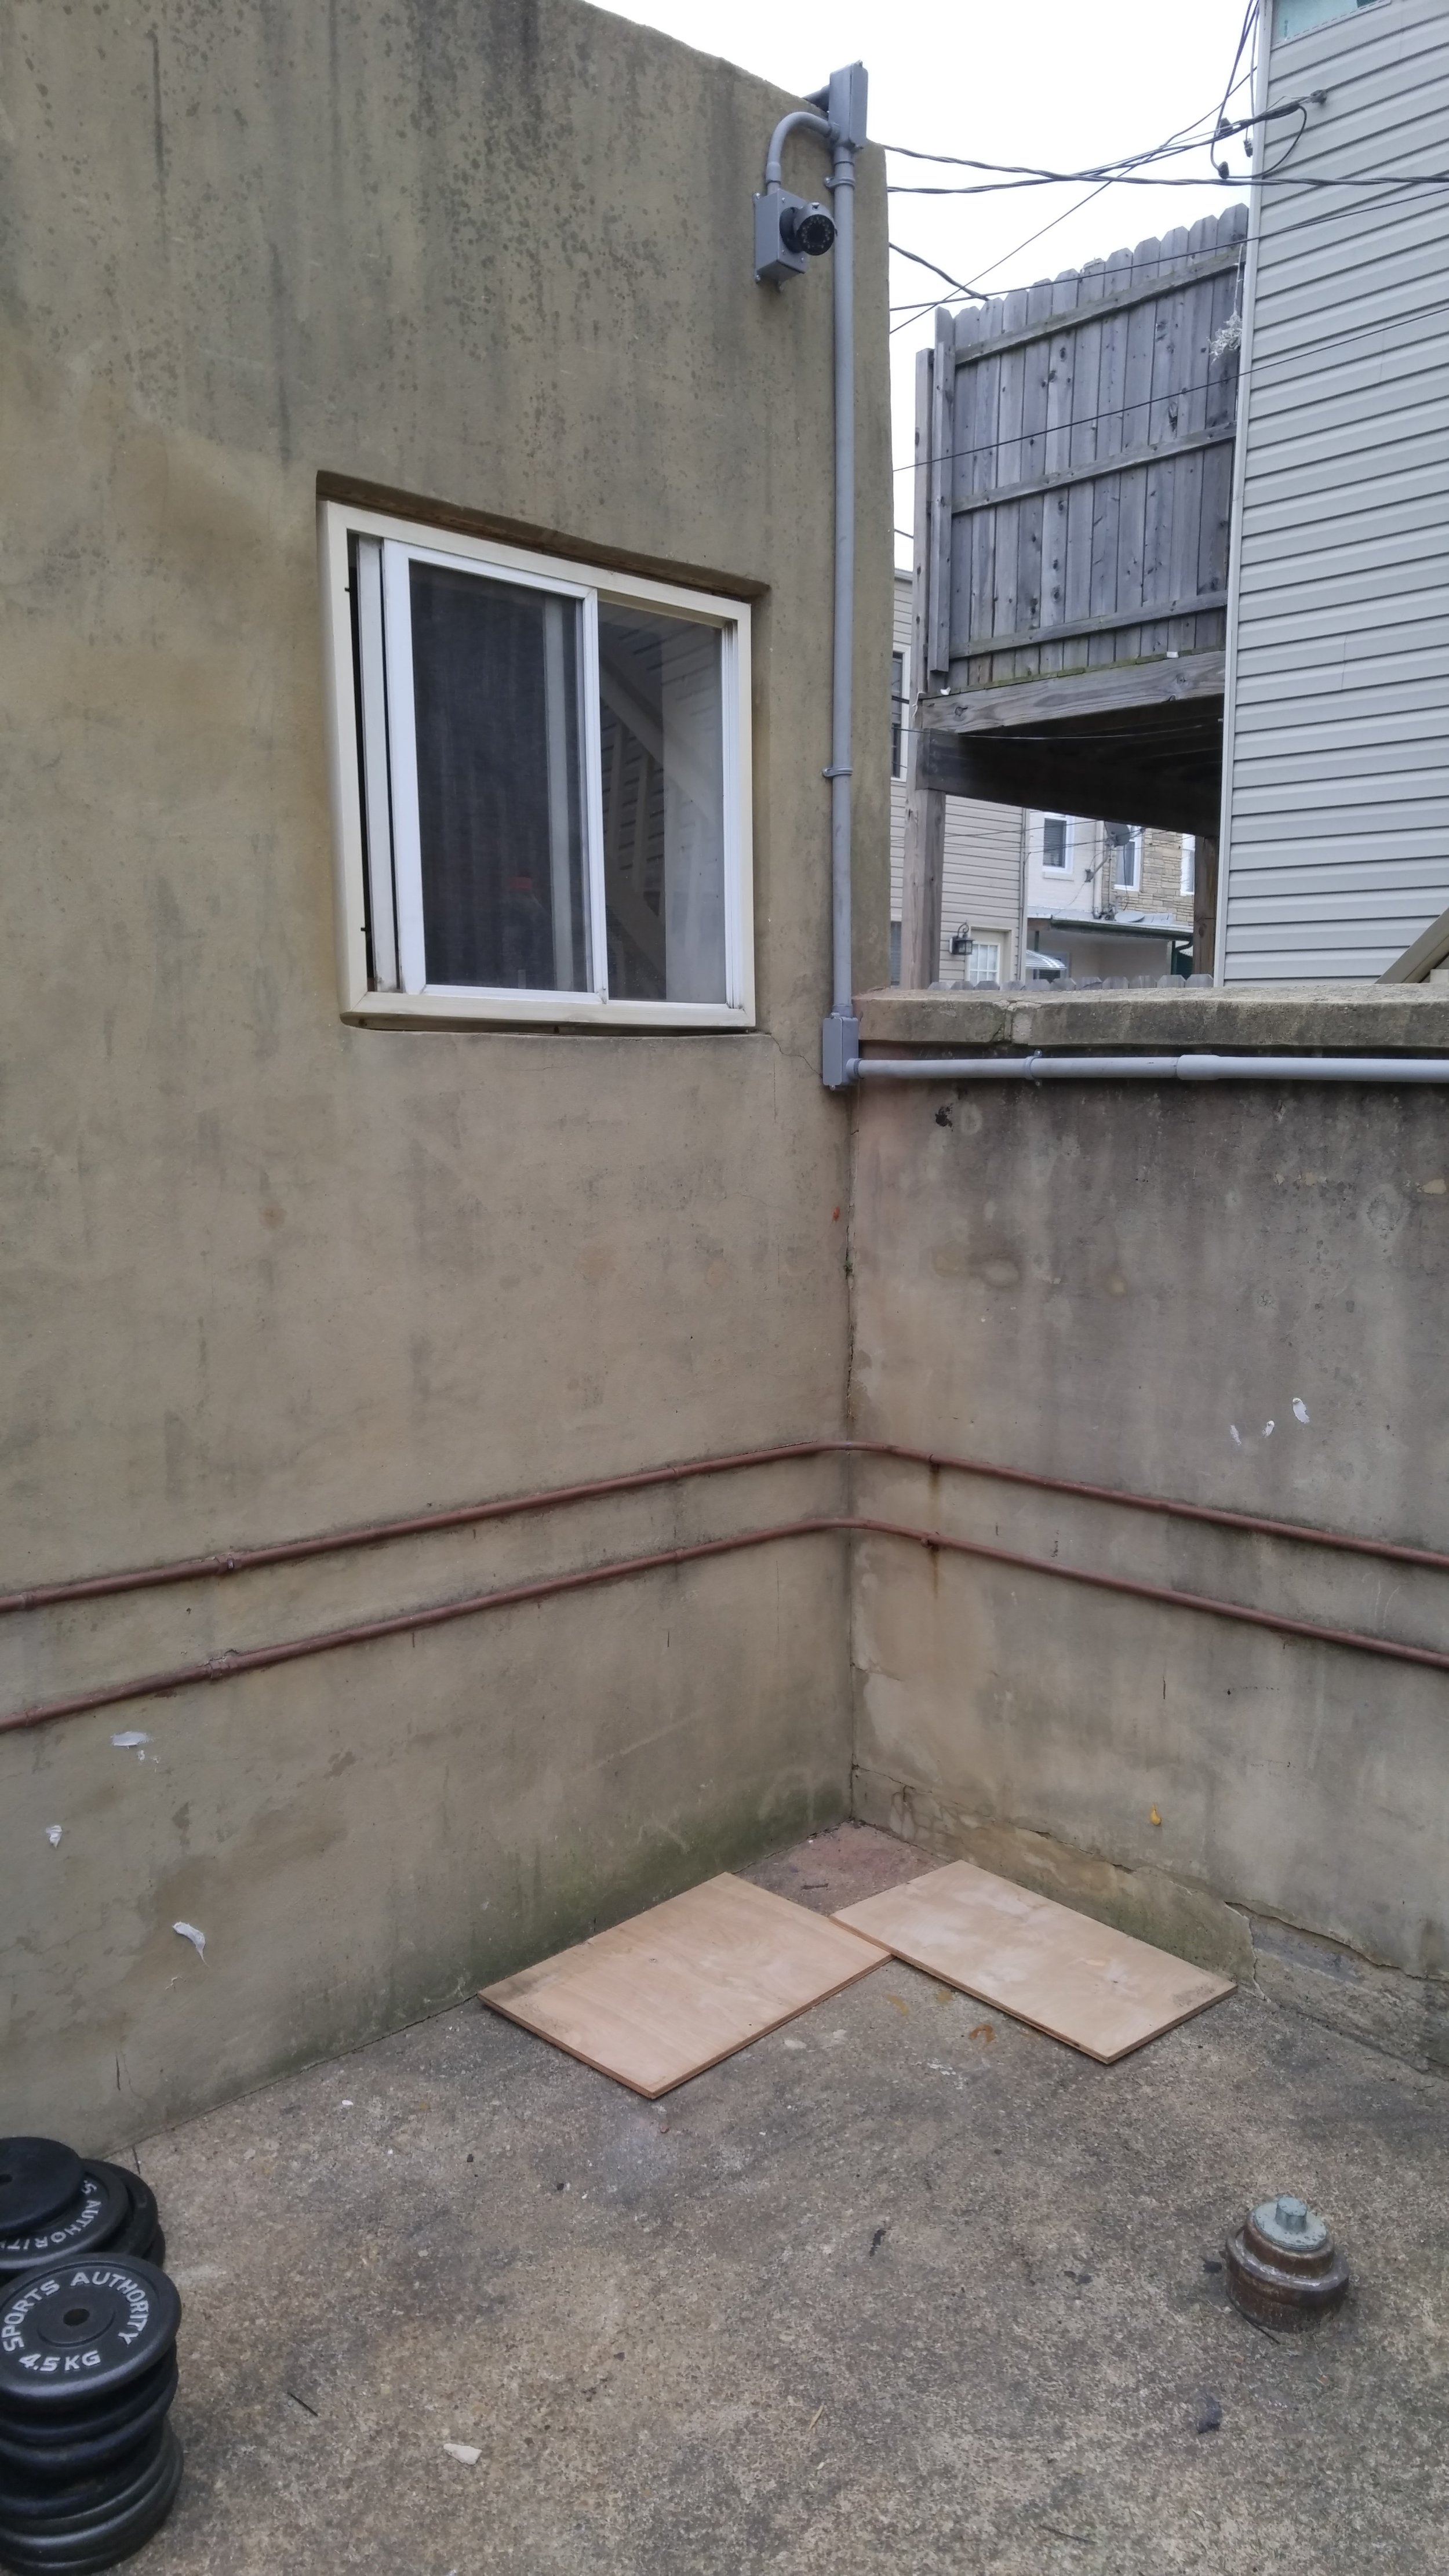
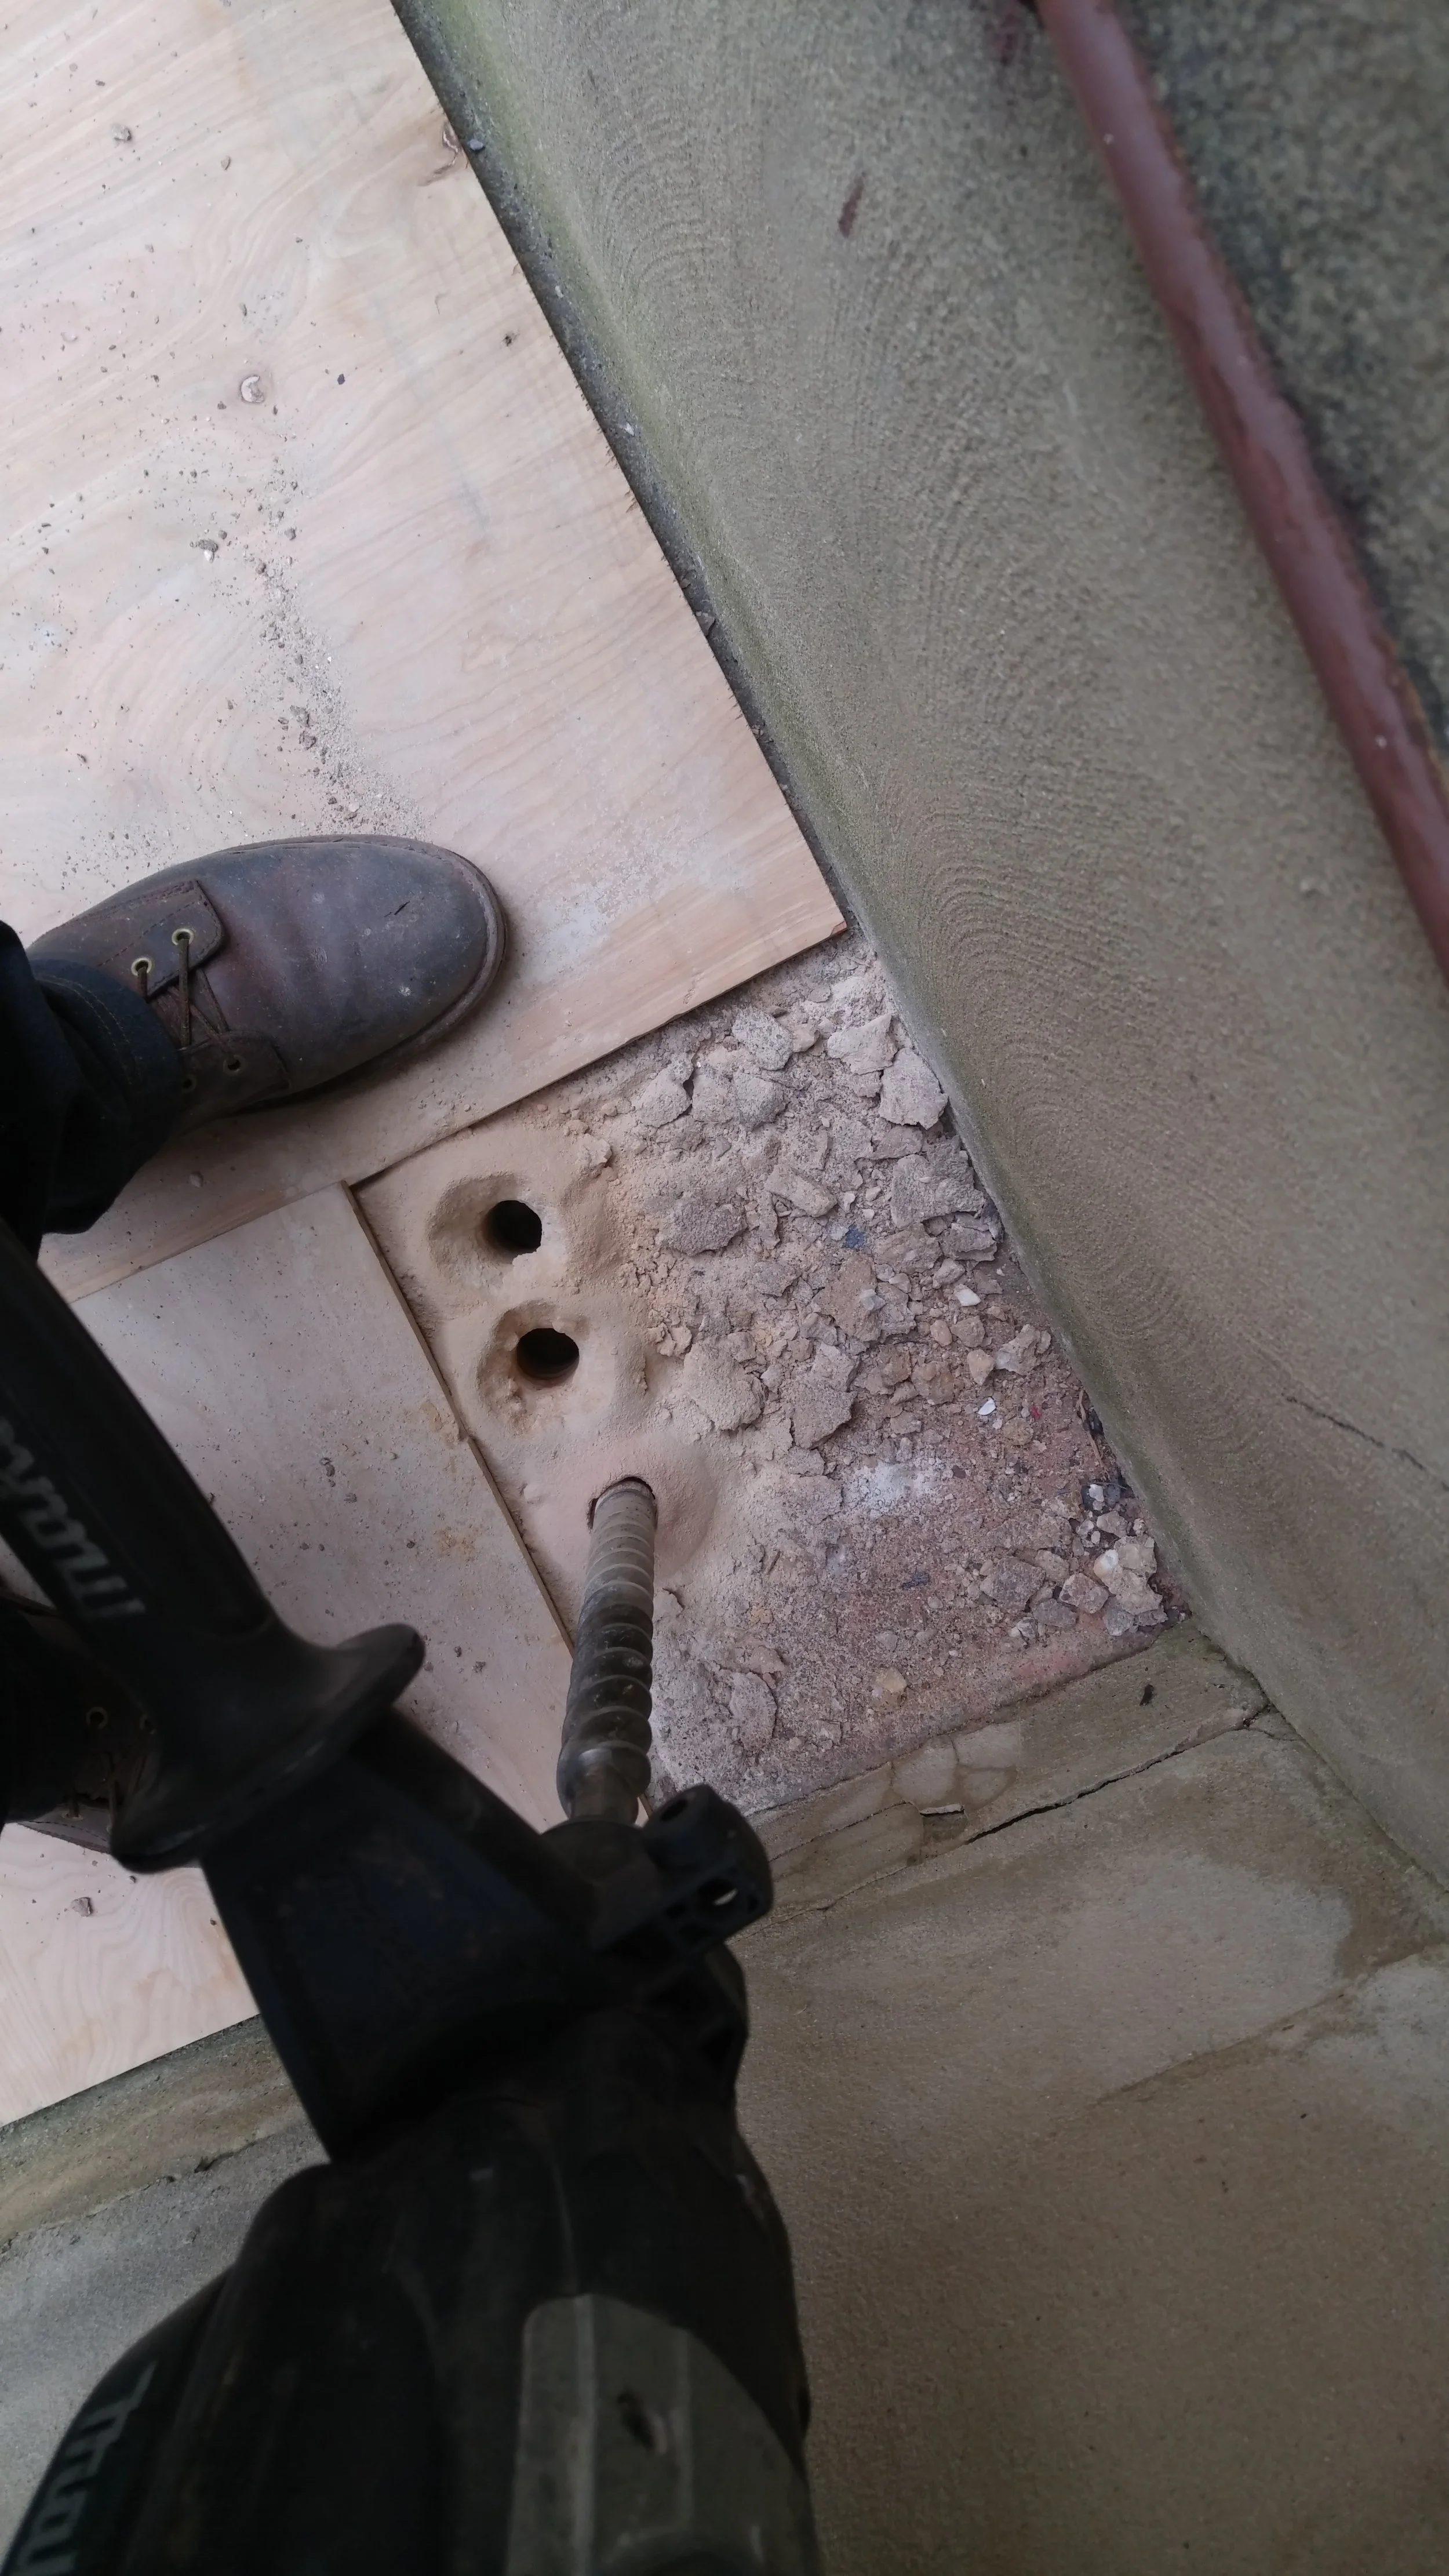
I began by laying out where a footing hole would be made; I just used some scrap plywood, which also helped protect the area around the hole:

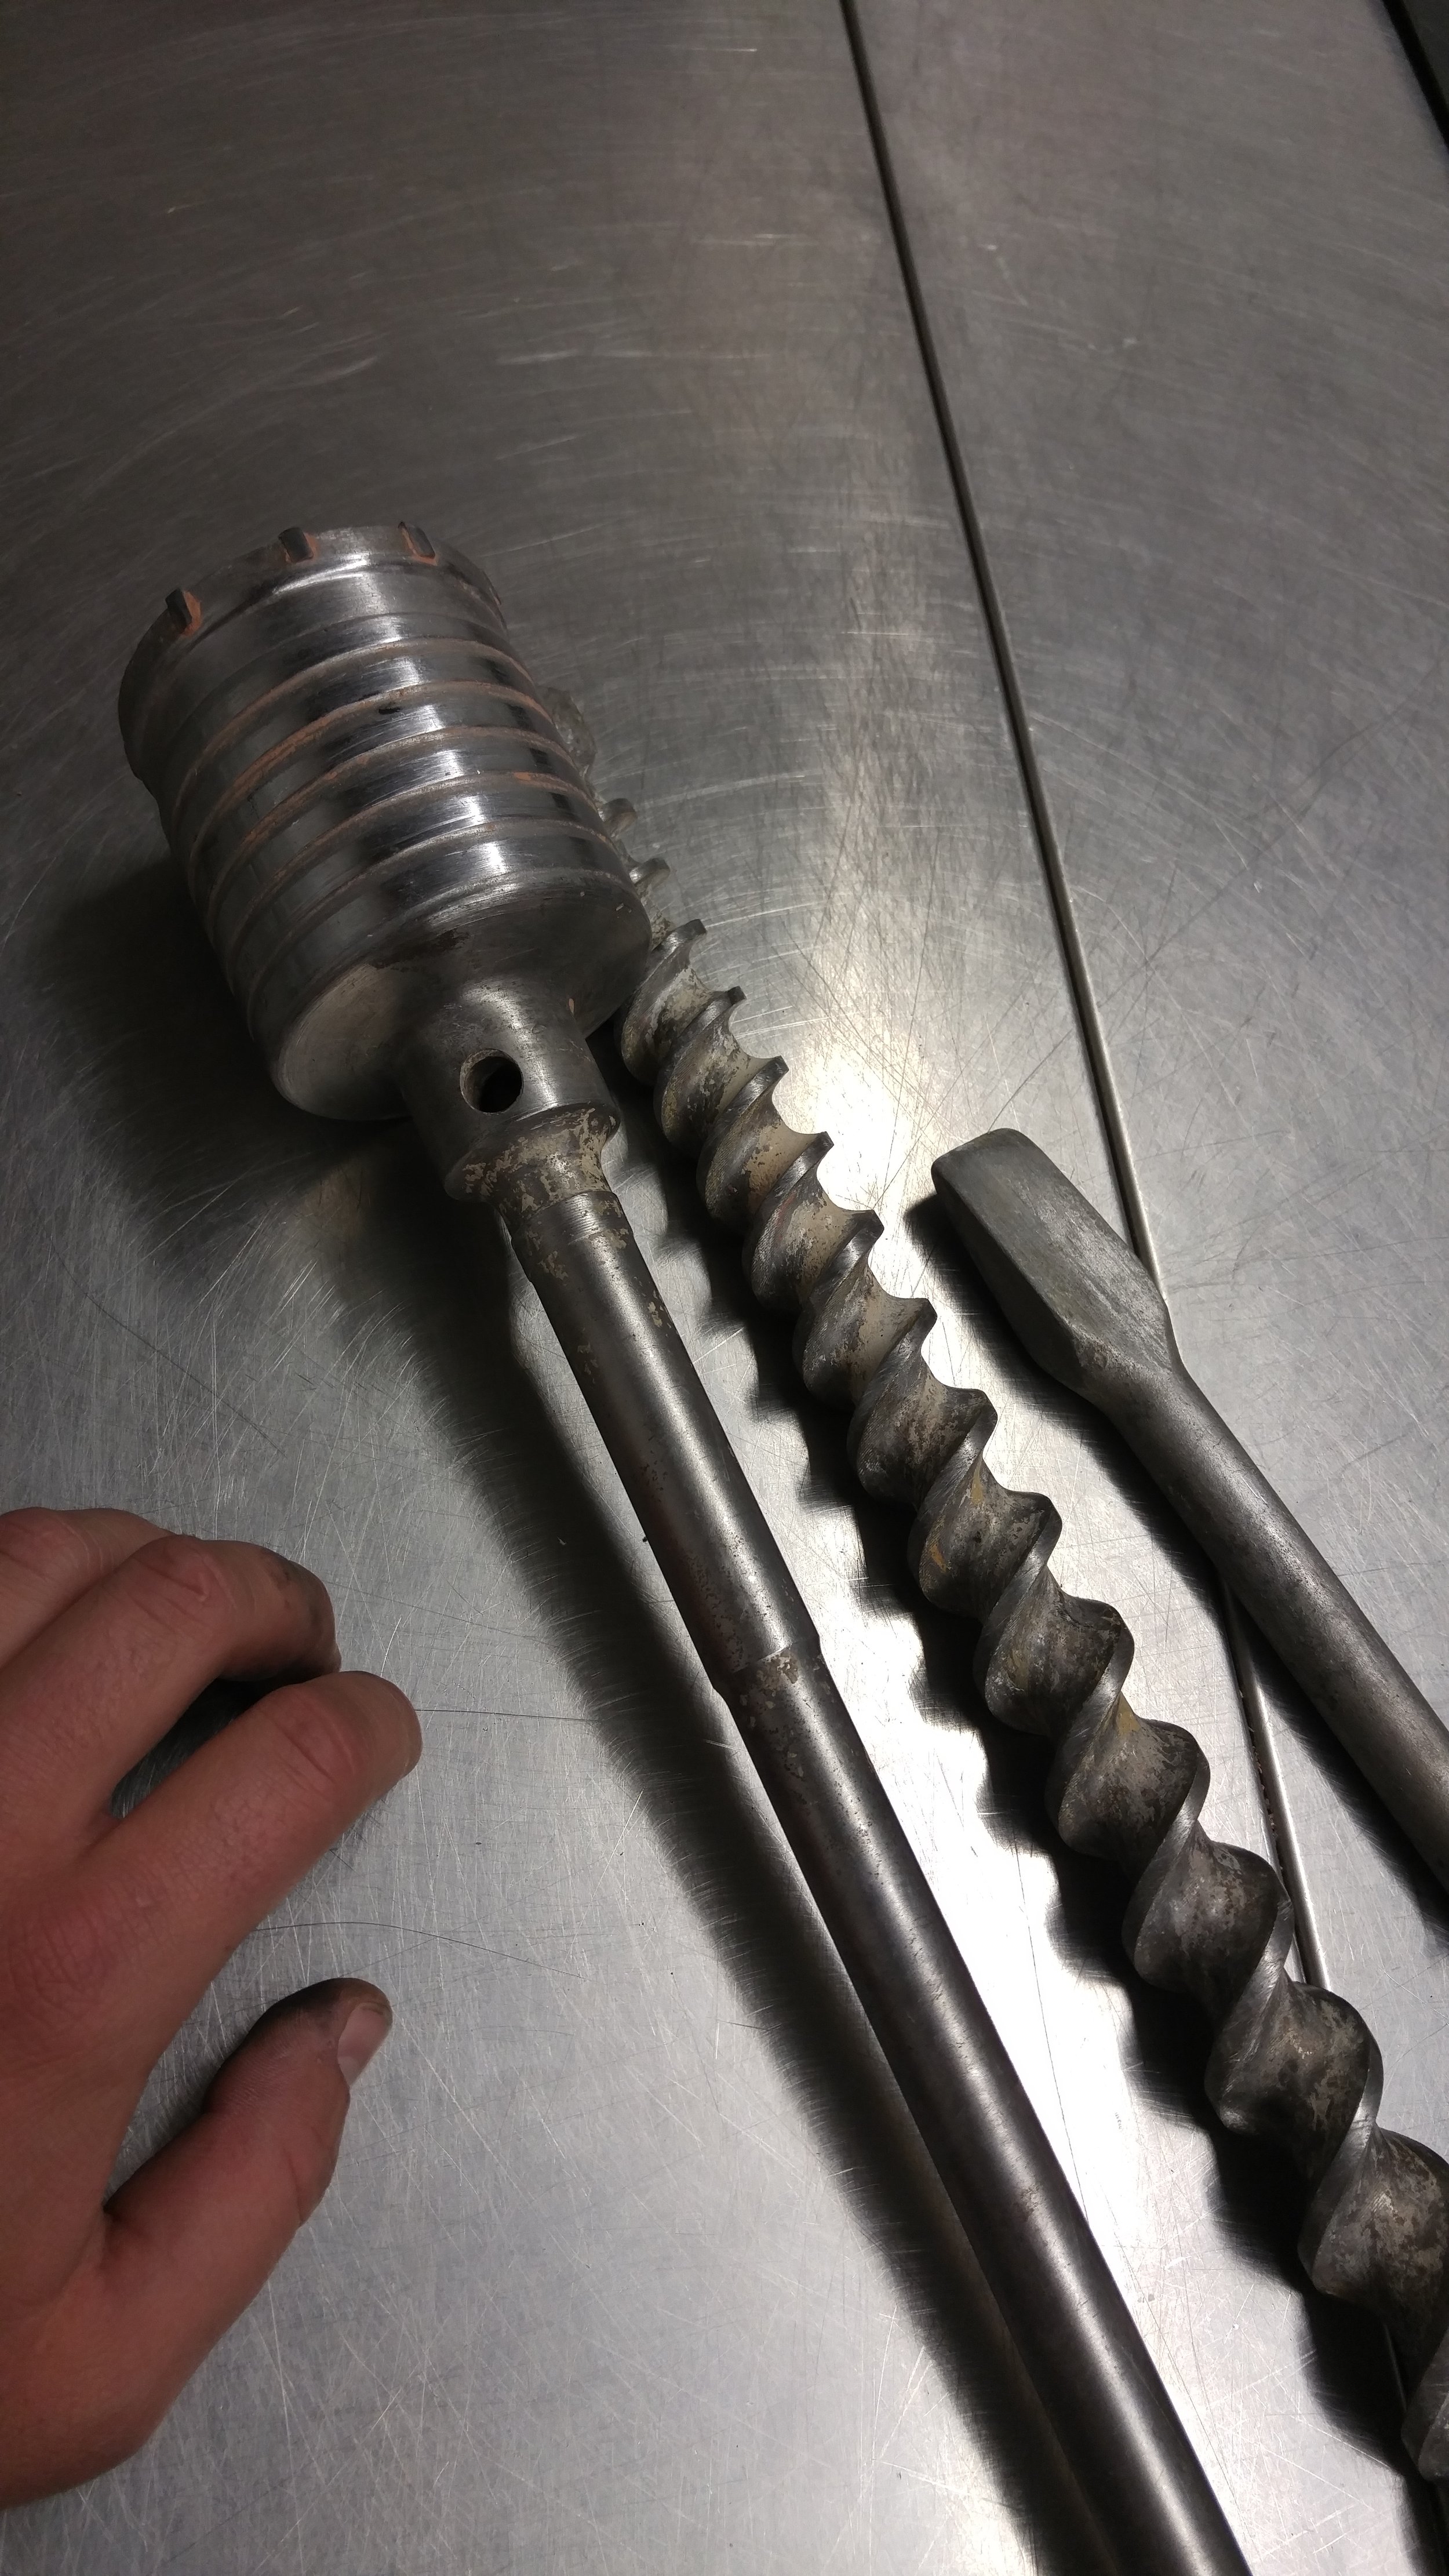
For this install, I rented a sweet Makita rotary hammer drill and some giant bits:

There was about 5" of slab above the dirt and the drill, while powerful was better at drilling holes than jack-hamemring, so I drilled several holes around the perimeter of the material I wanted to remove:
After lots of chipping, cursing, banging and digging, I finally got a cleaned out hole:

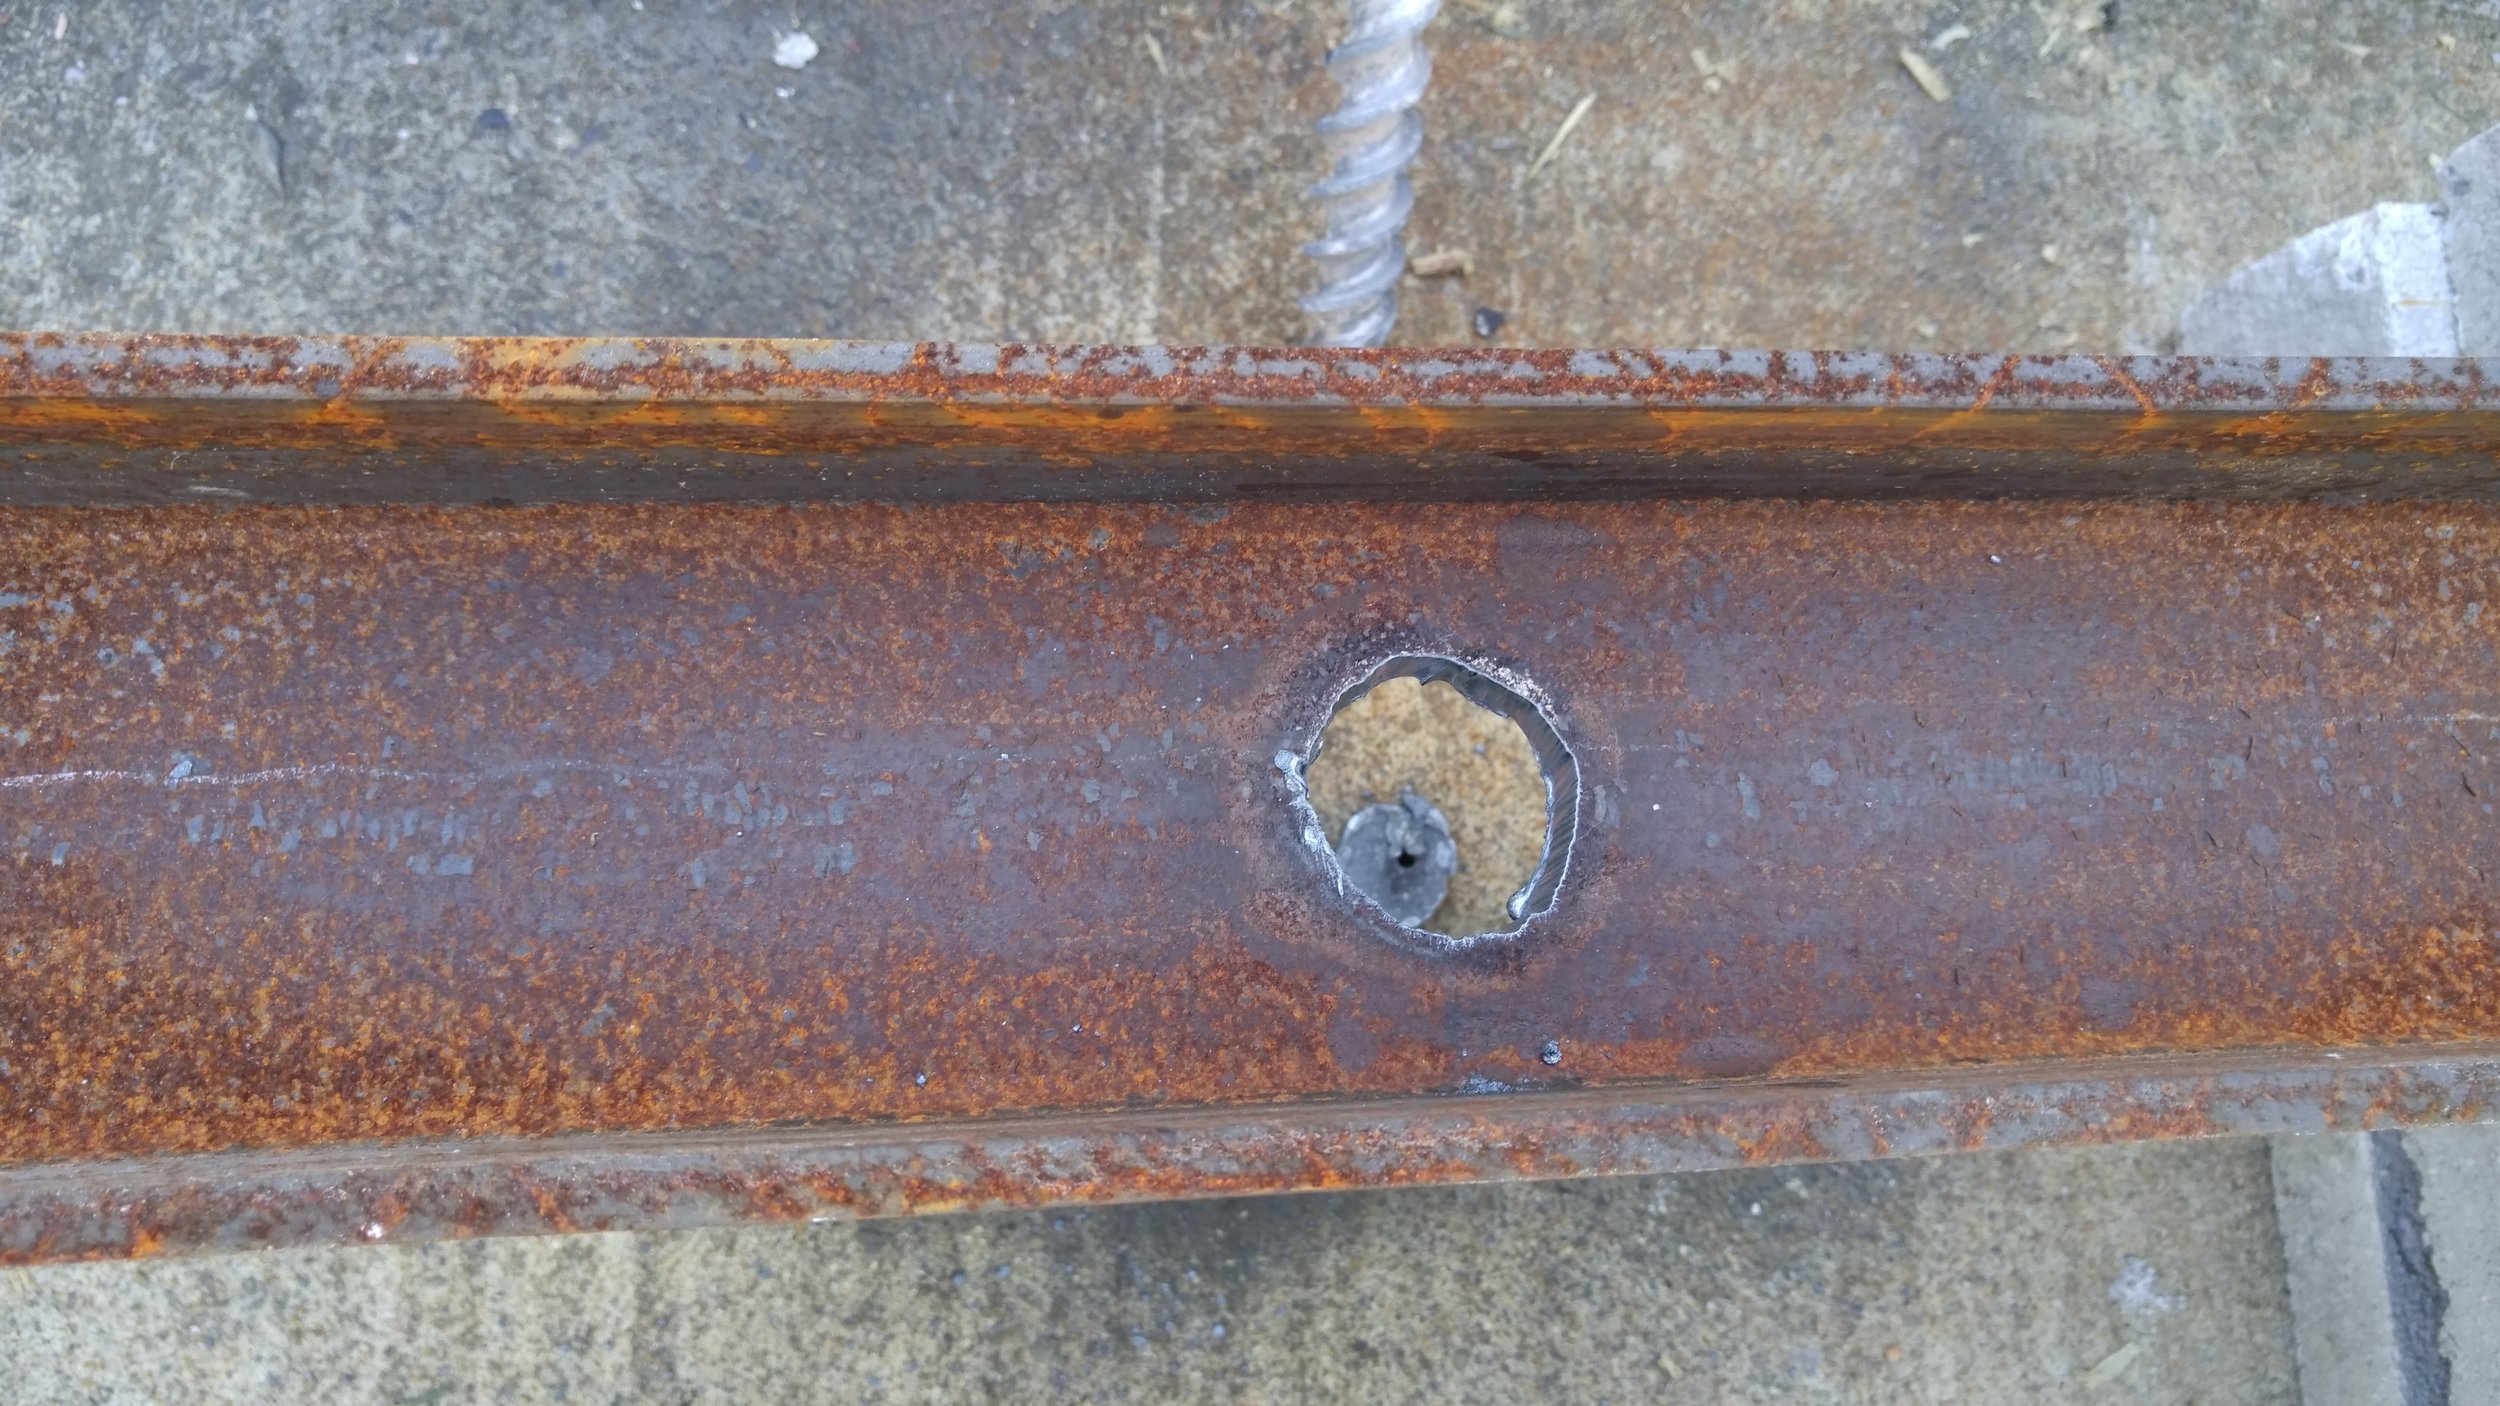
To prepare the beam, I marked out 4 evenly spaced hole locations, then drilled them out with a small drill bit. The small hole made it easy to start the plasma torch arc, which was used to quickly cut the rough through bolt hole. This was made a little oversized of the large 1" bolts so that I could use the holes to locate where to drill into the wall.

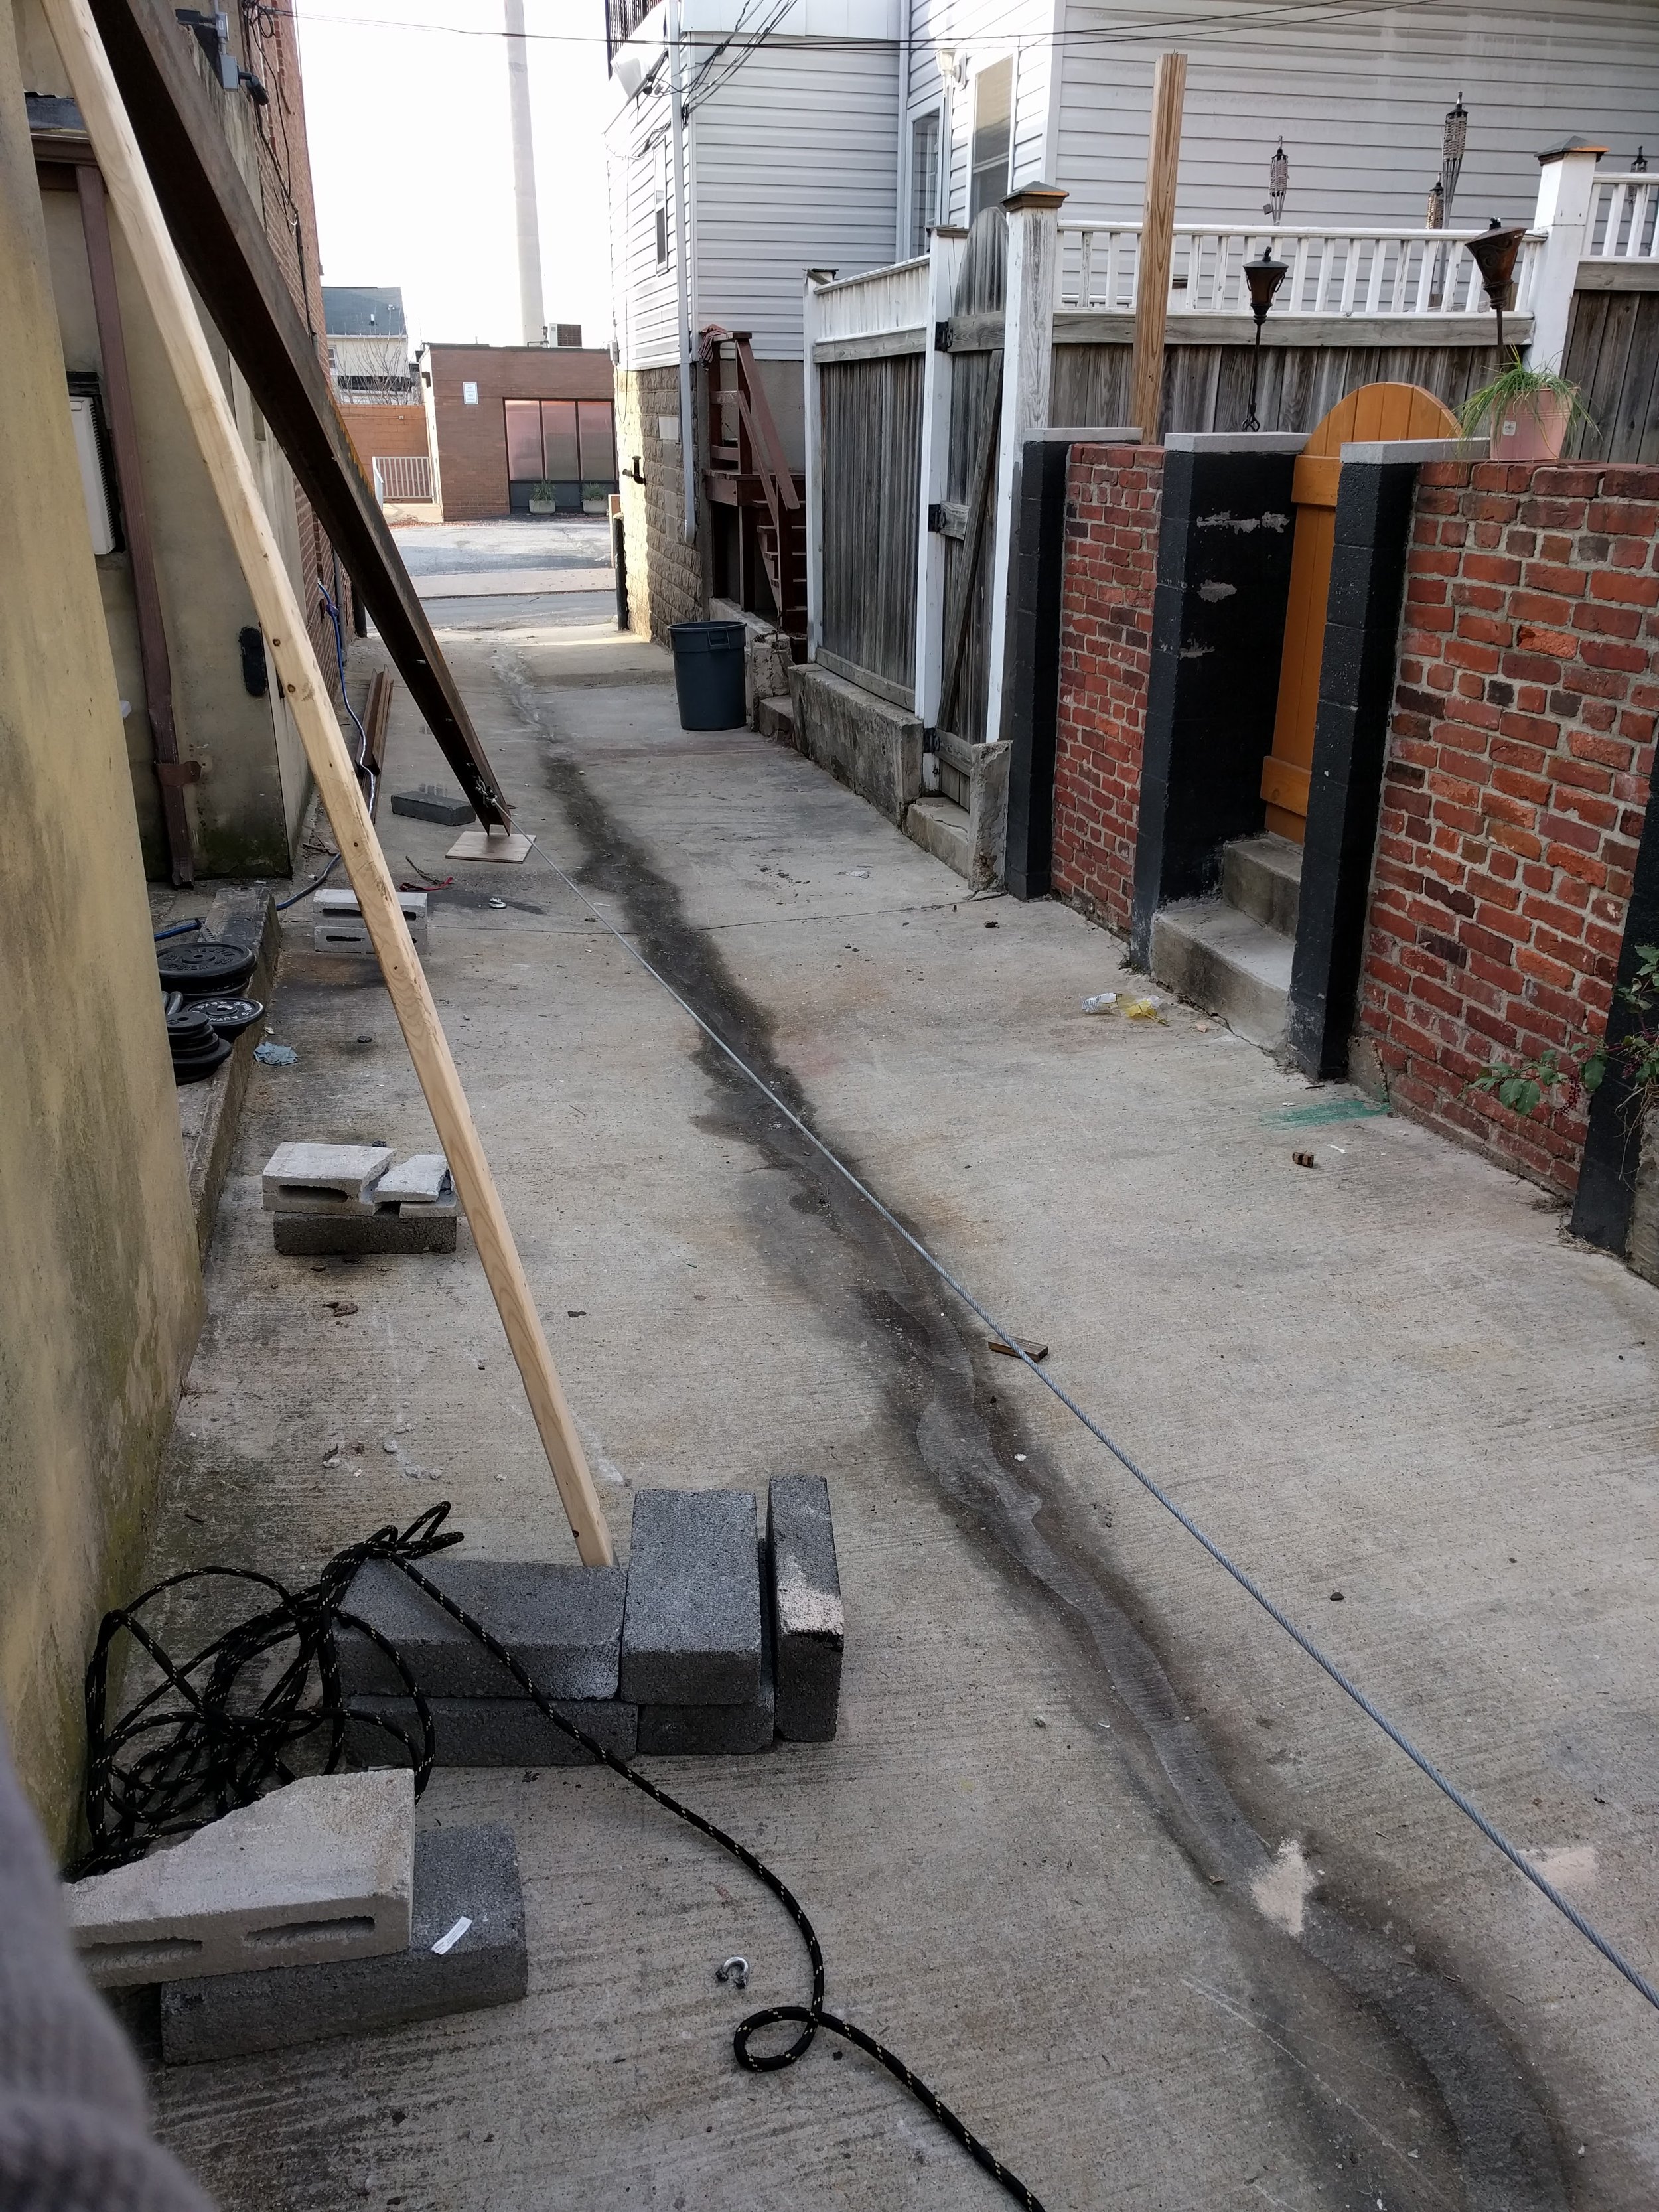
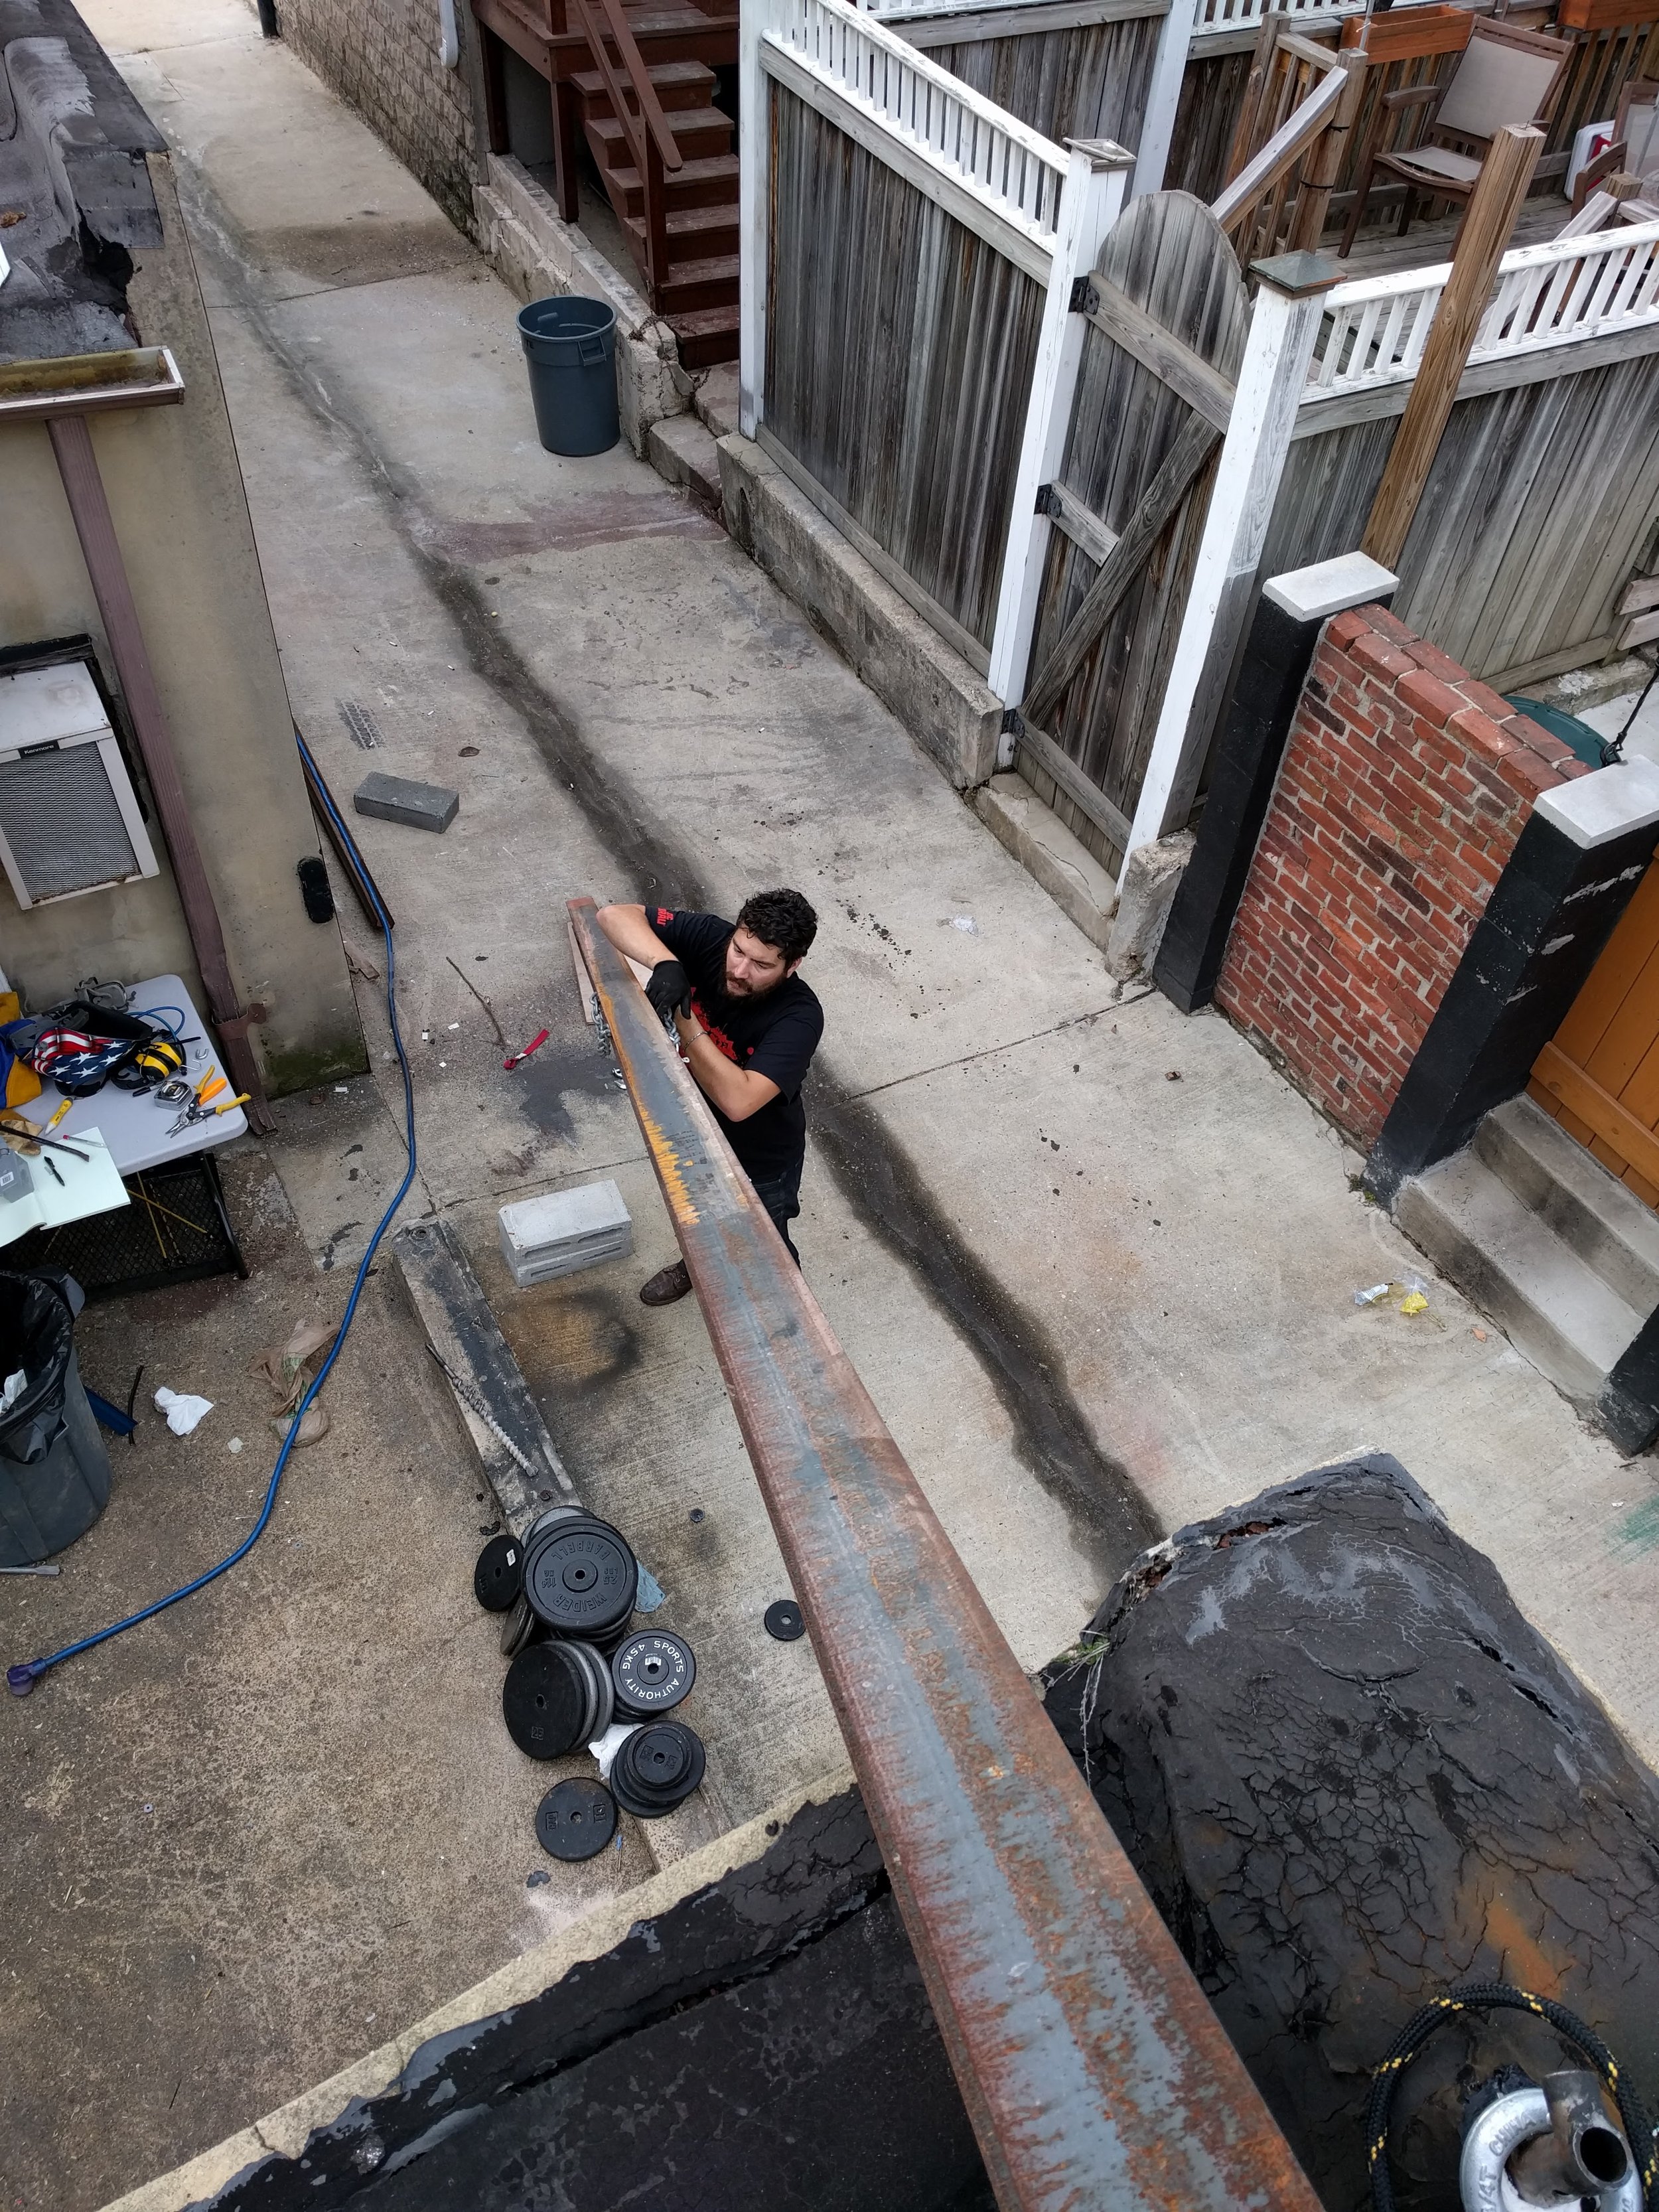
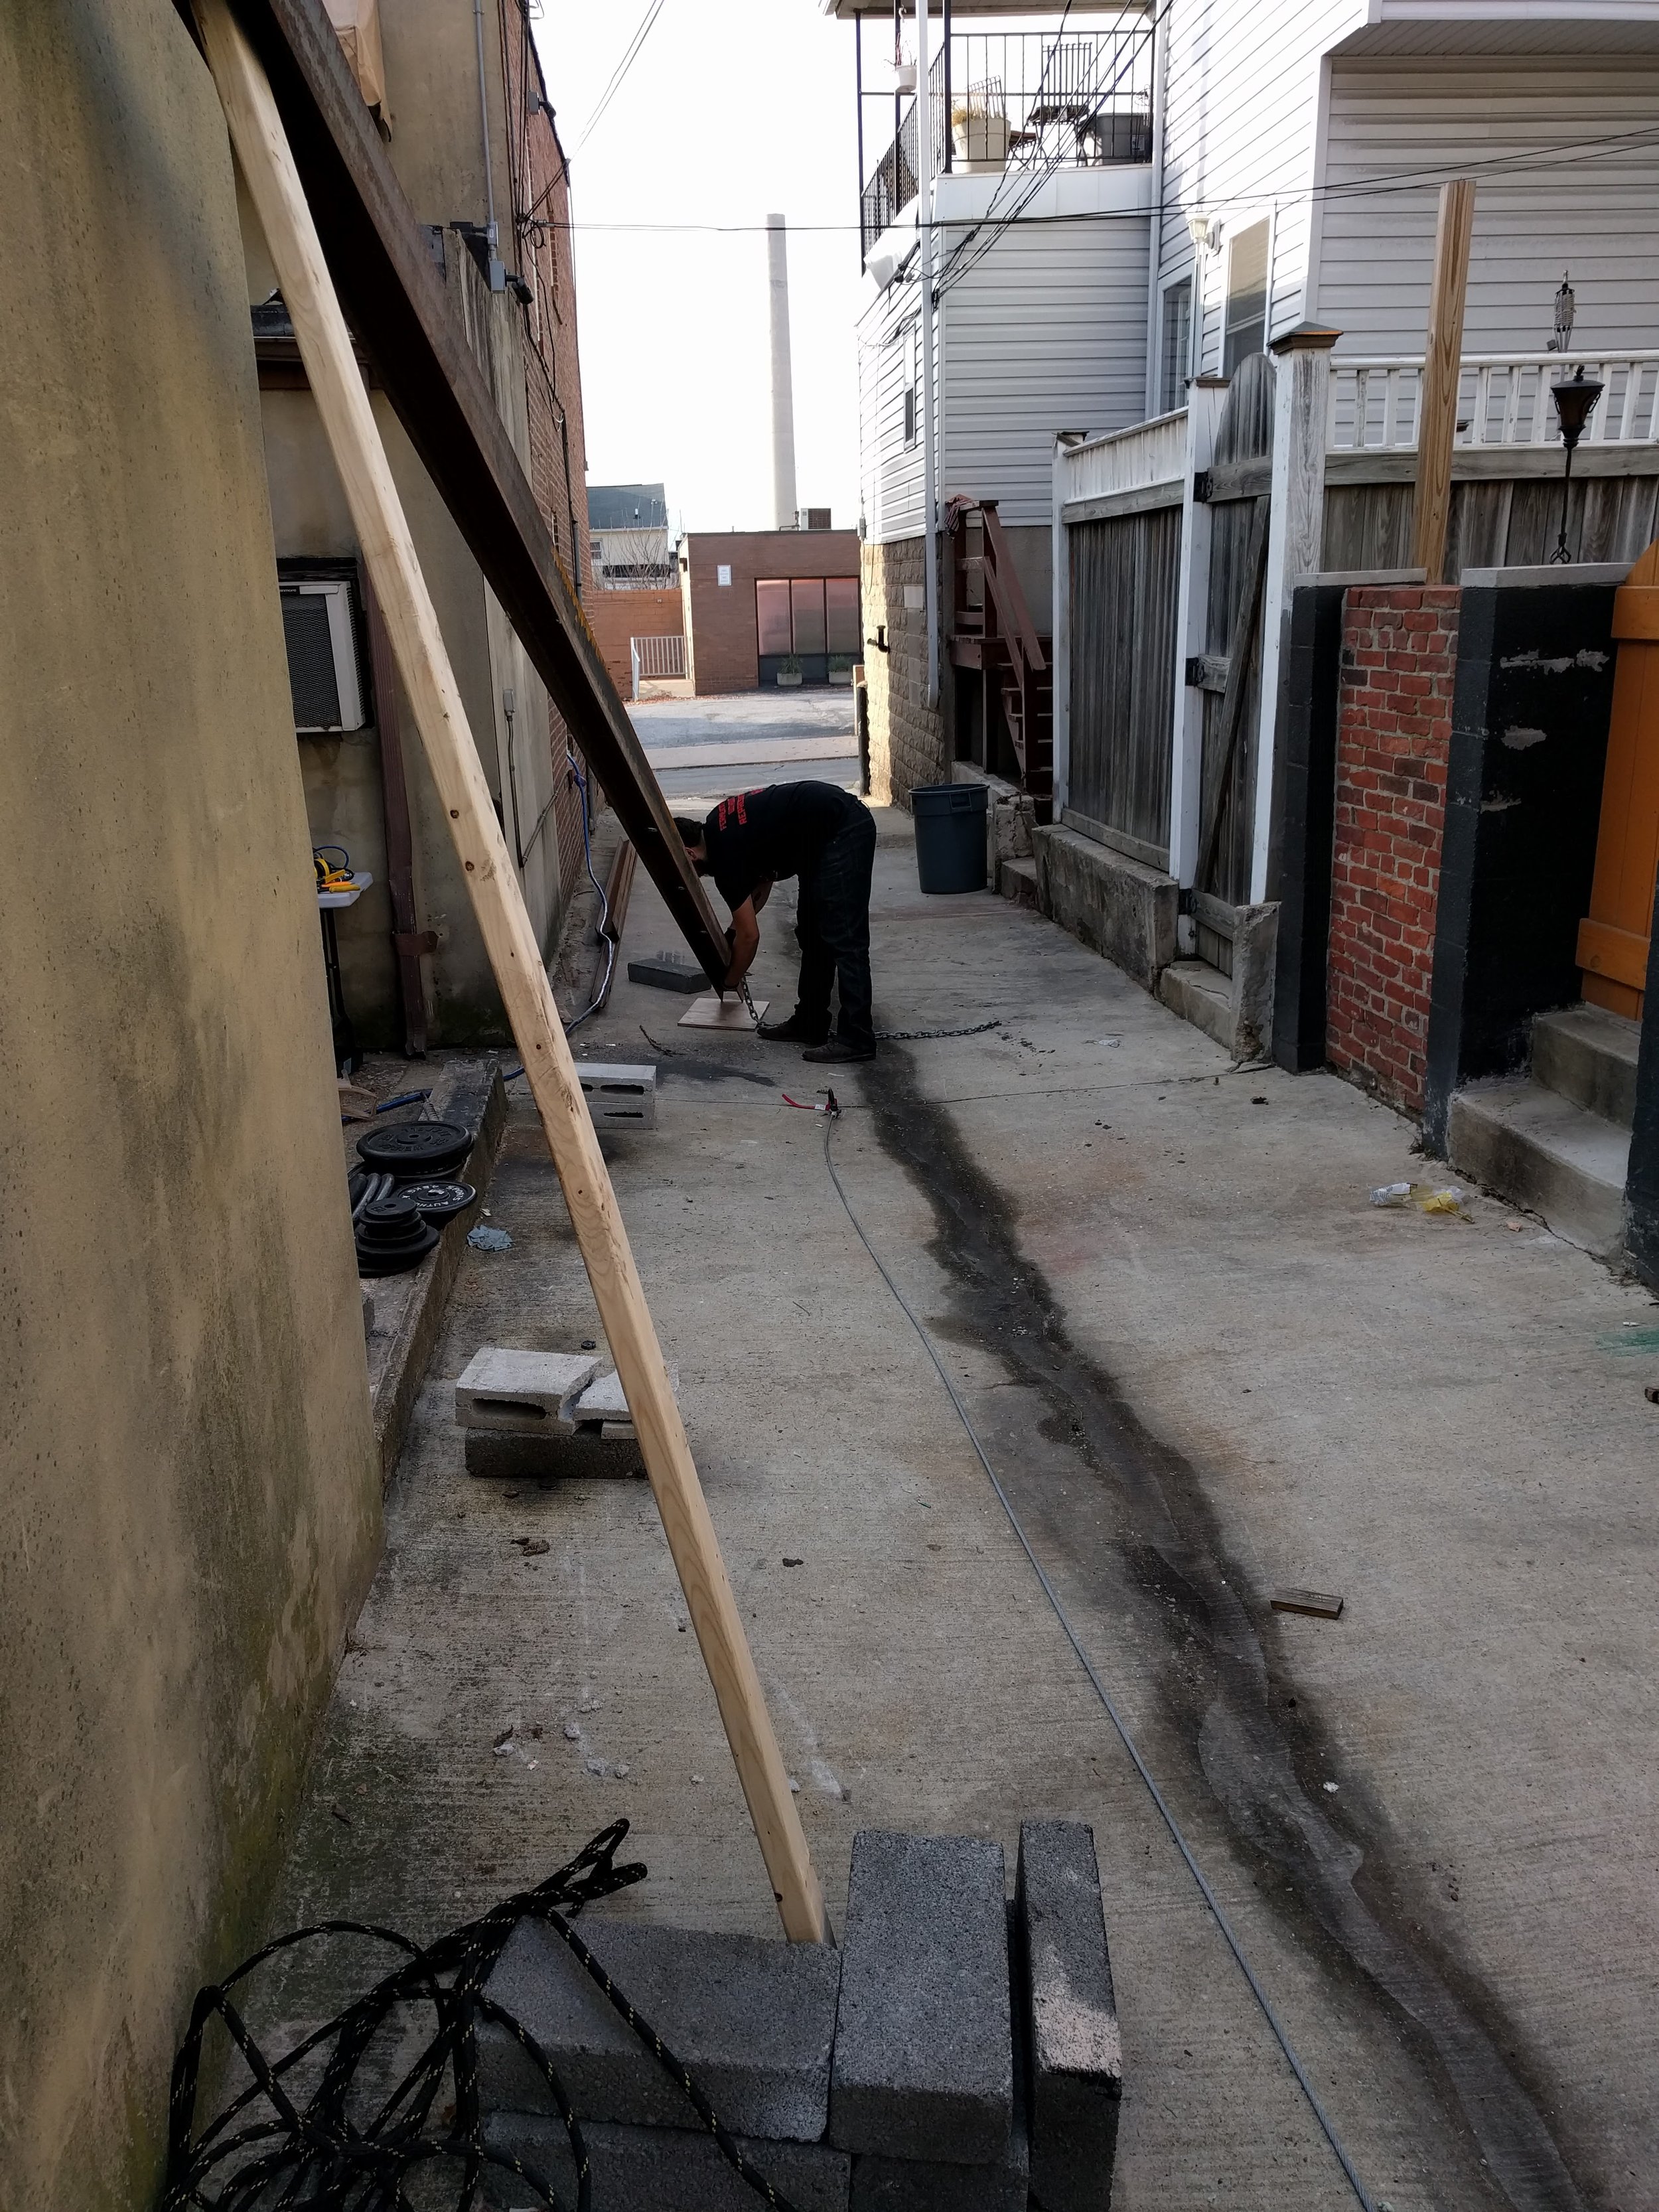
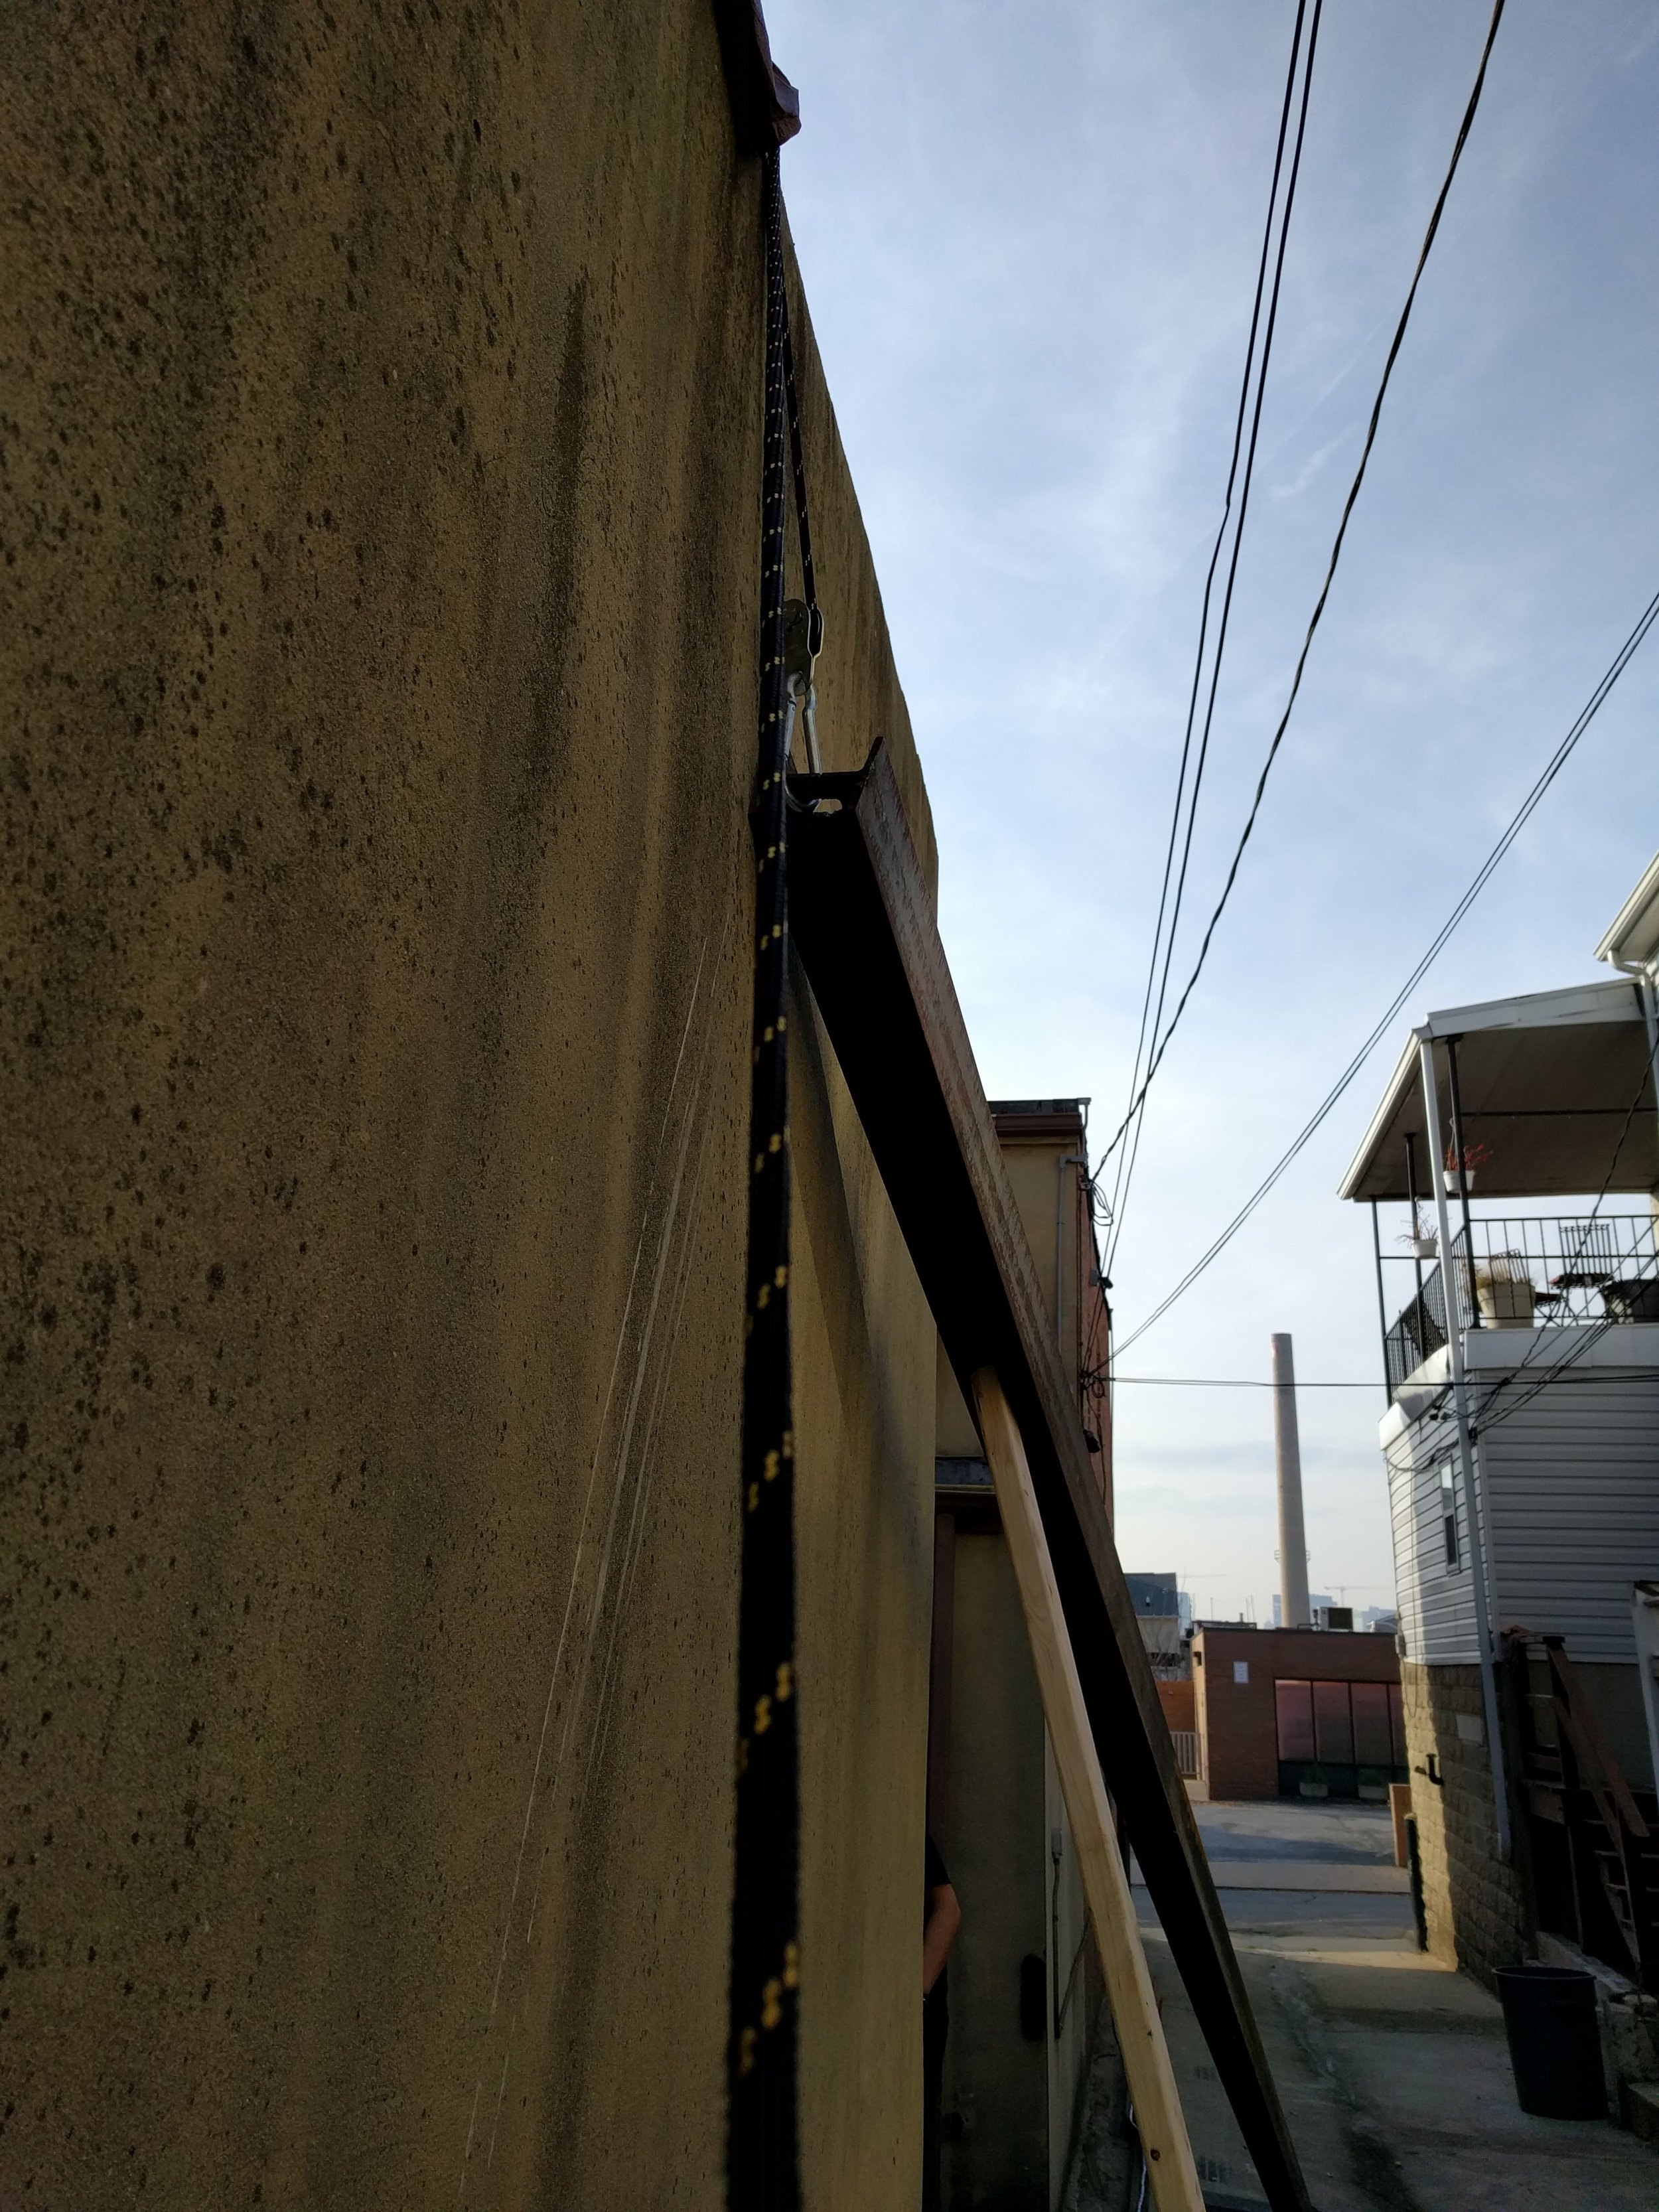
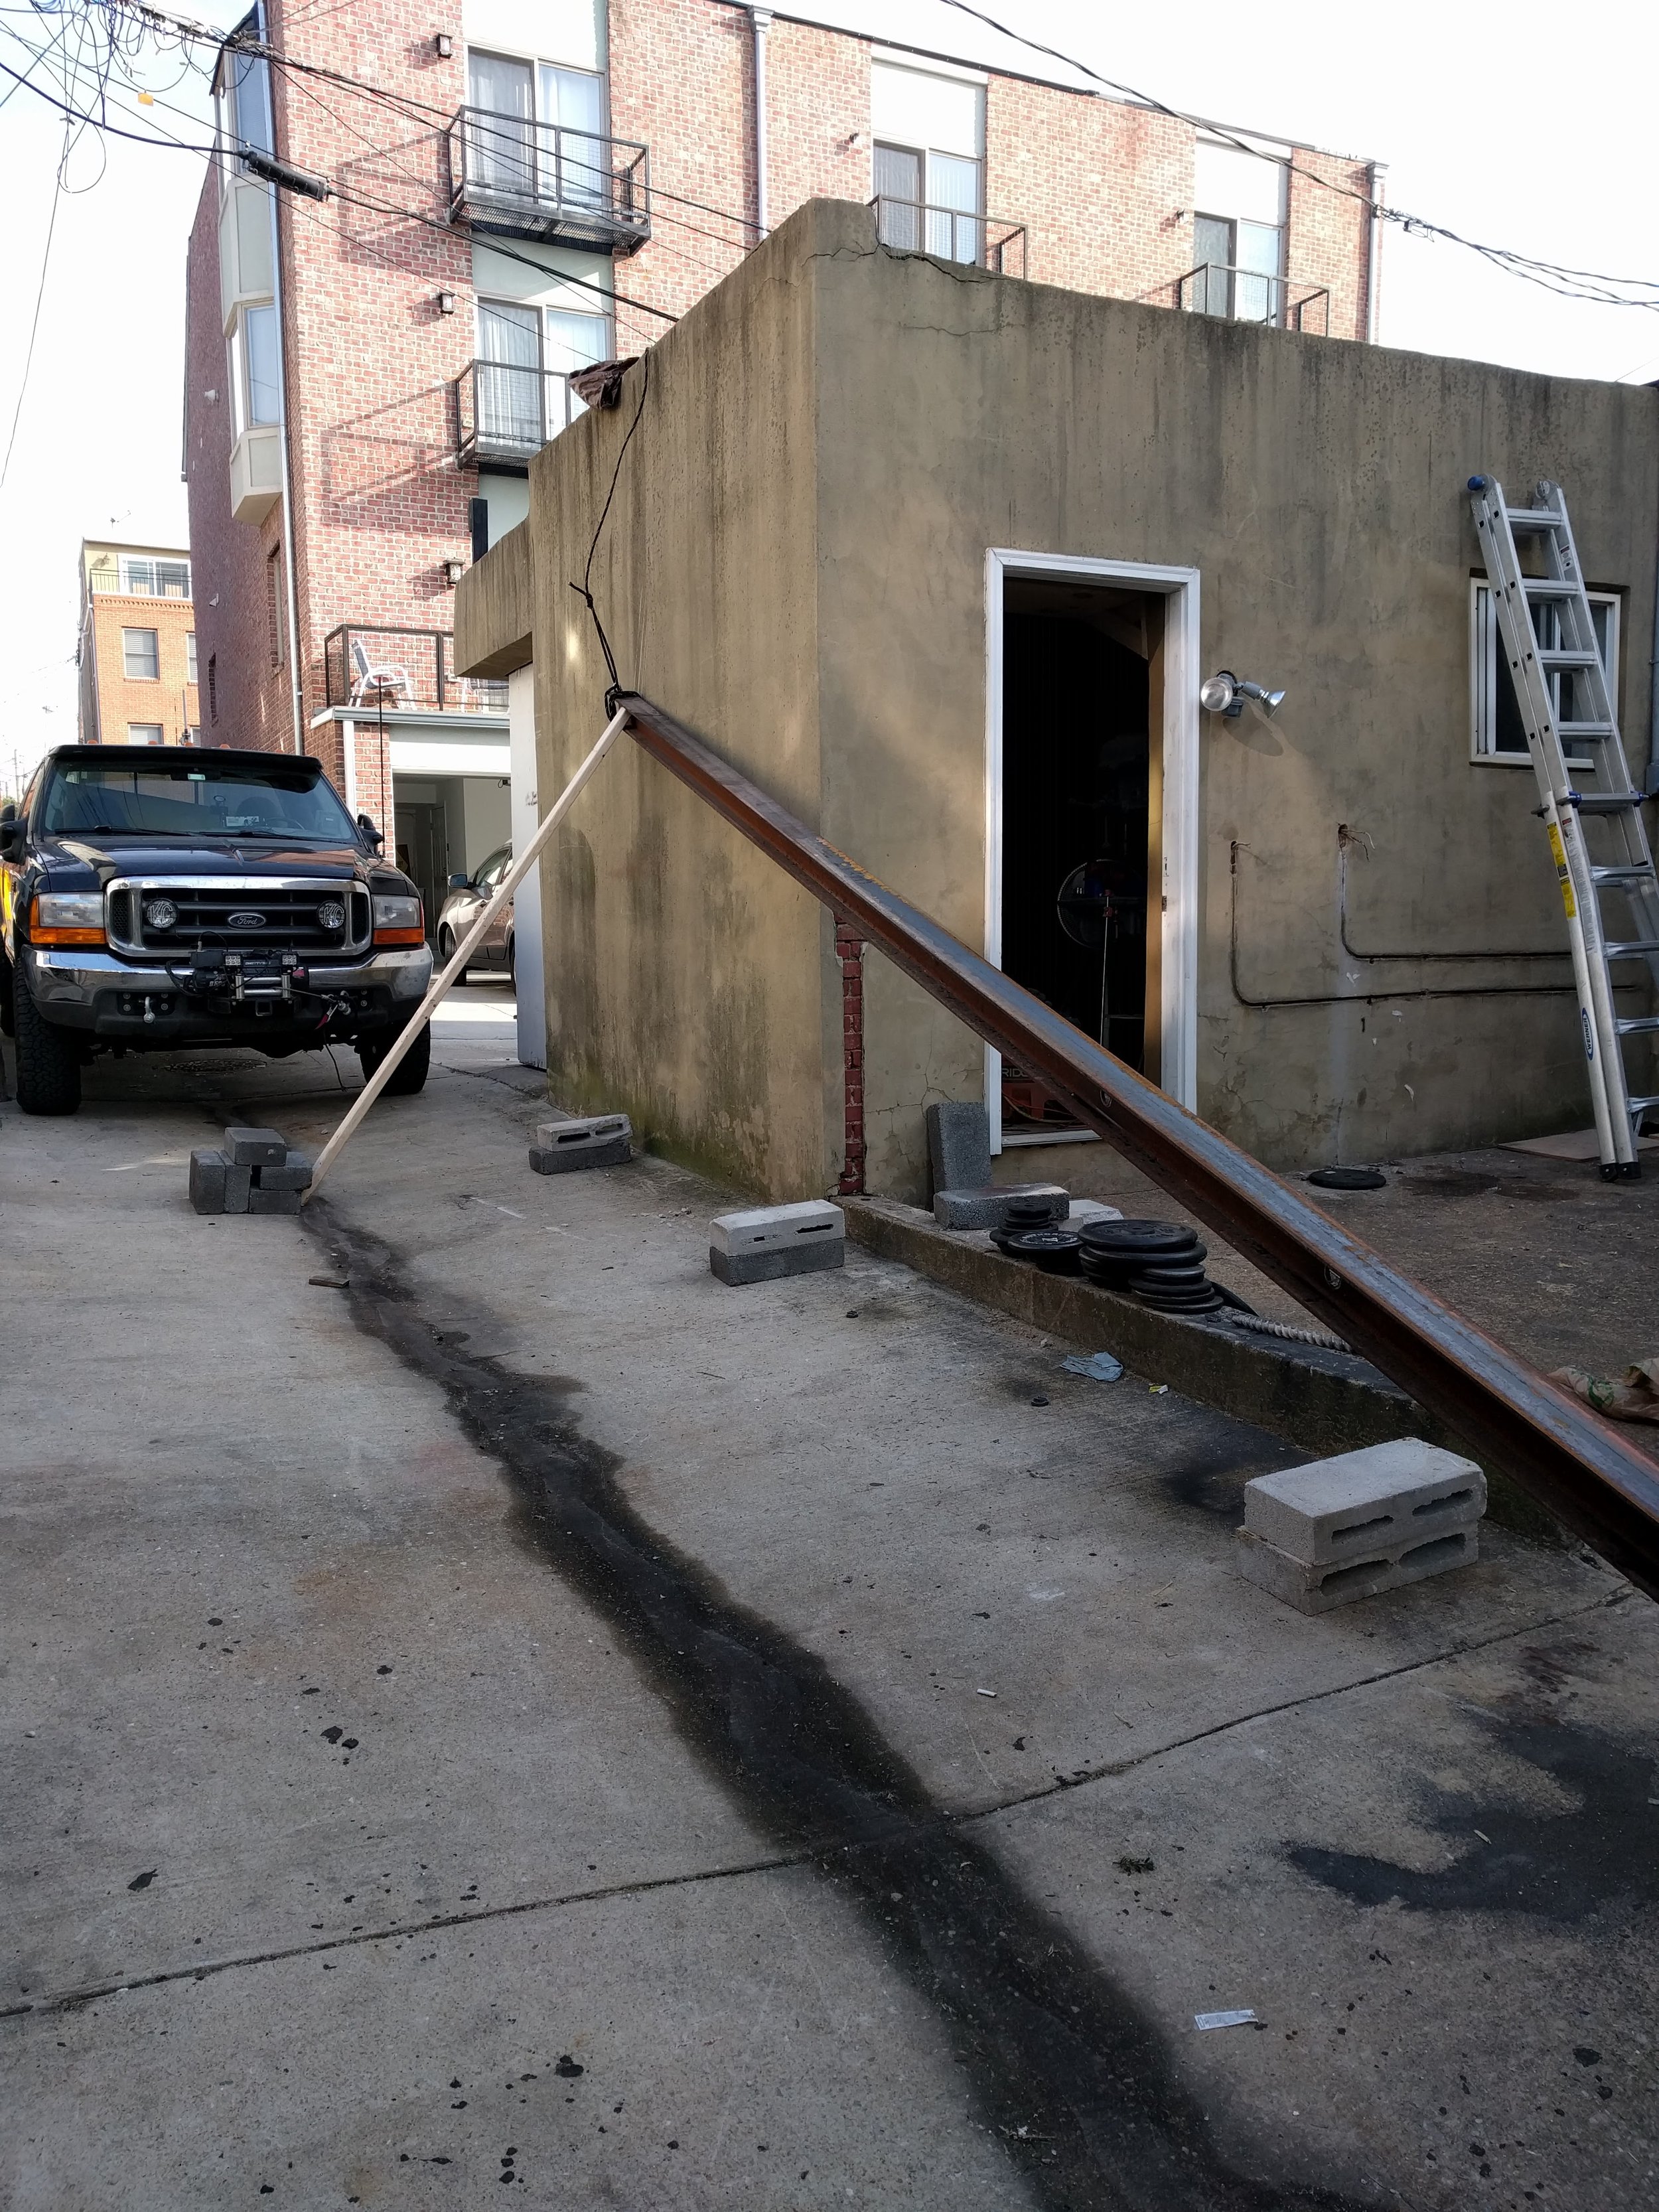
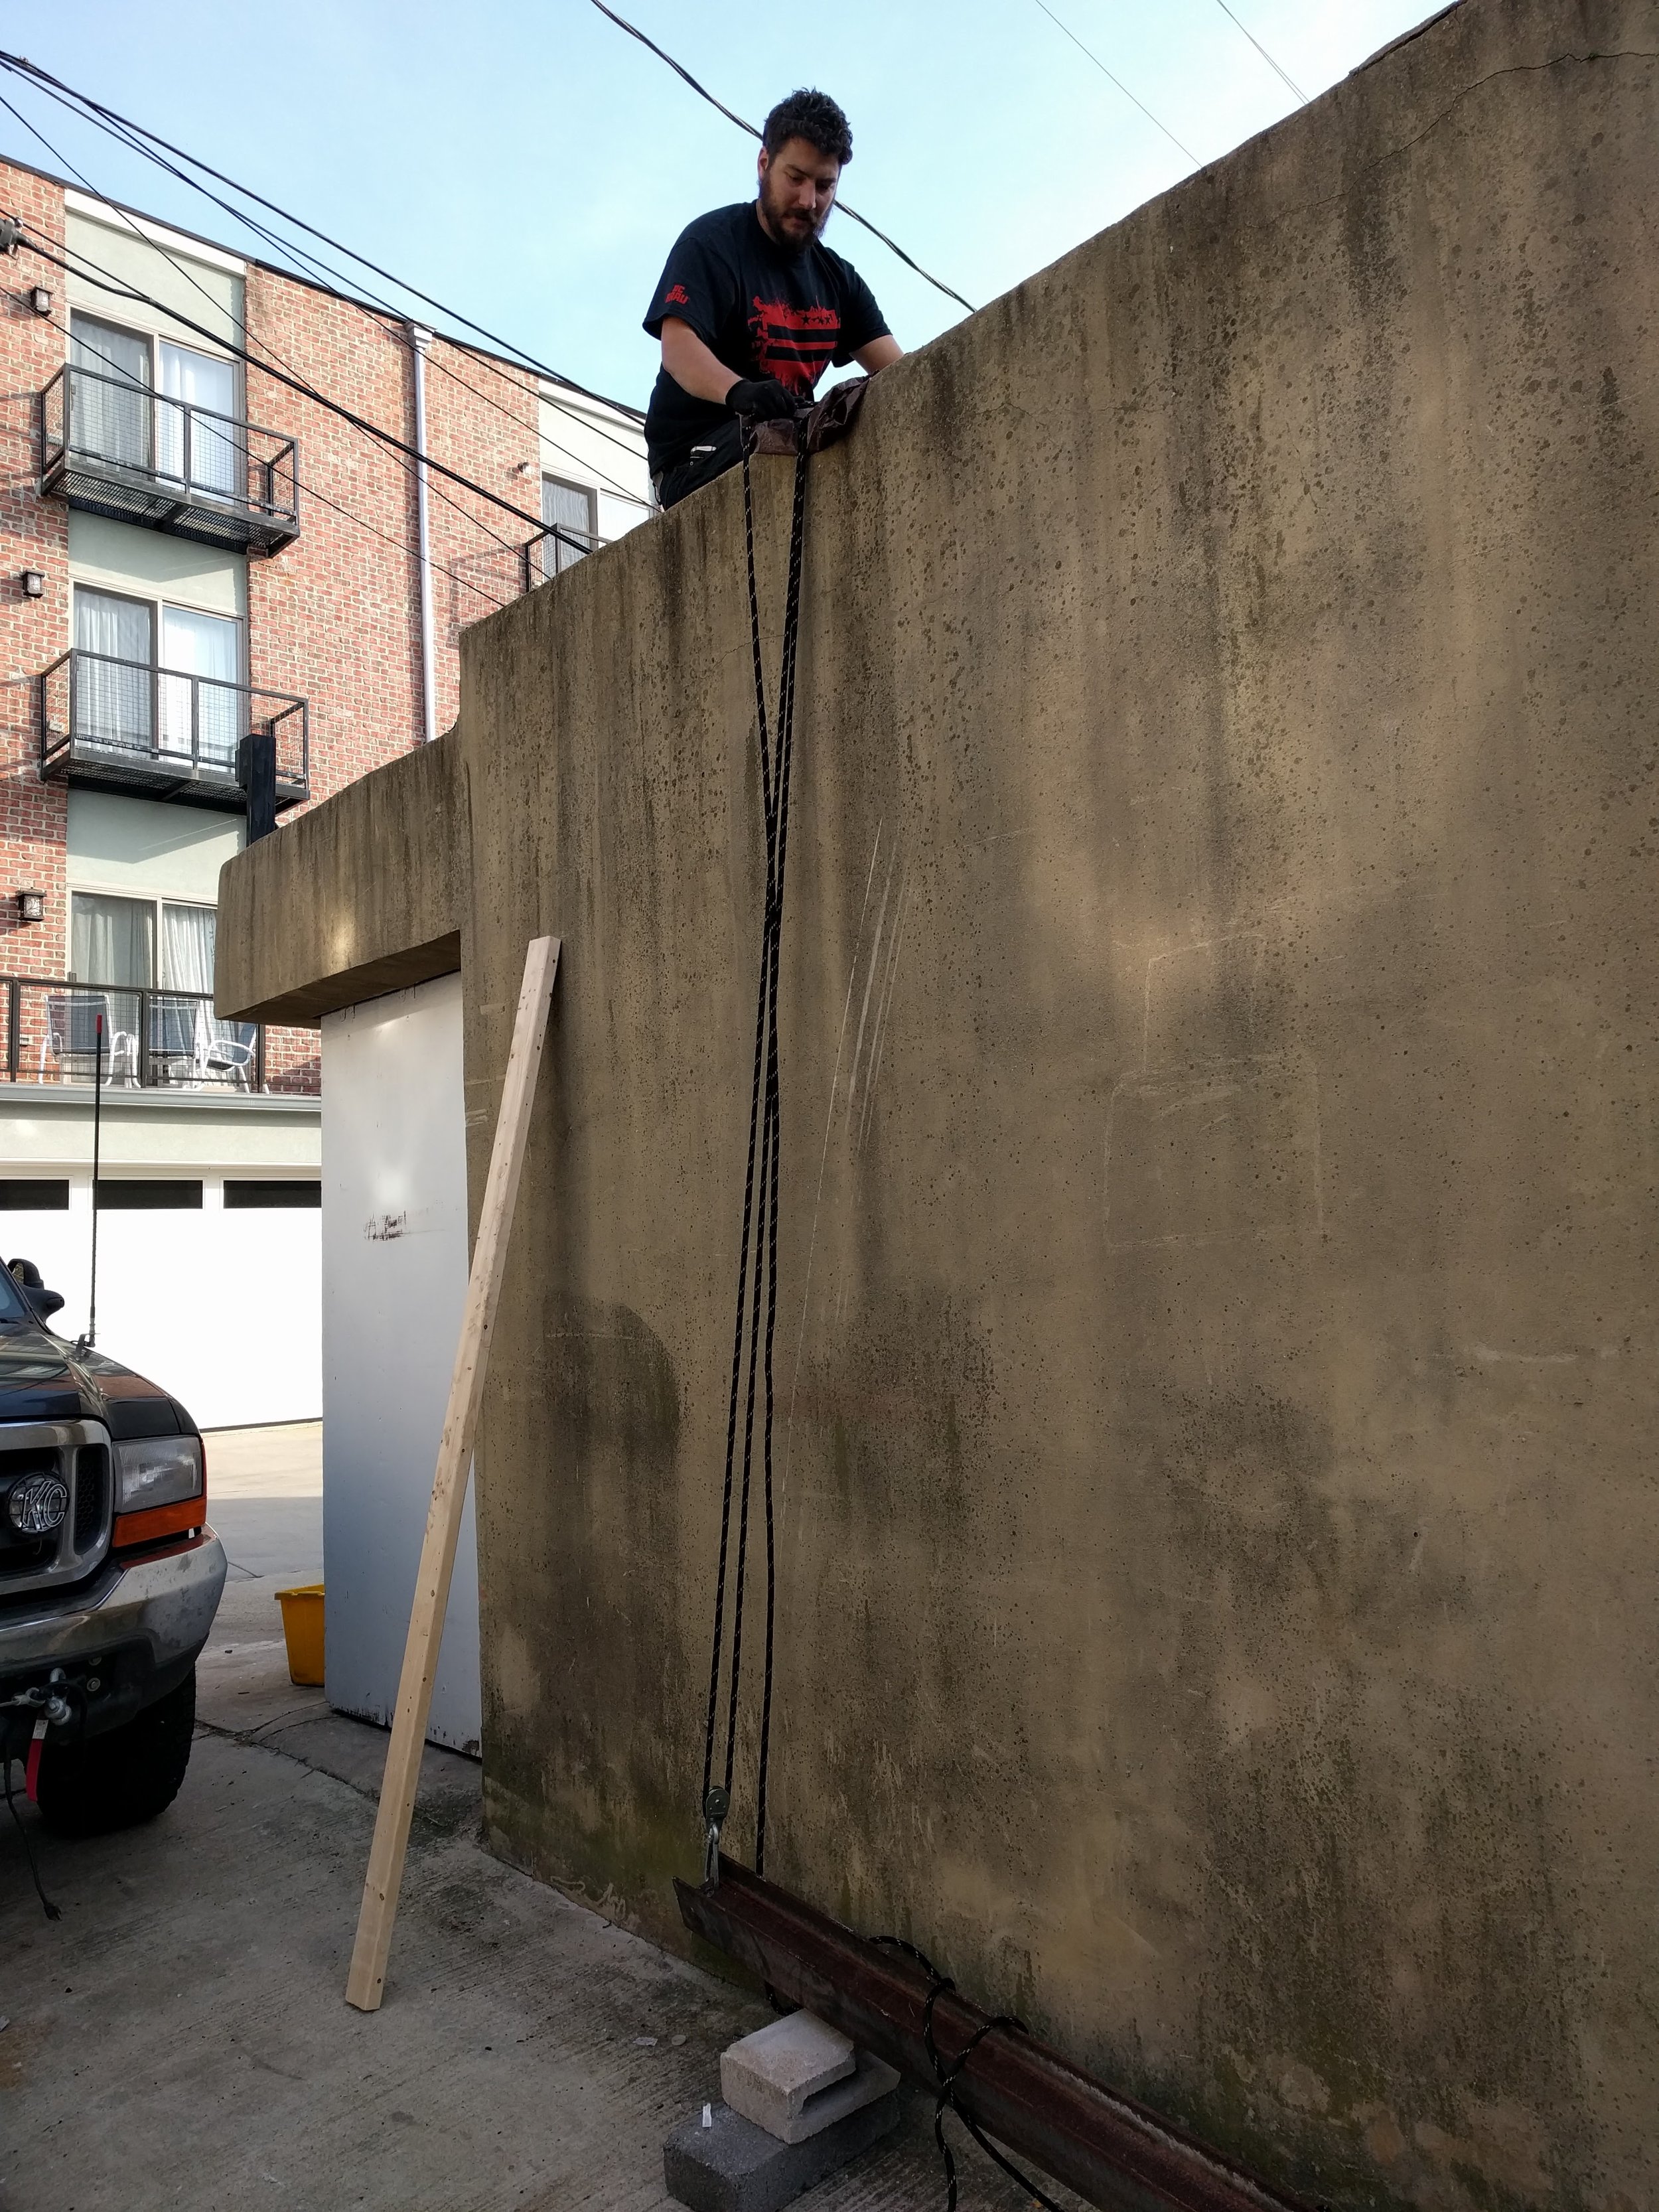
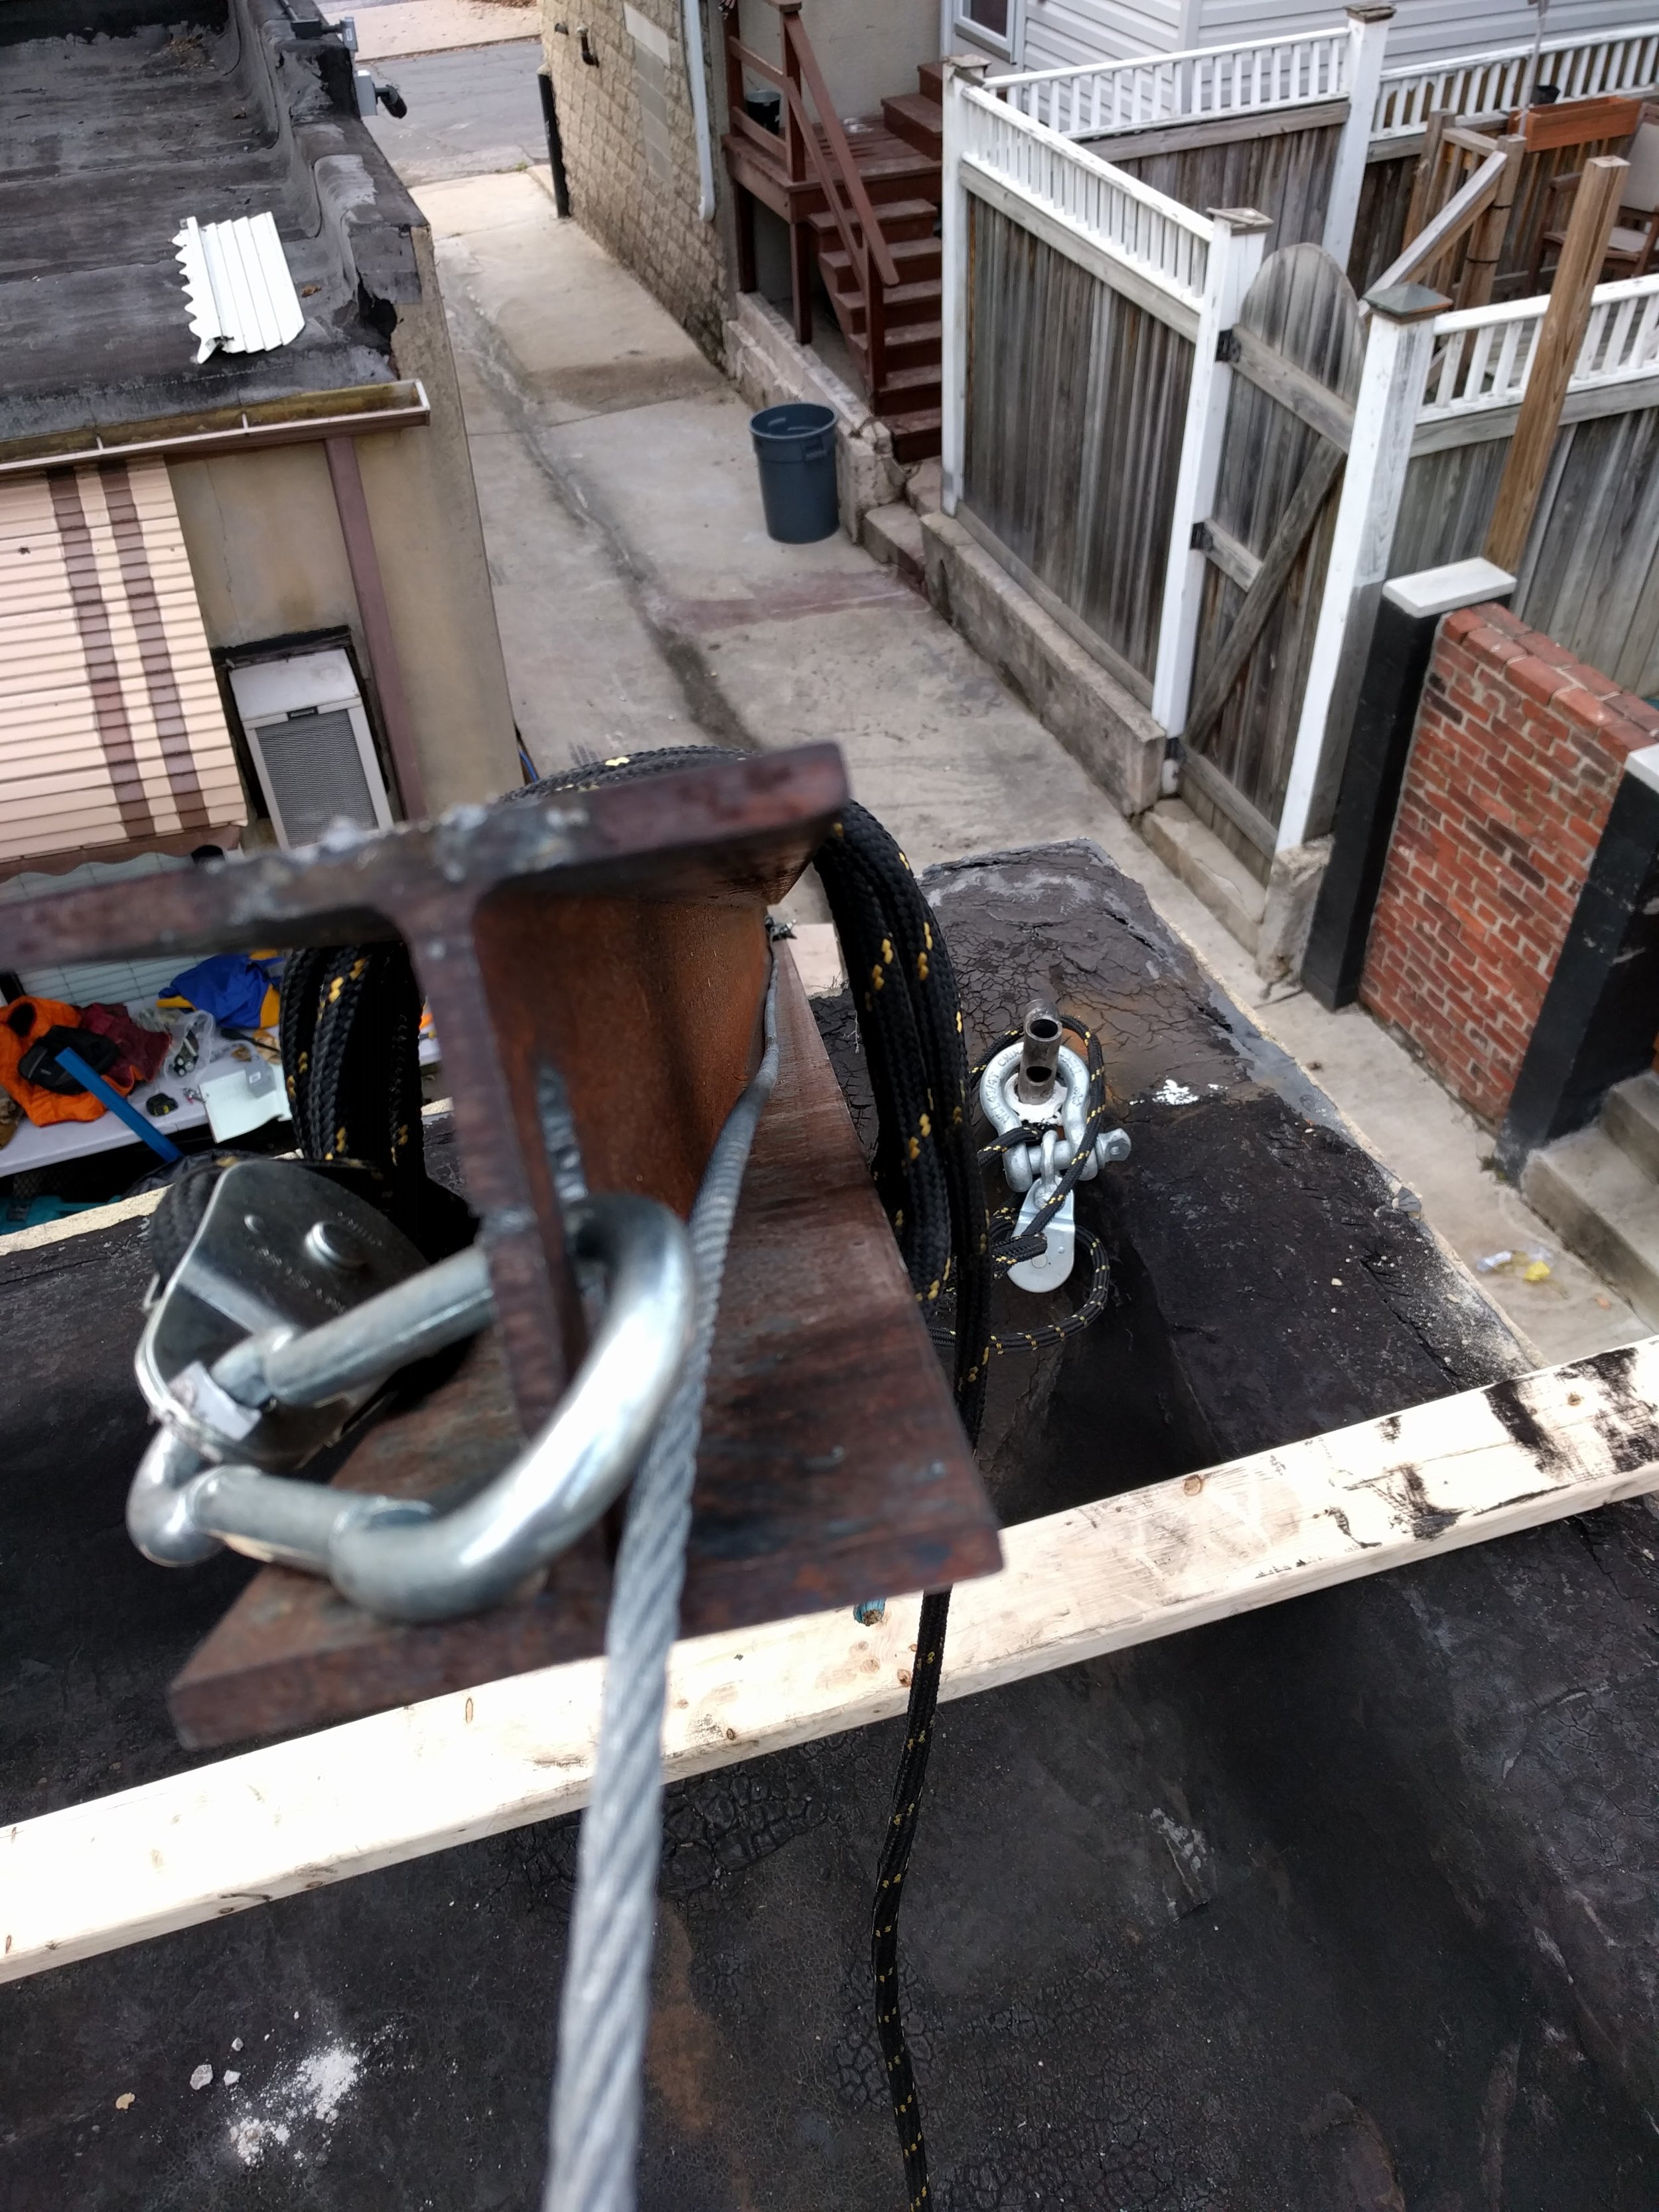
My friend and I hauled the beam up about half way by hand, until it became impossible. I ended up cutting a small hole in the end of the beam with the plasma torch to serve as a hook point. We mulled over the heavy beam a bit before rigging up a rudimentary block and tackle system:


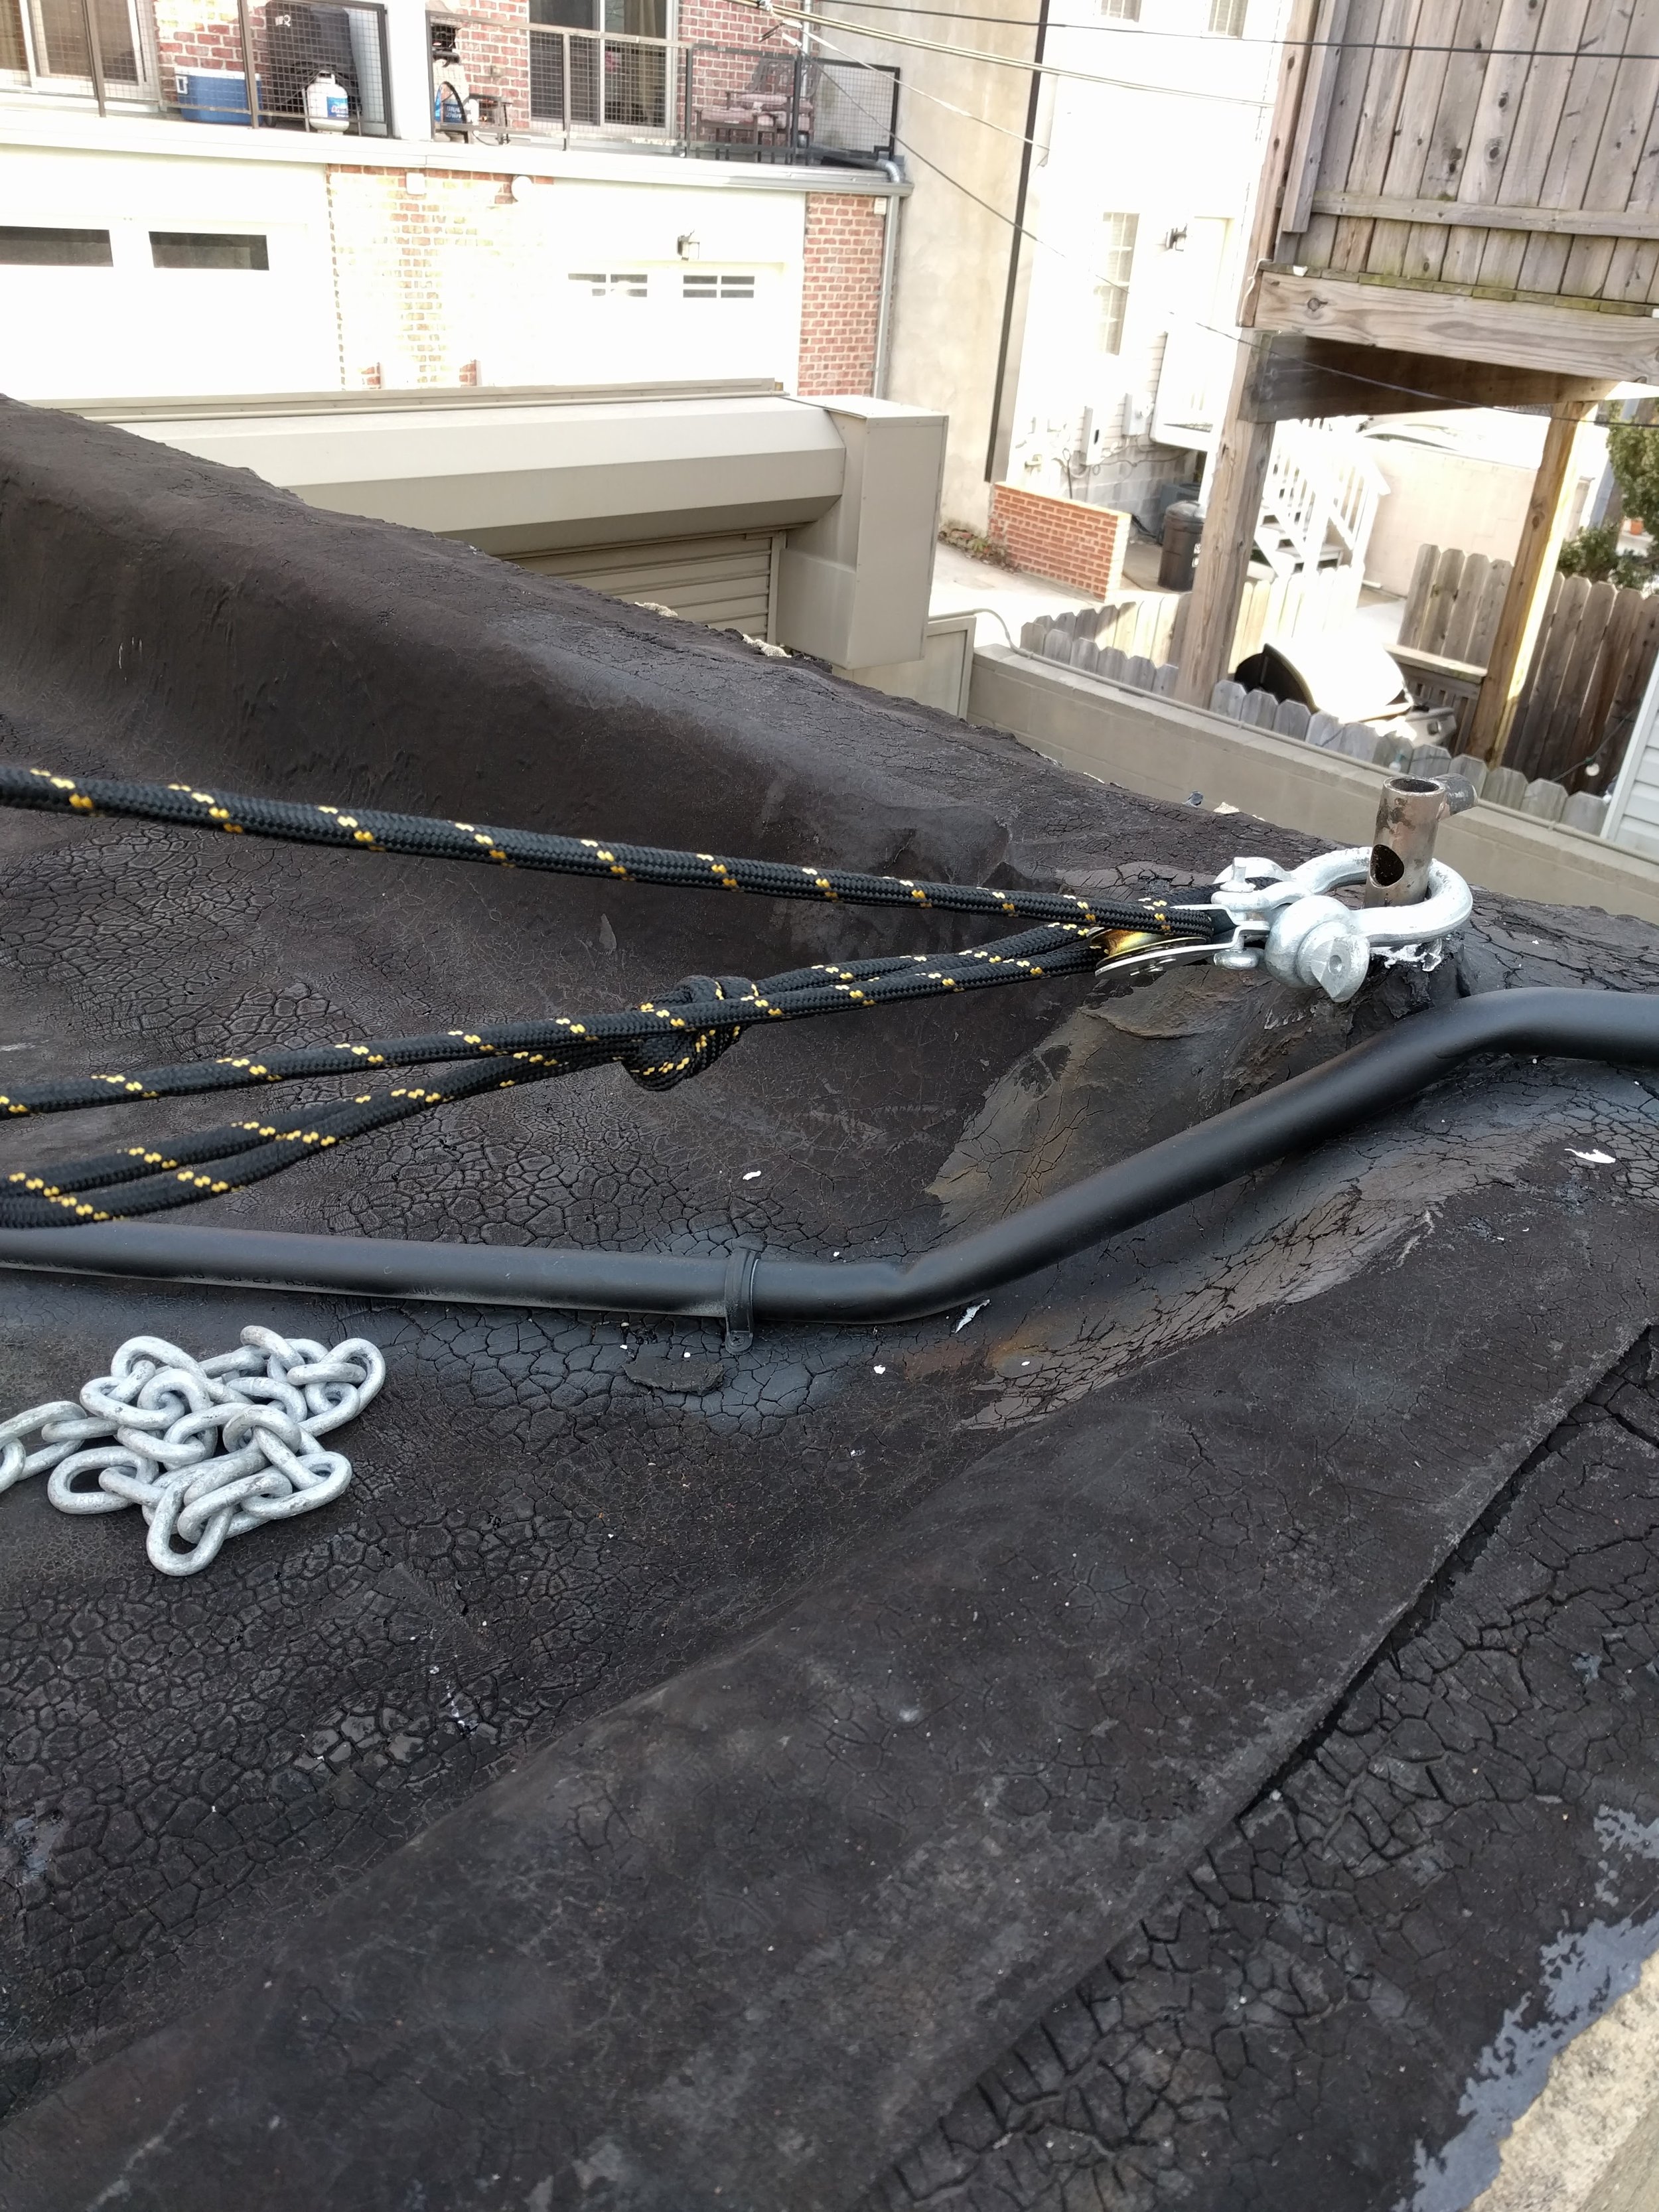
We had a pulley on our fixed point and another on the mast's end. This should have given us a 4-1 mechanical advantage. The beam was still a huge pain to lift up:


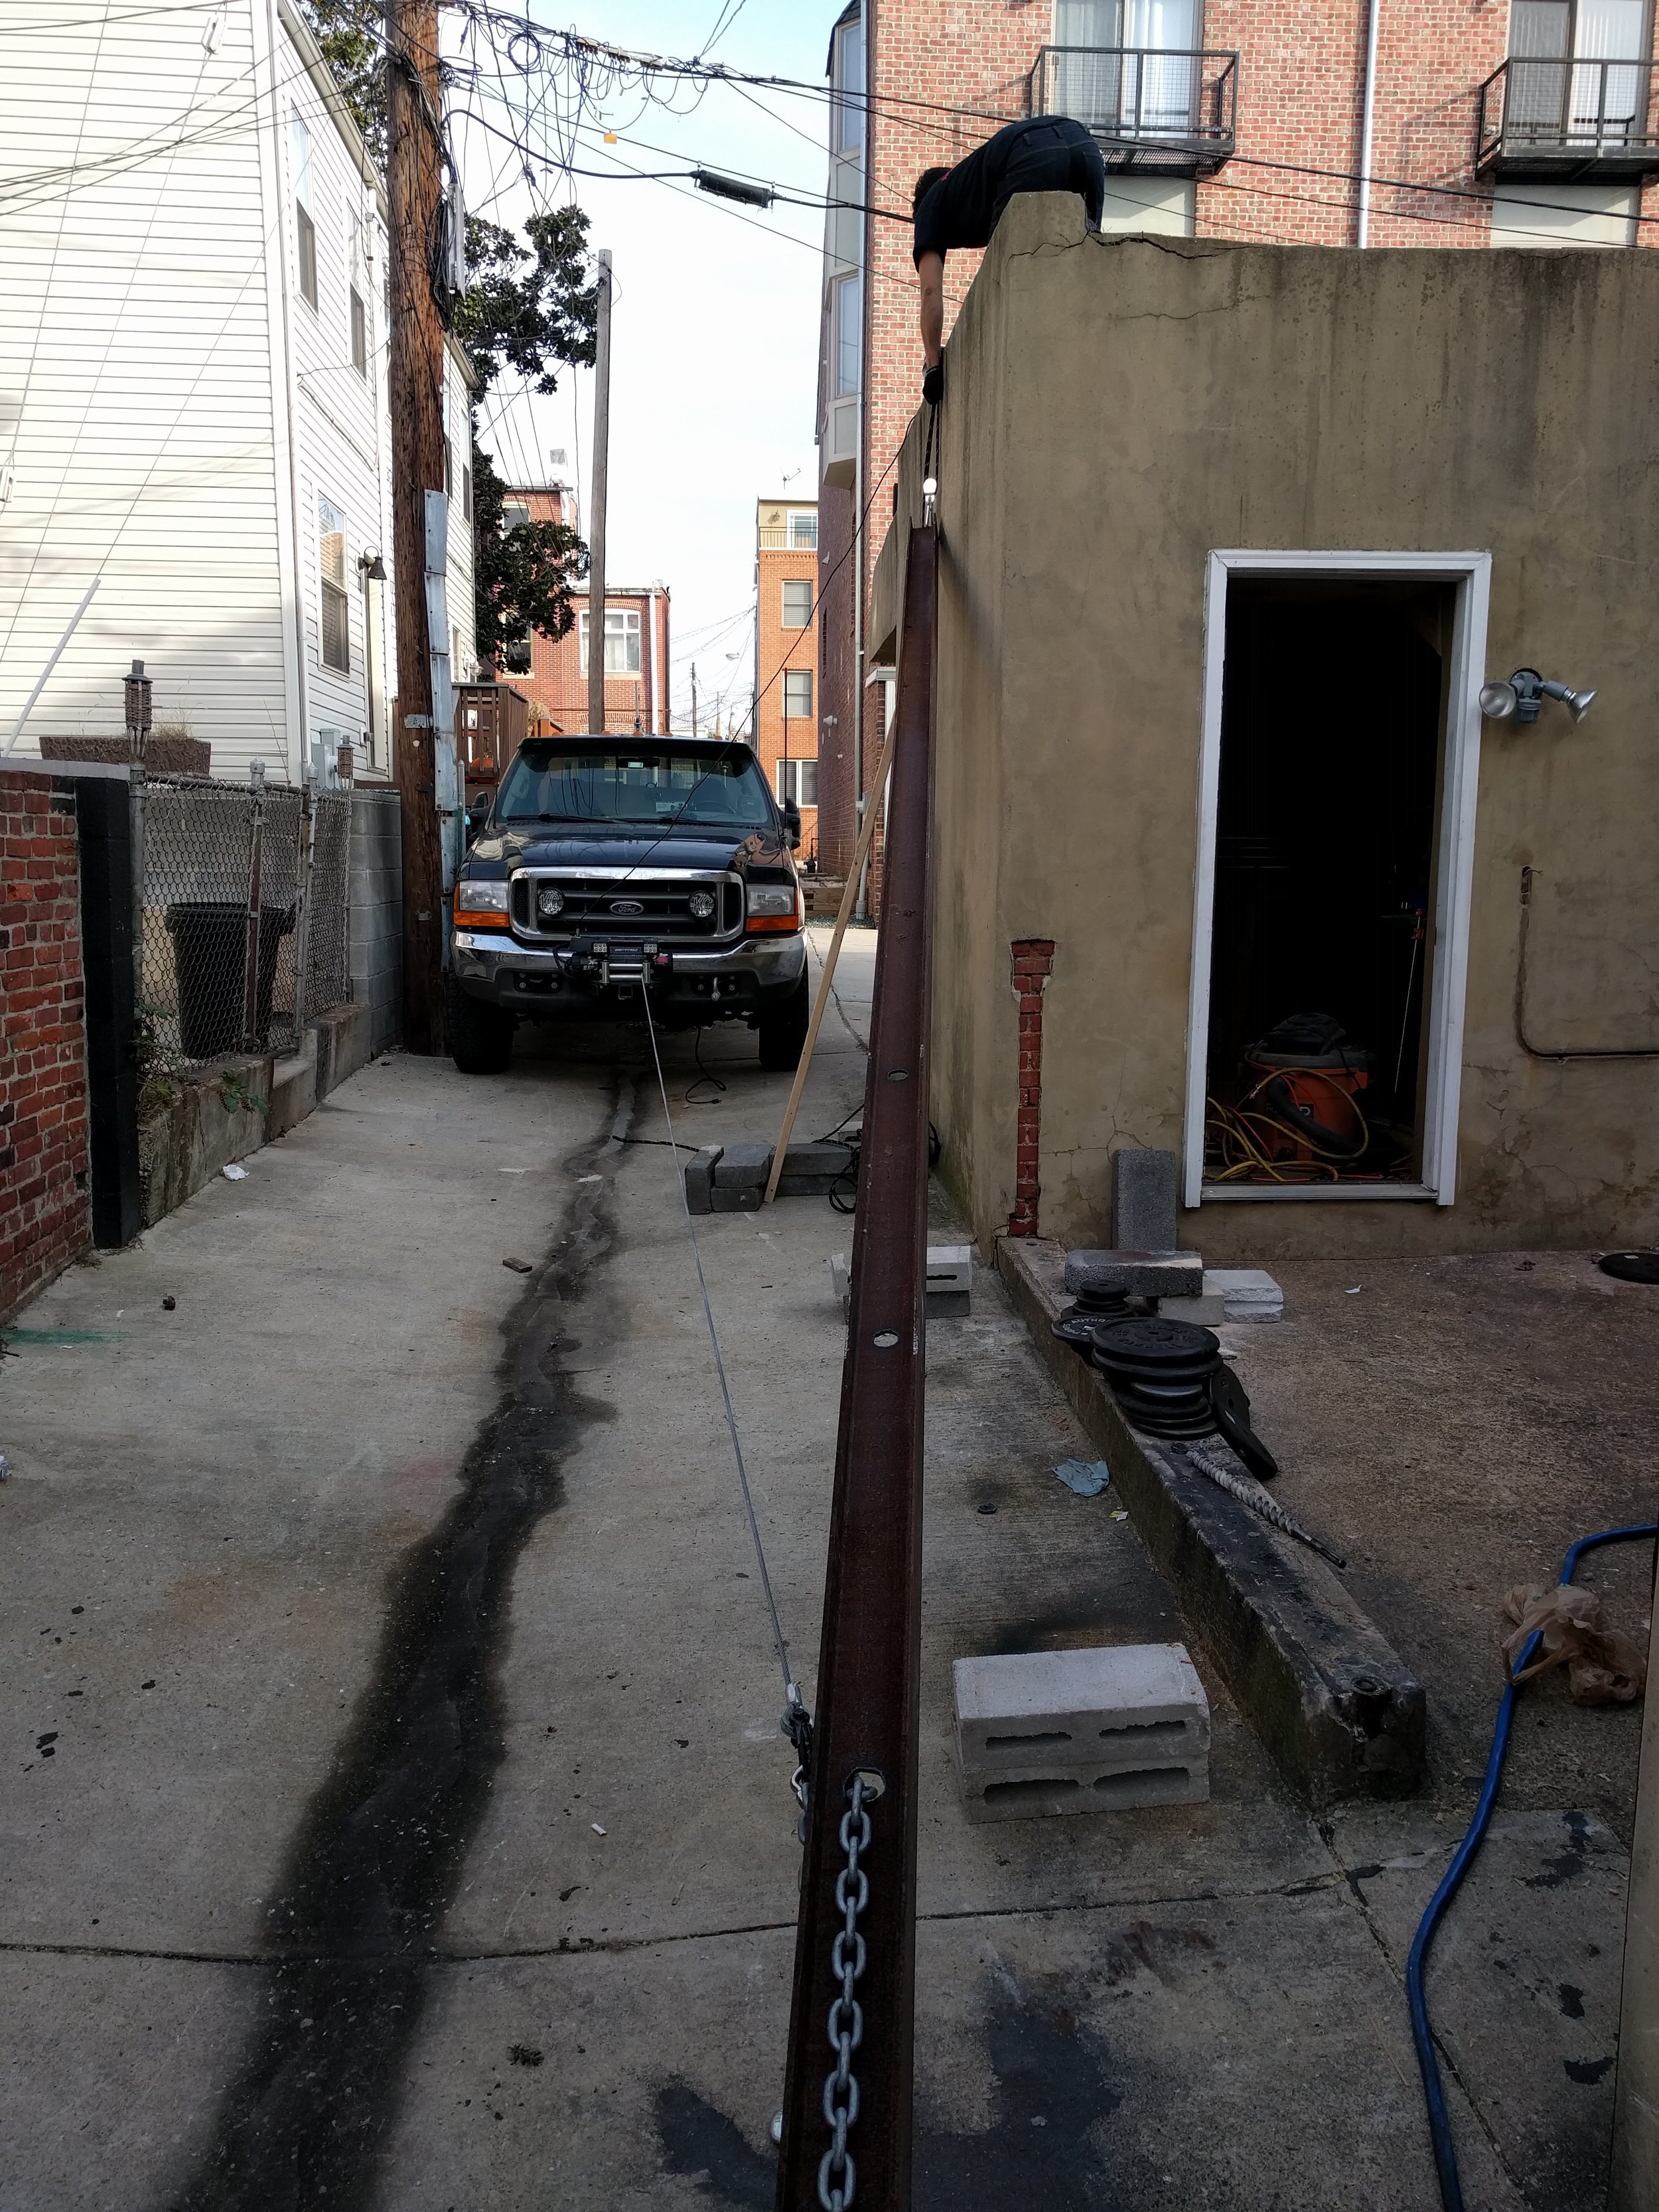
After this point, we didn't have any pictures because we were both frantically trying to haul the beam up and over the edge of the garage. It was very heavy and required us fix the winch to the bottom of the beam so, as we hauled the one end up, we could remotely pull the bottom towards us:


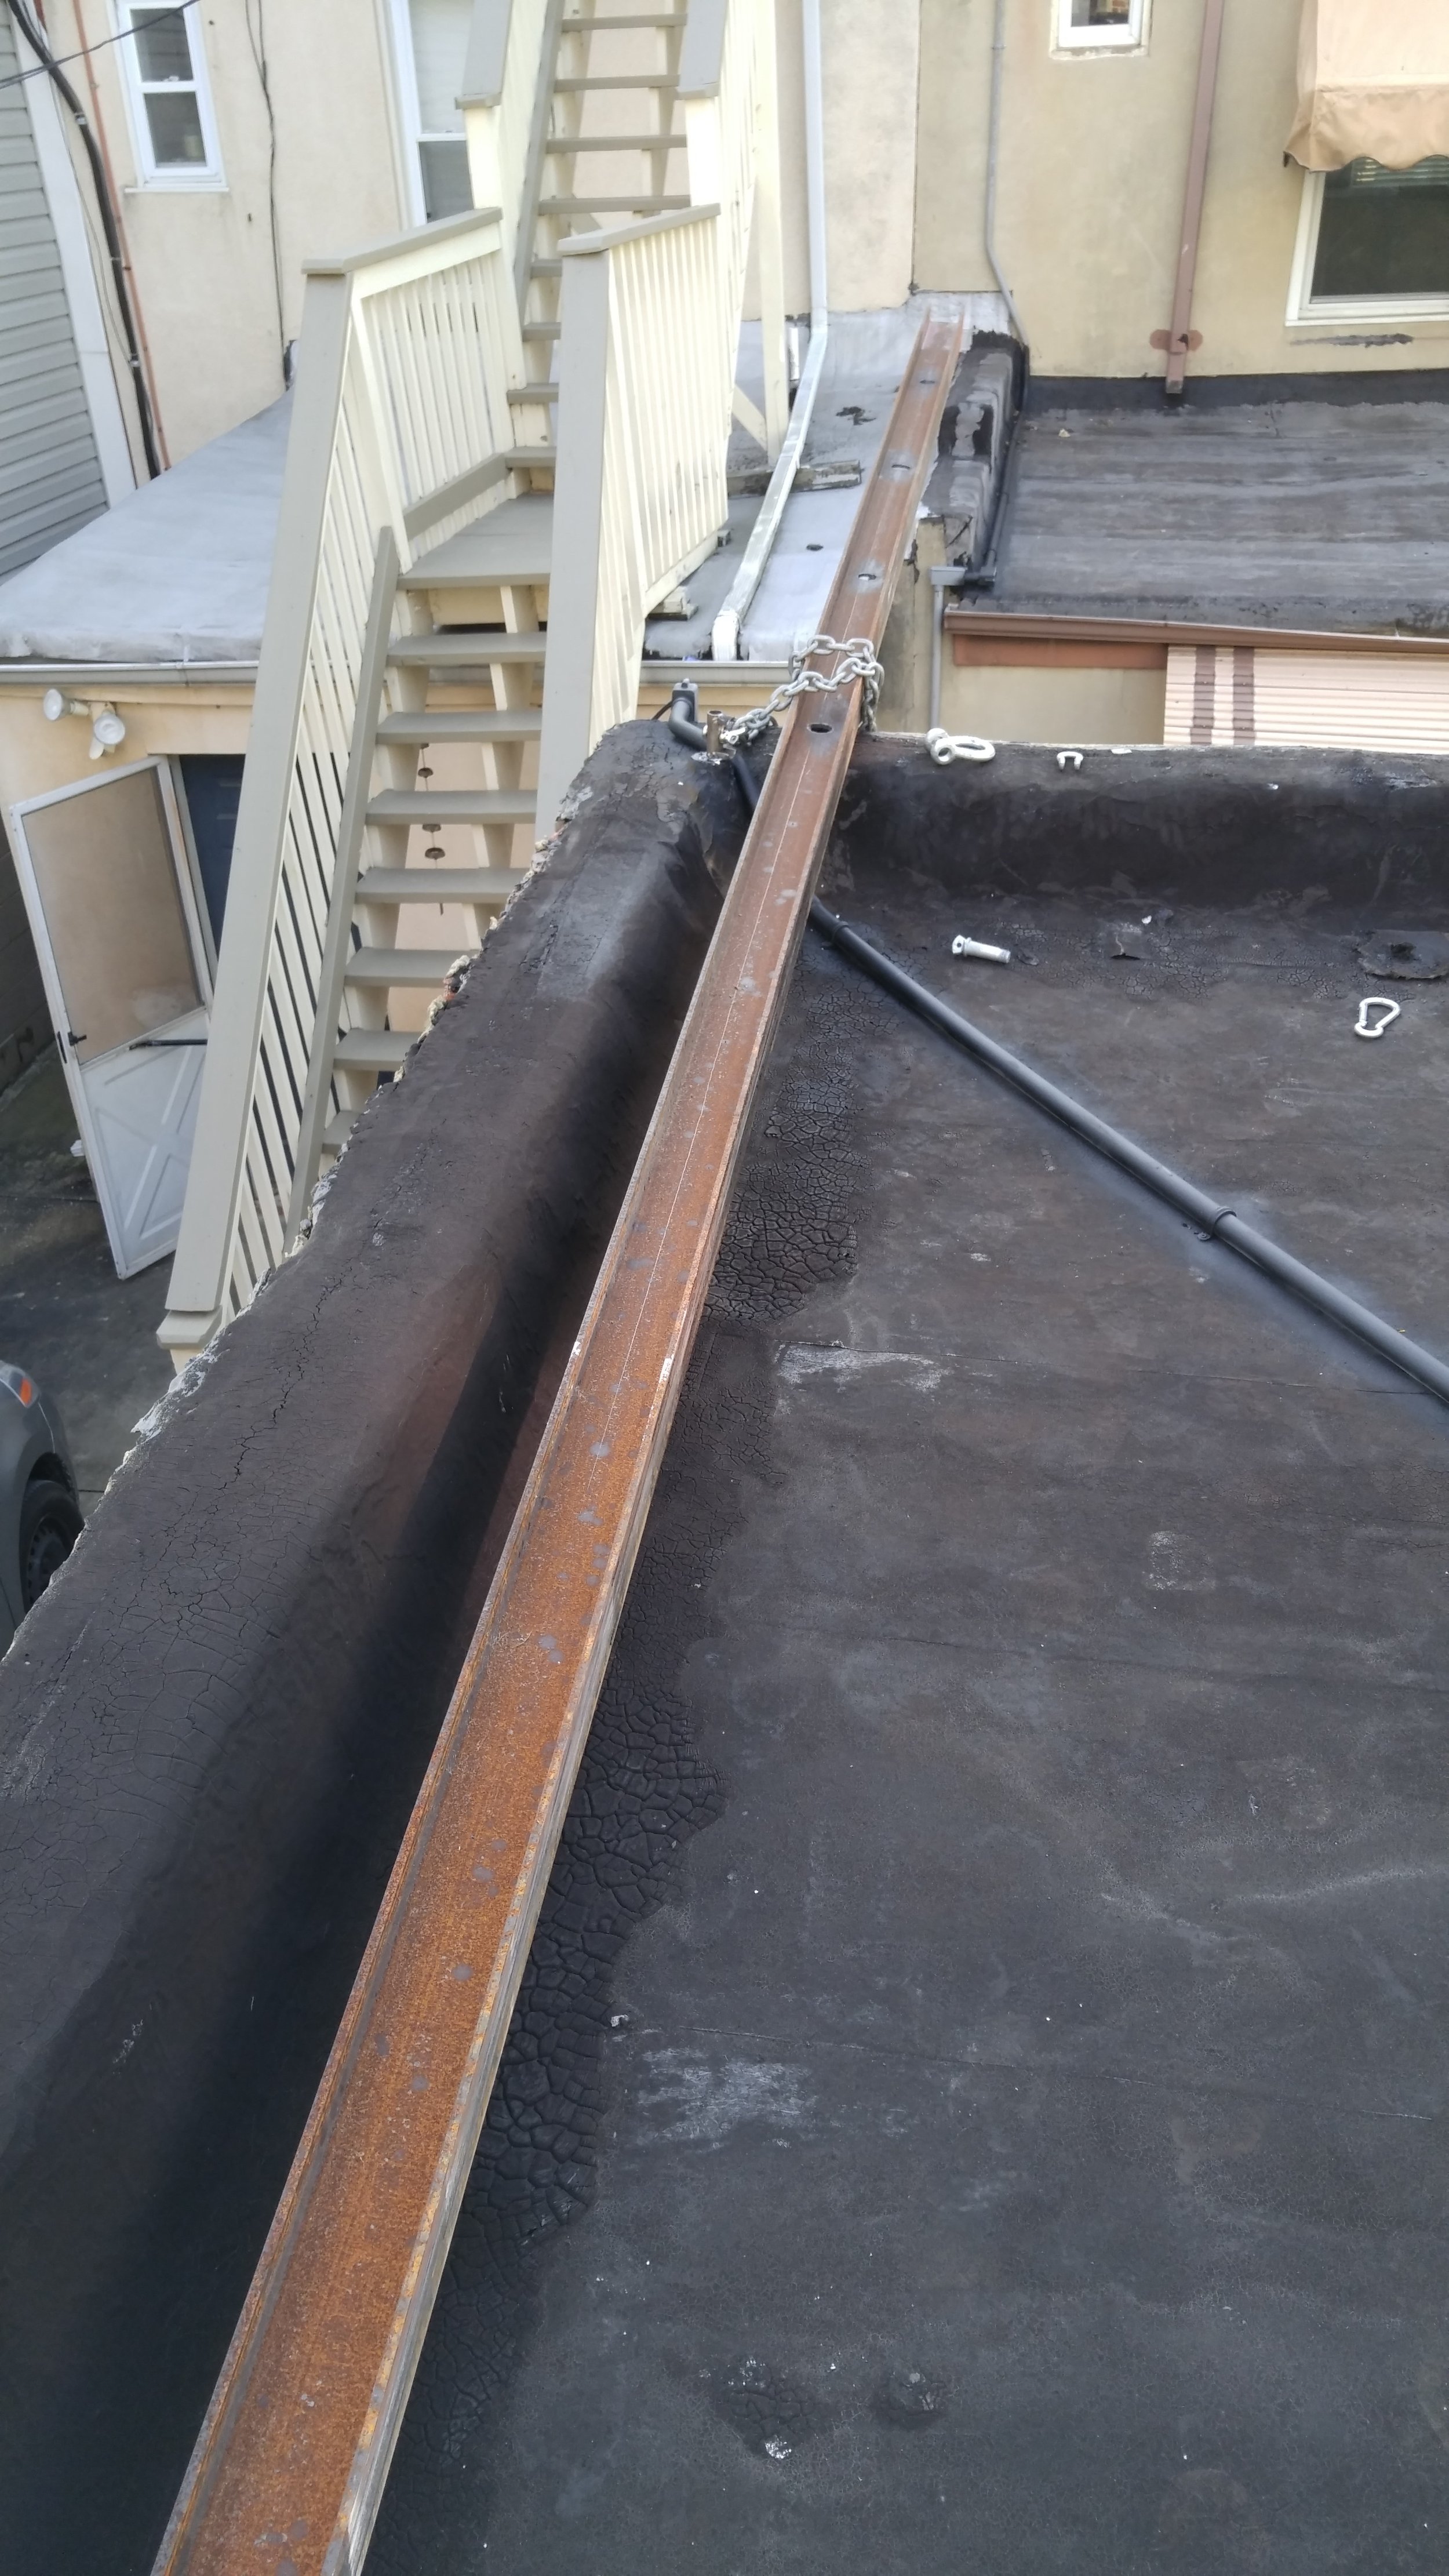
Once the huffing and puffing was over, the mast was propped up on the roof. At this point, I transferred the winch cable over the garage from the back, then down the beam, and fixed it to the top most through-hole. This was nearly the center of the beam:


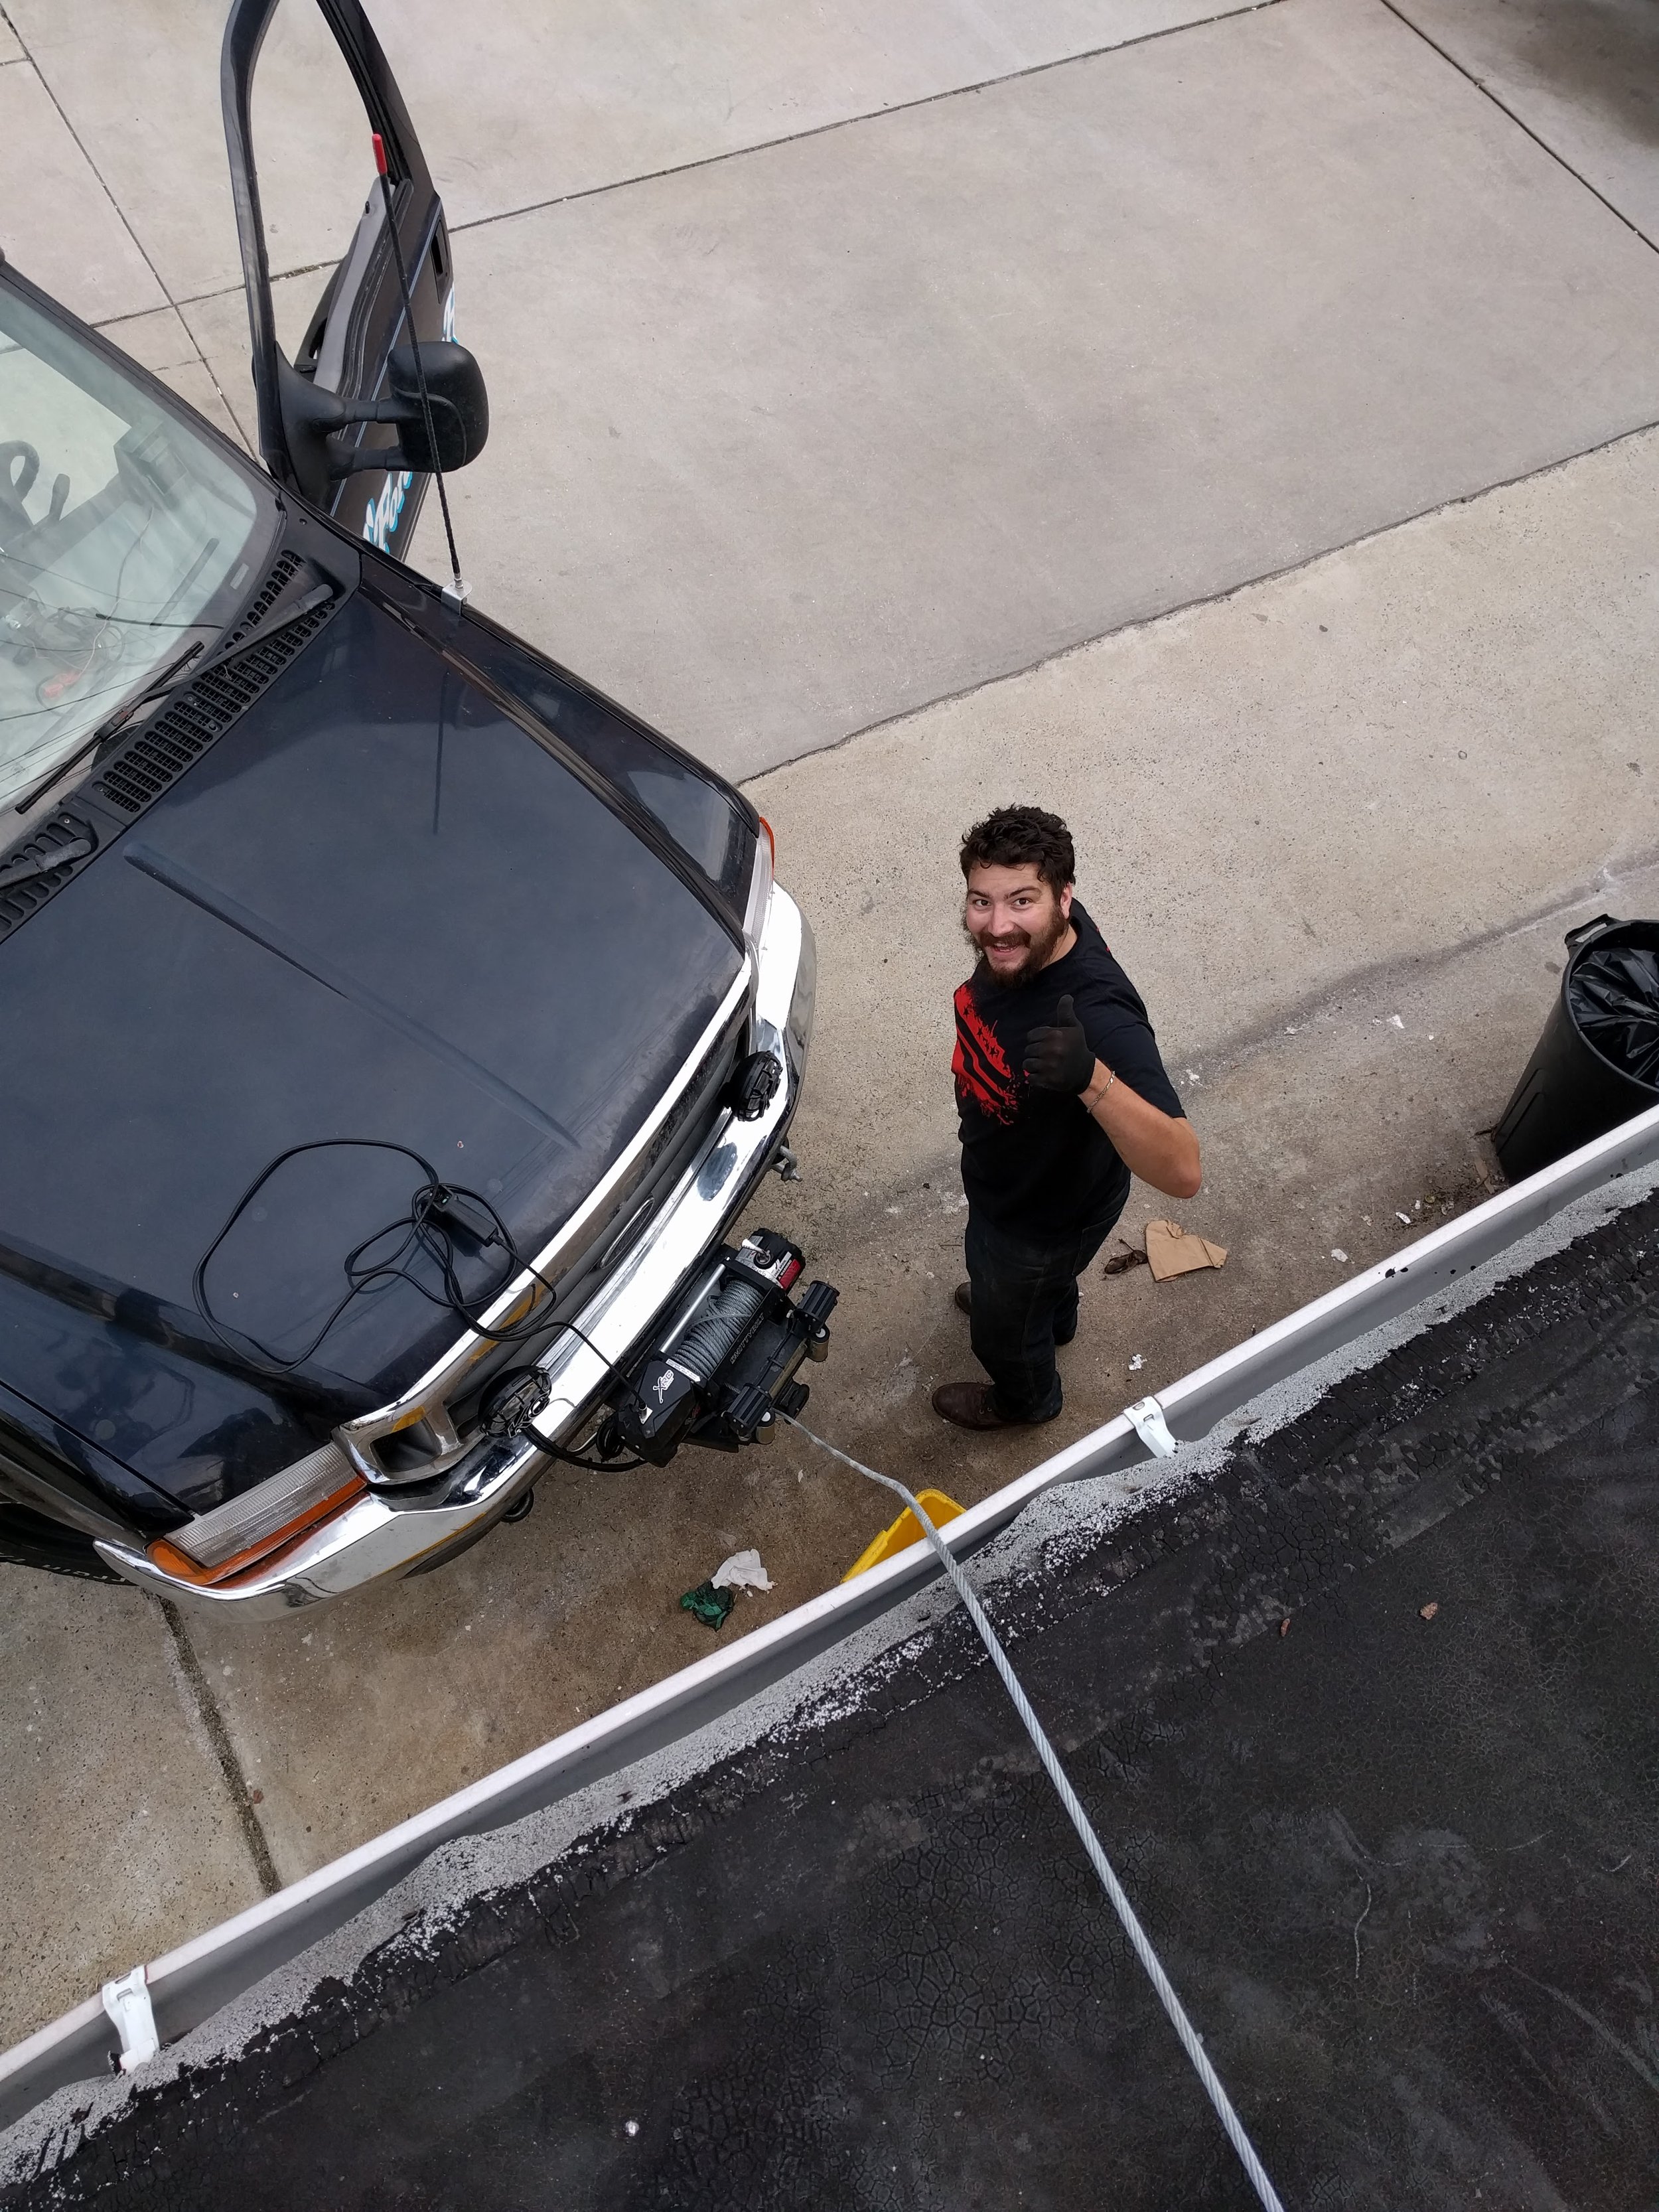
Let me tell you, that a powerful winch on the front of a truck is a useful thing to have. The 9000 pound winch had no trouble pulling the beam up level and sliding it onto the roof. Look how excited I am:

Once the beam was up there, some re-arranging of the various pulley points let me use the winch to slide it over into position. At this point, I chained the beam to the corner so that as it went over, it would stay in put.


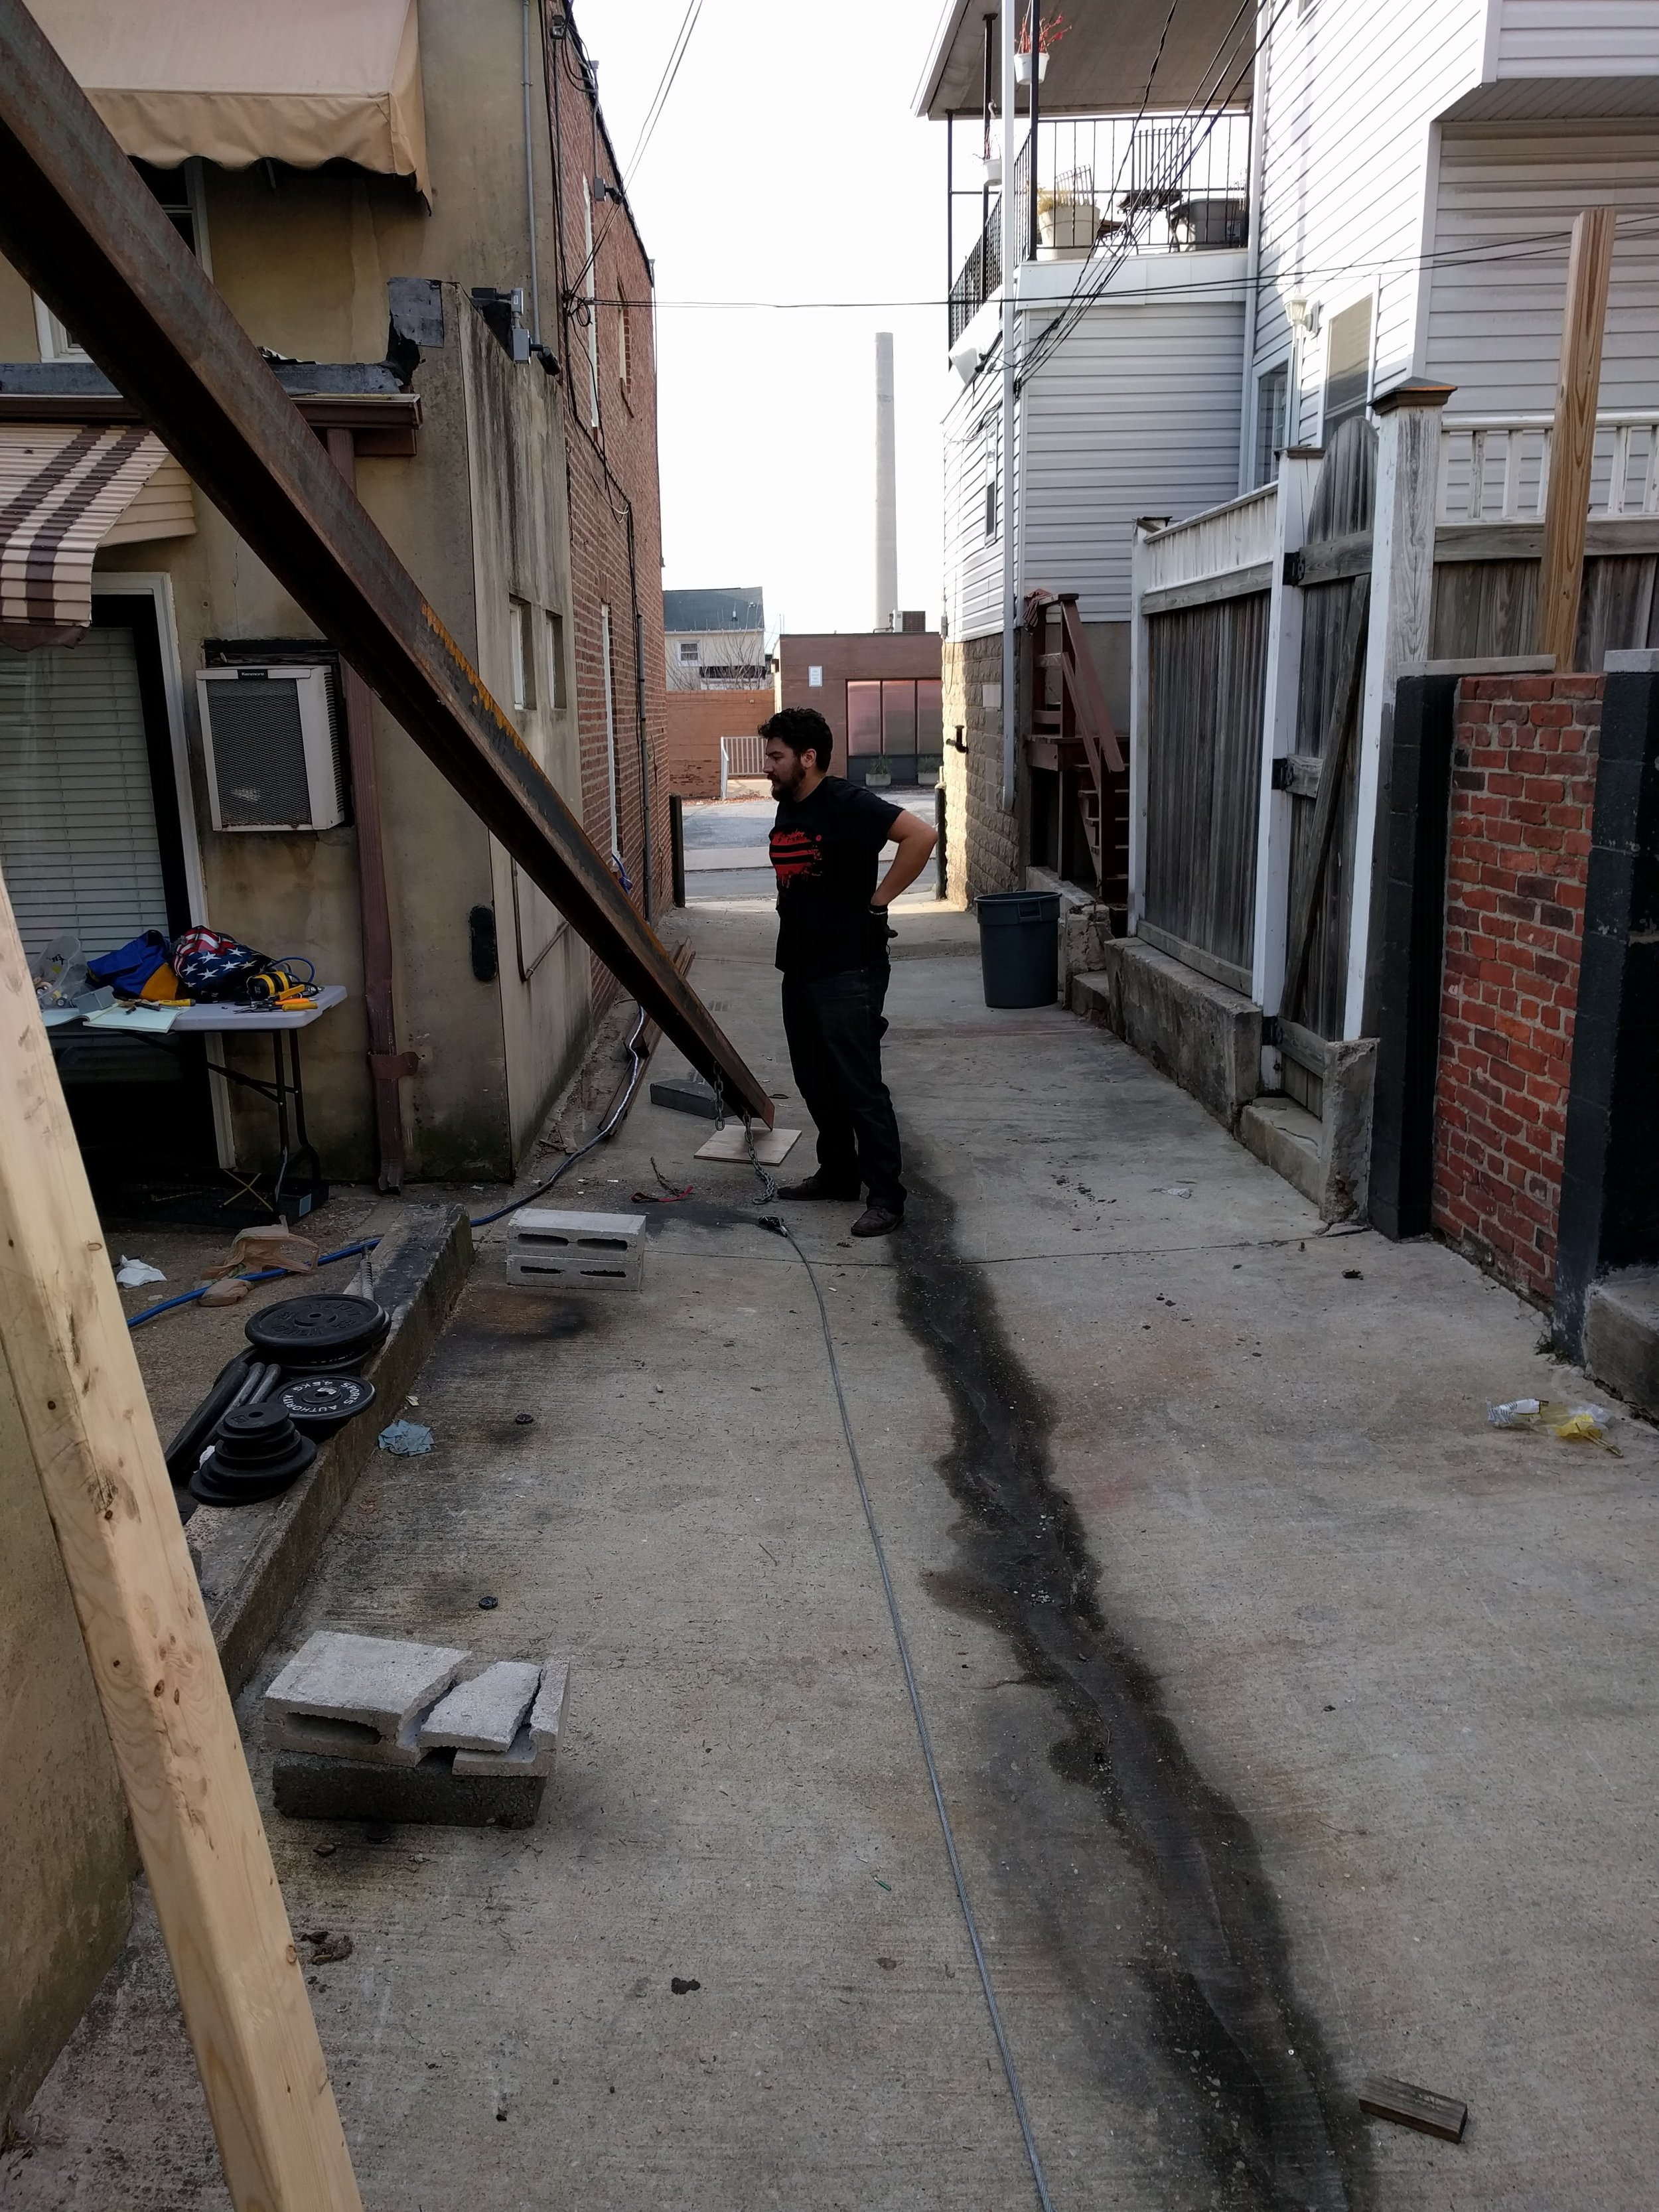
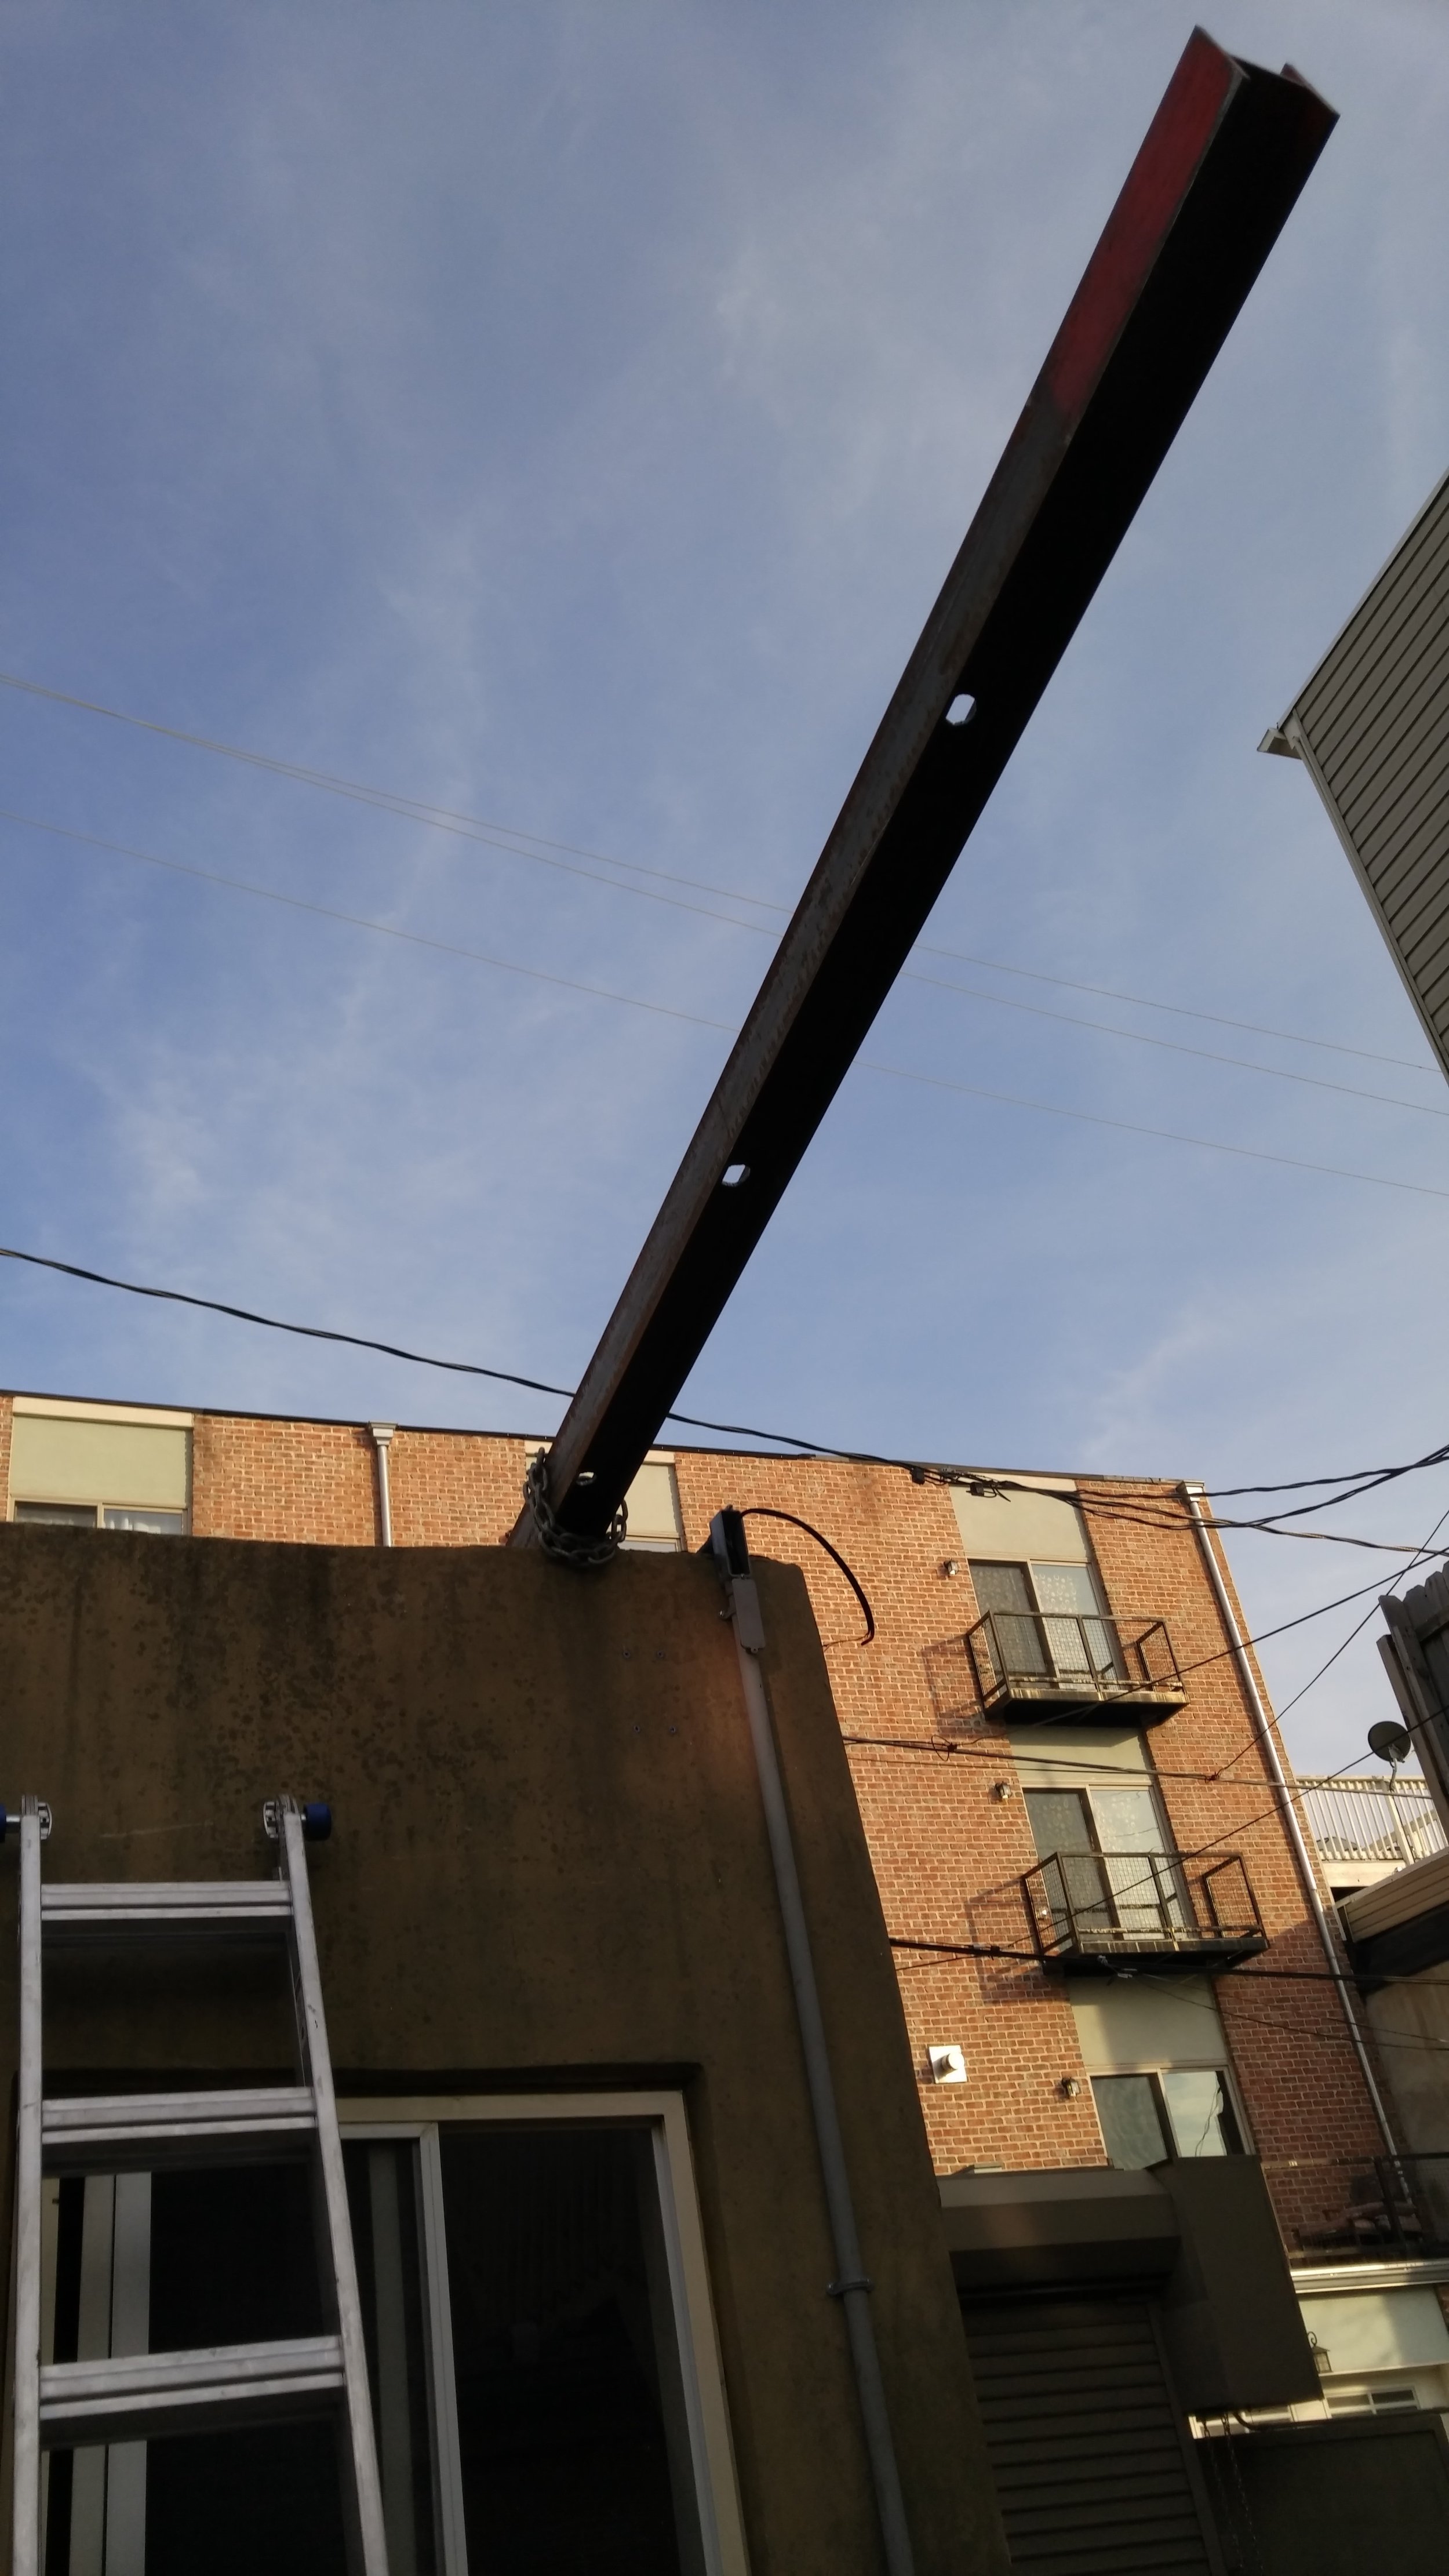
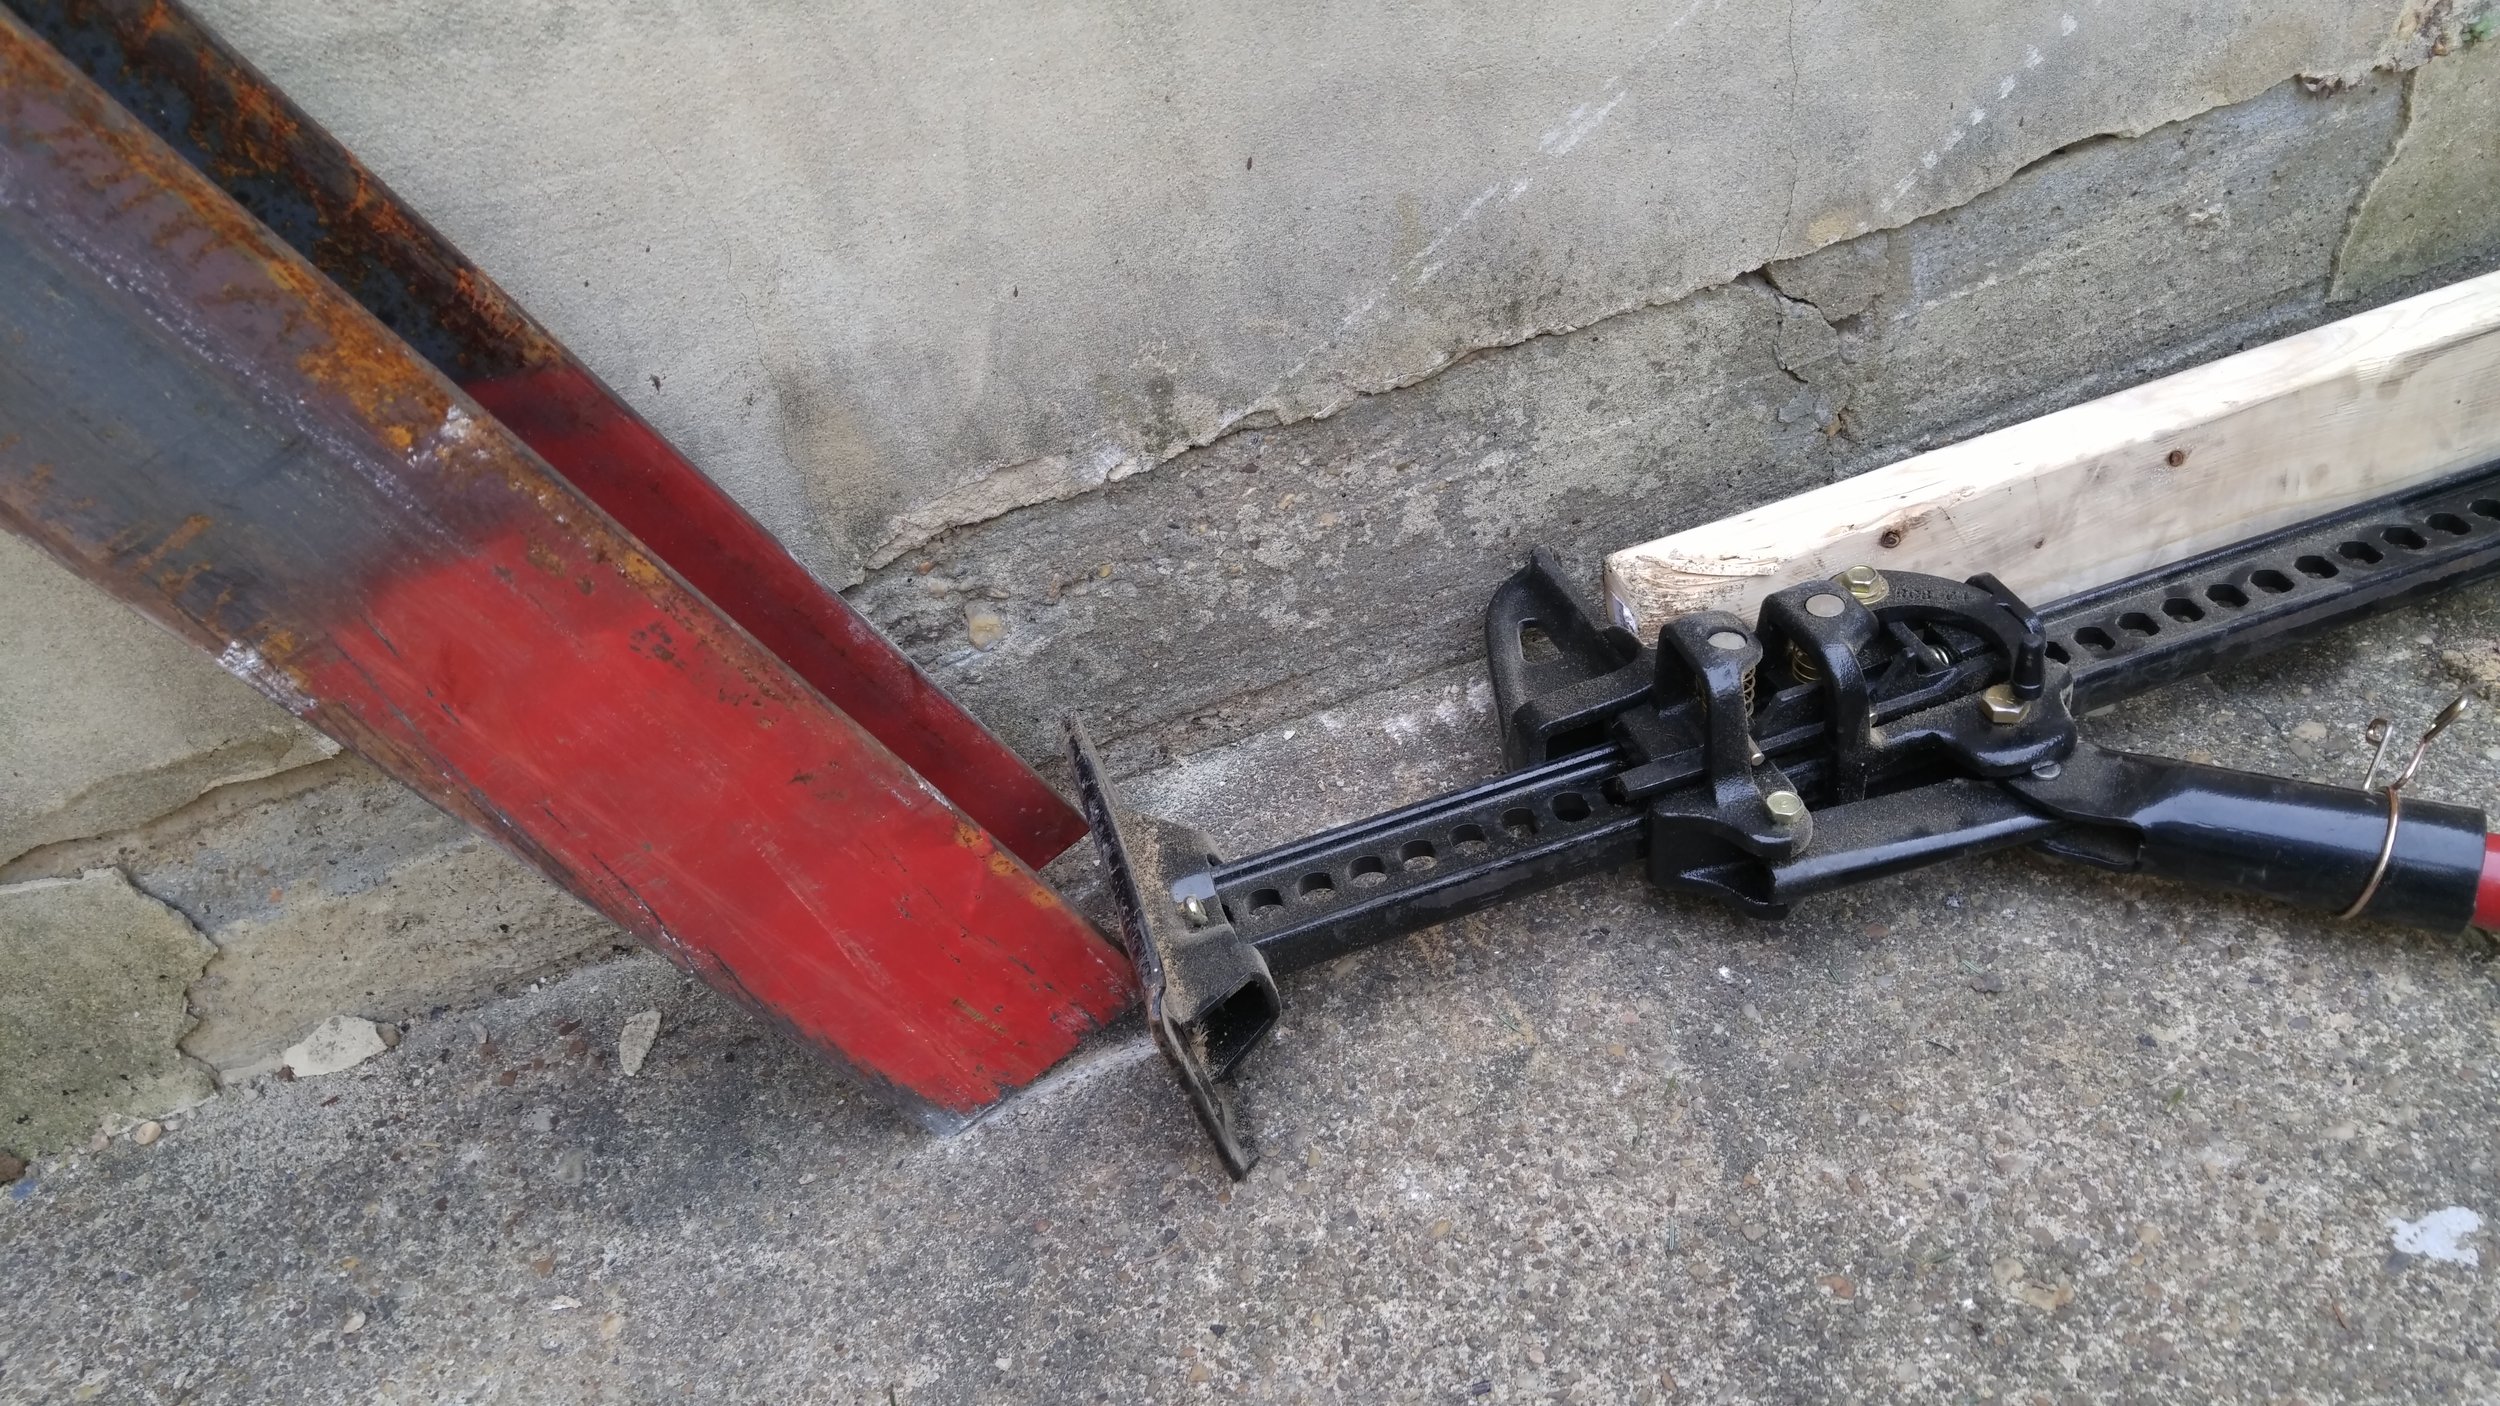
I was surprised how easy it was to lift the one end and walk forward, dropping the mast over the ledge. I guess having it pivot around it's center helped me out. Towards the end of the movement, it slid down at an angle. I just used my big jack and then lots of inching along with a pry bar to move it toward the hole:

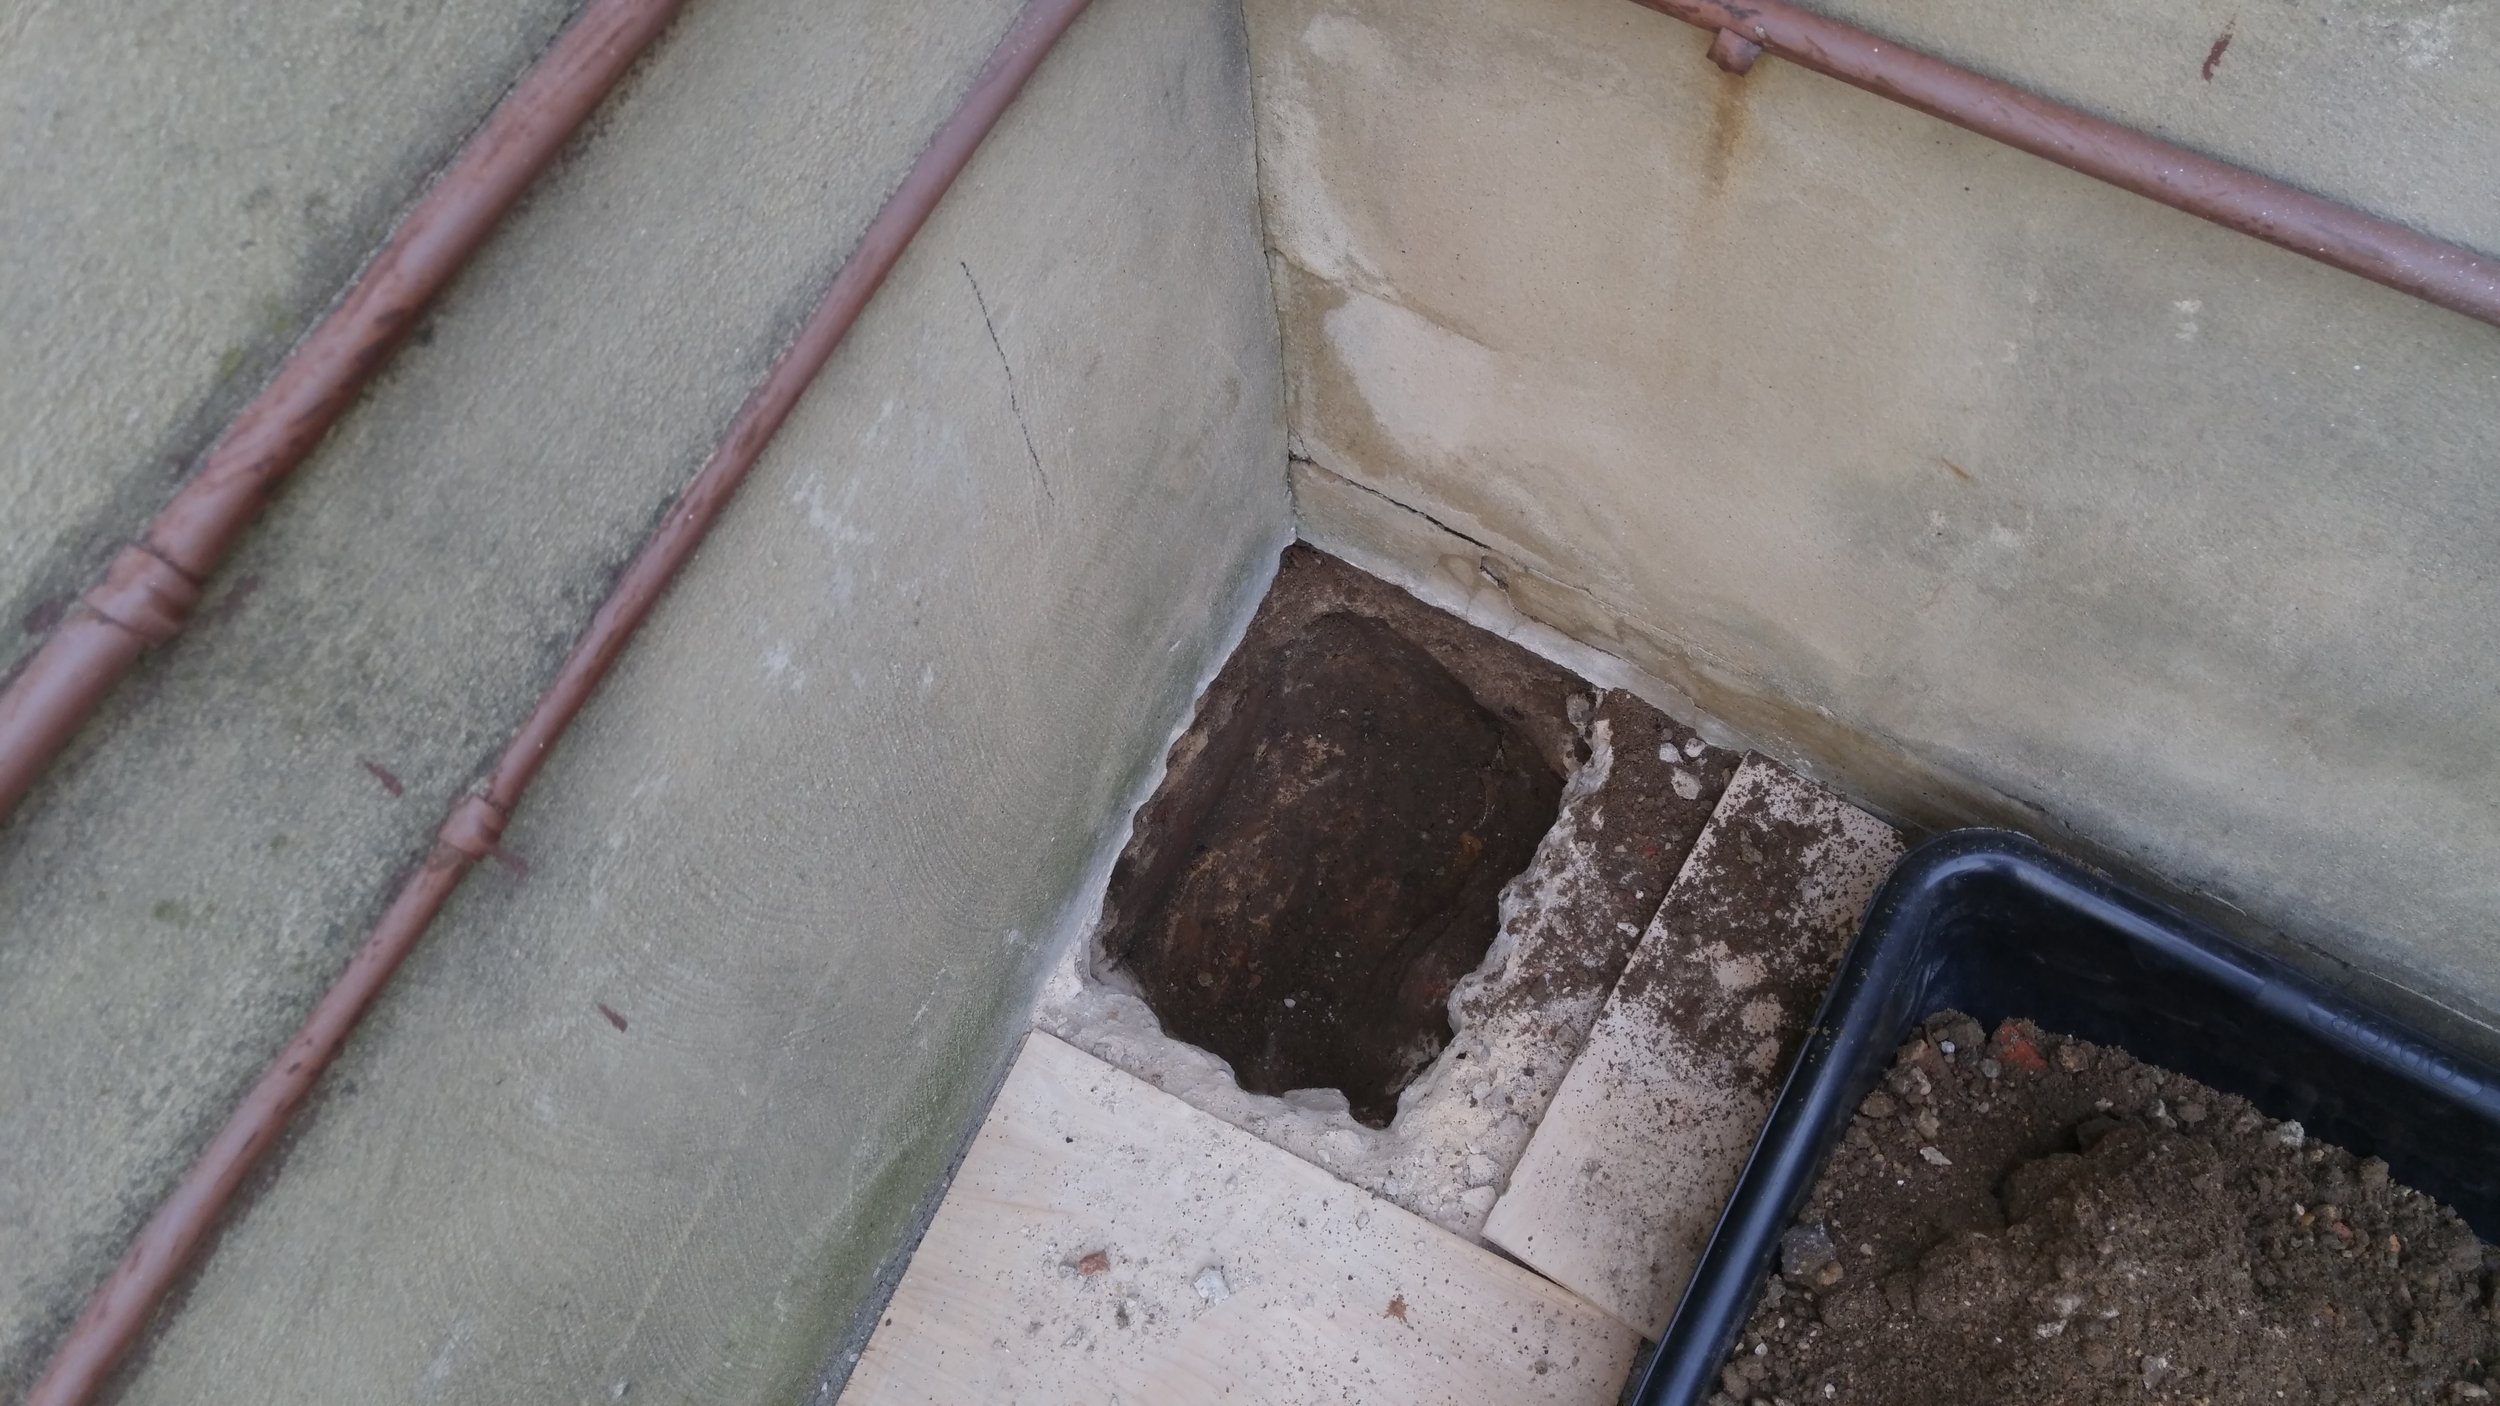
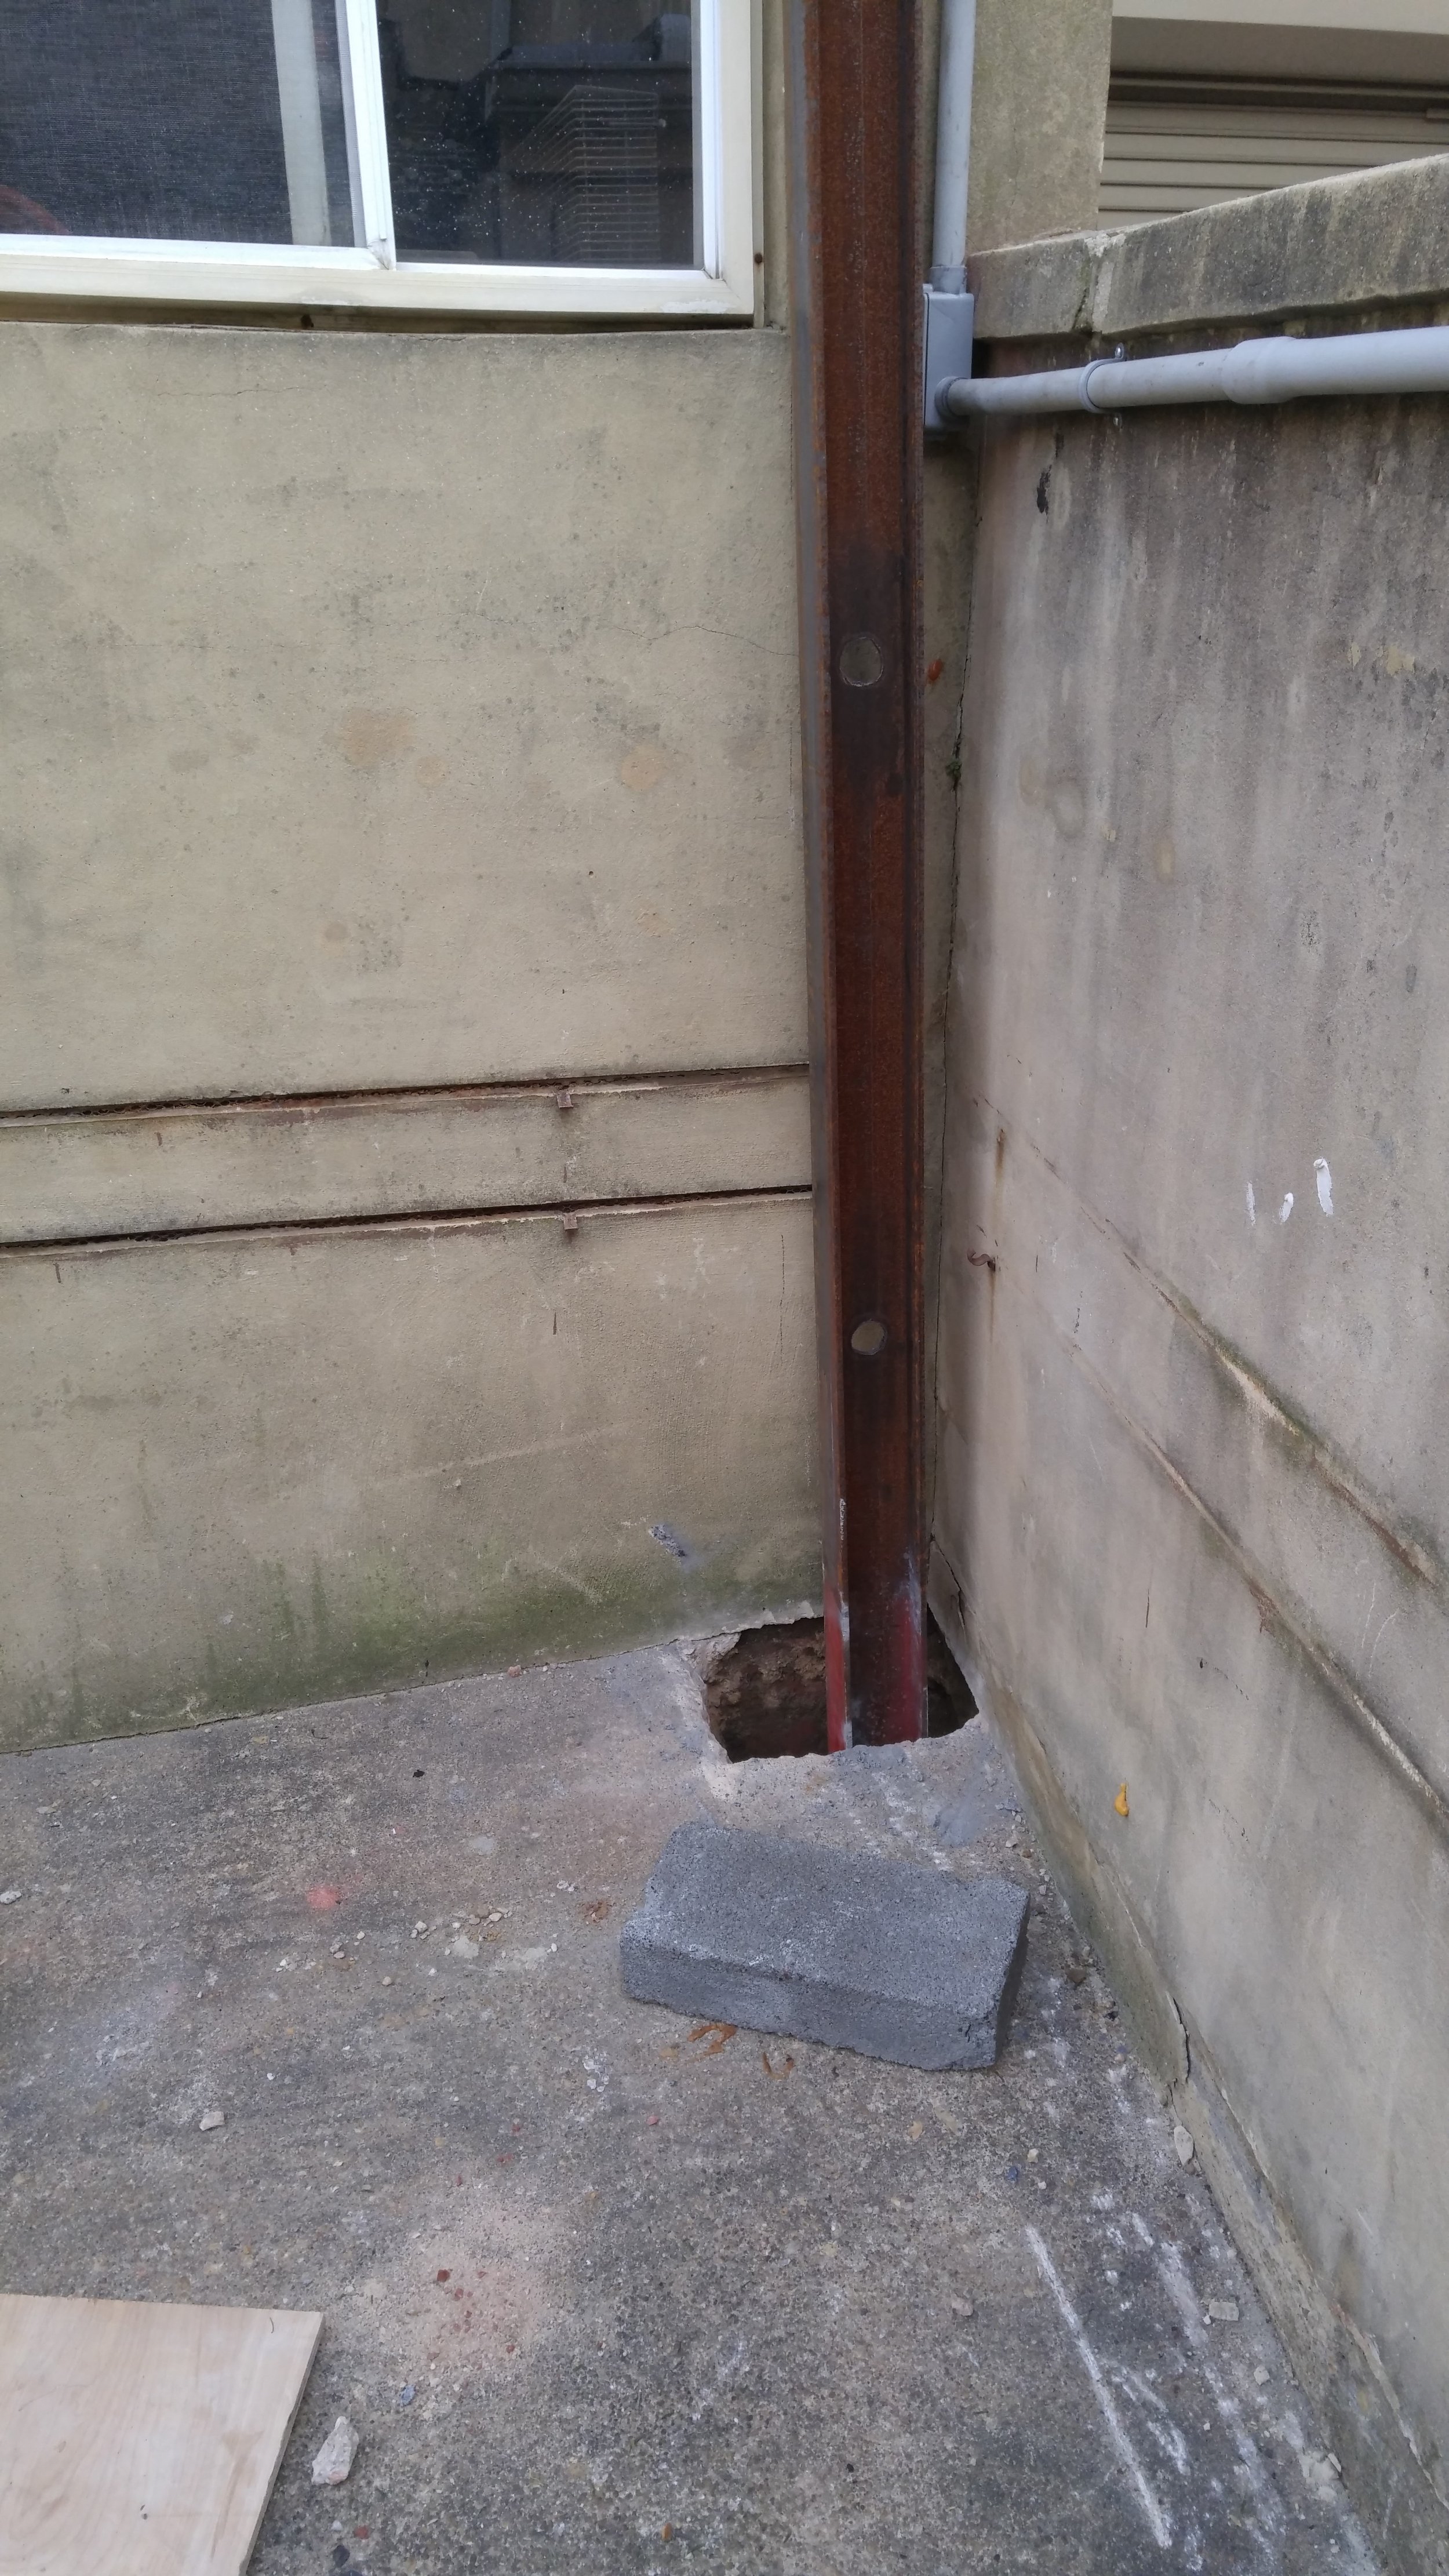
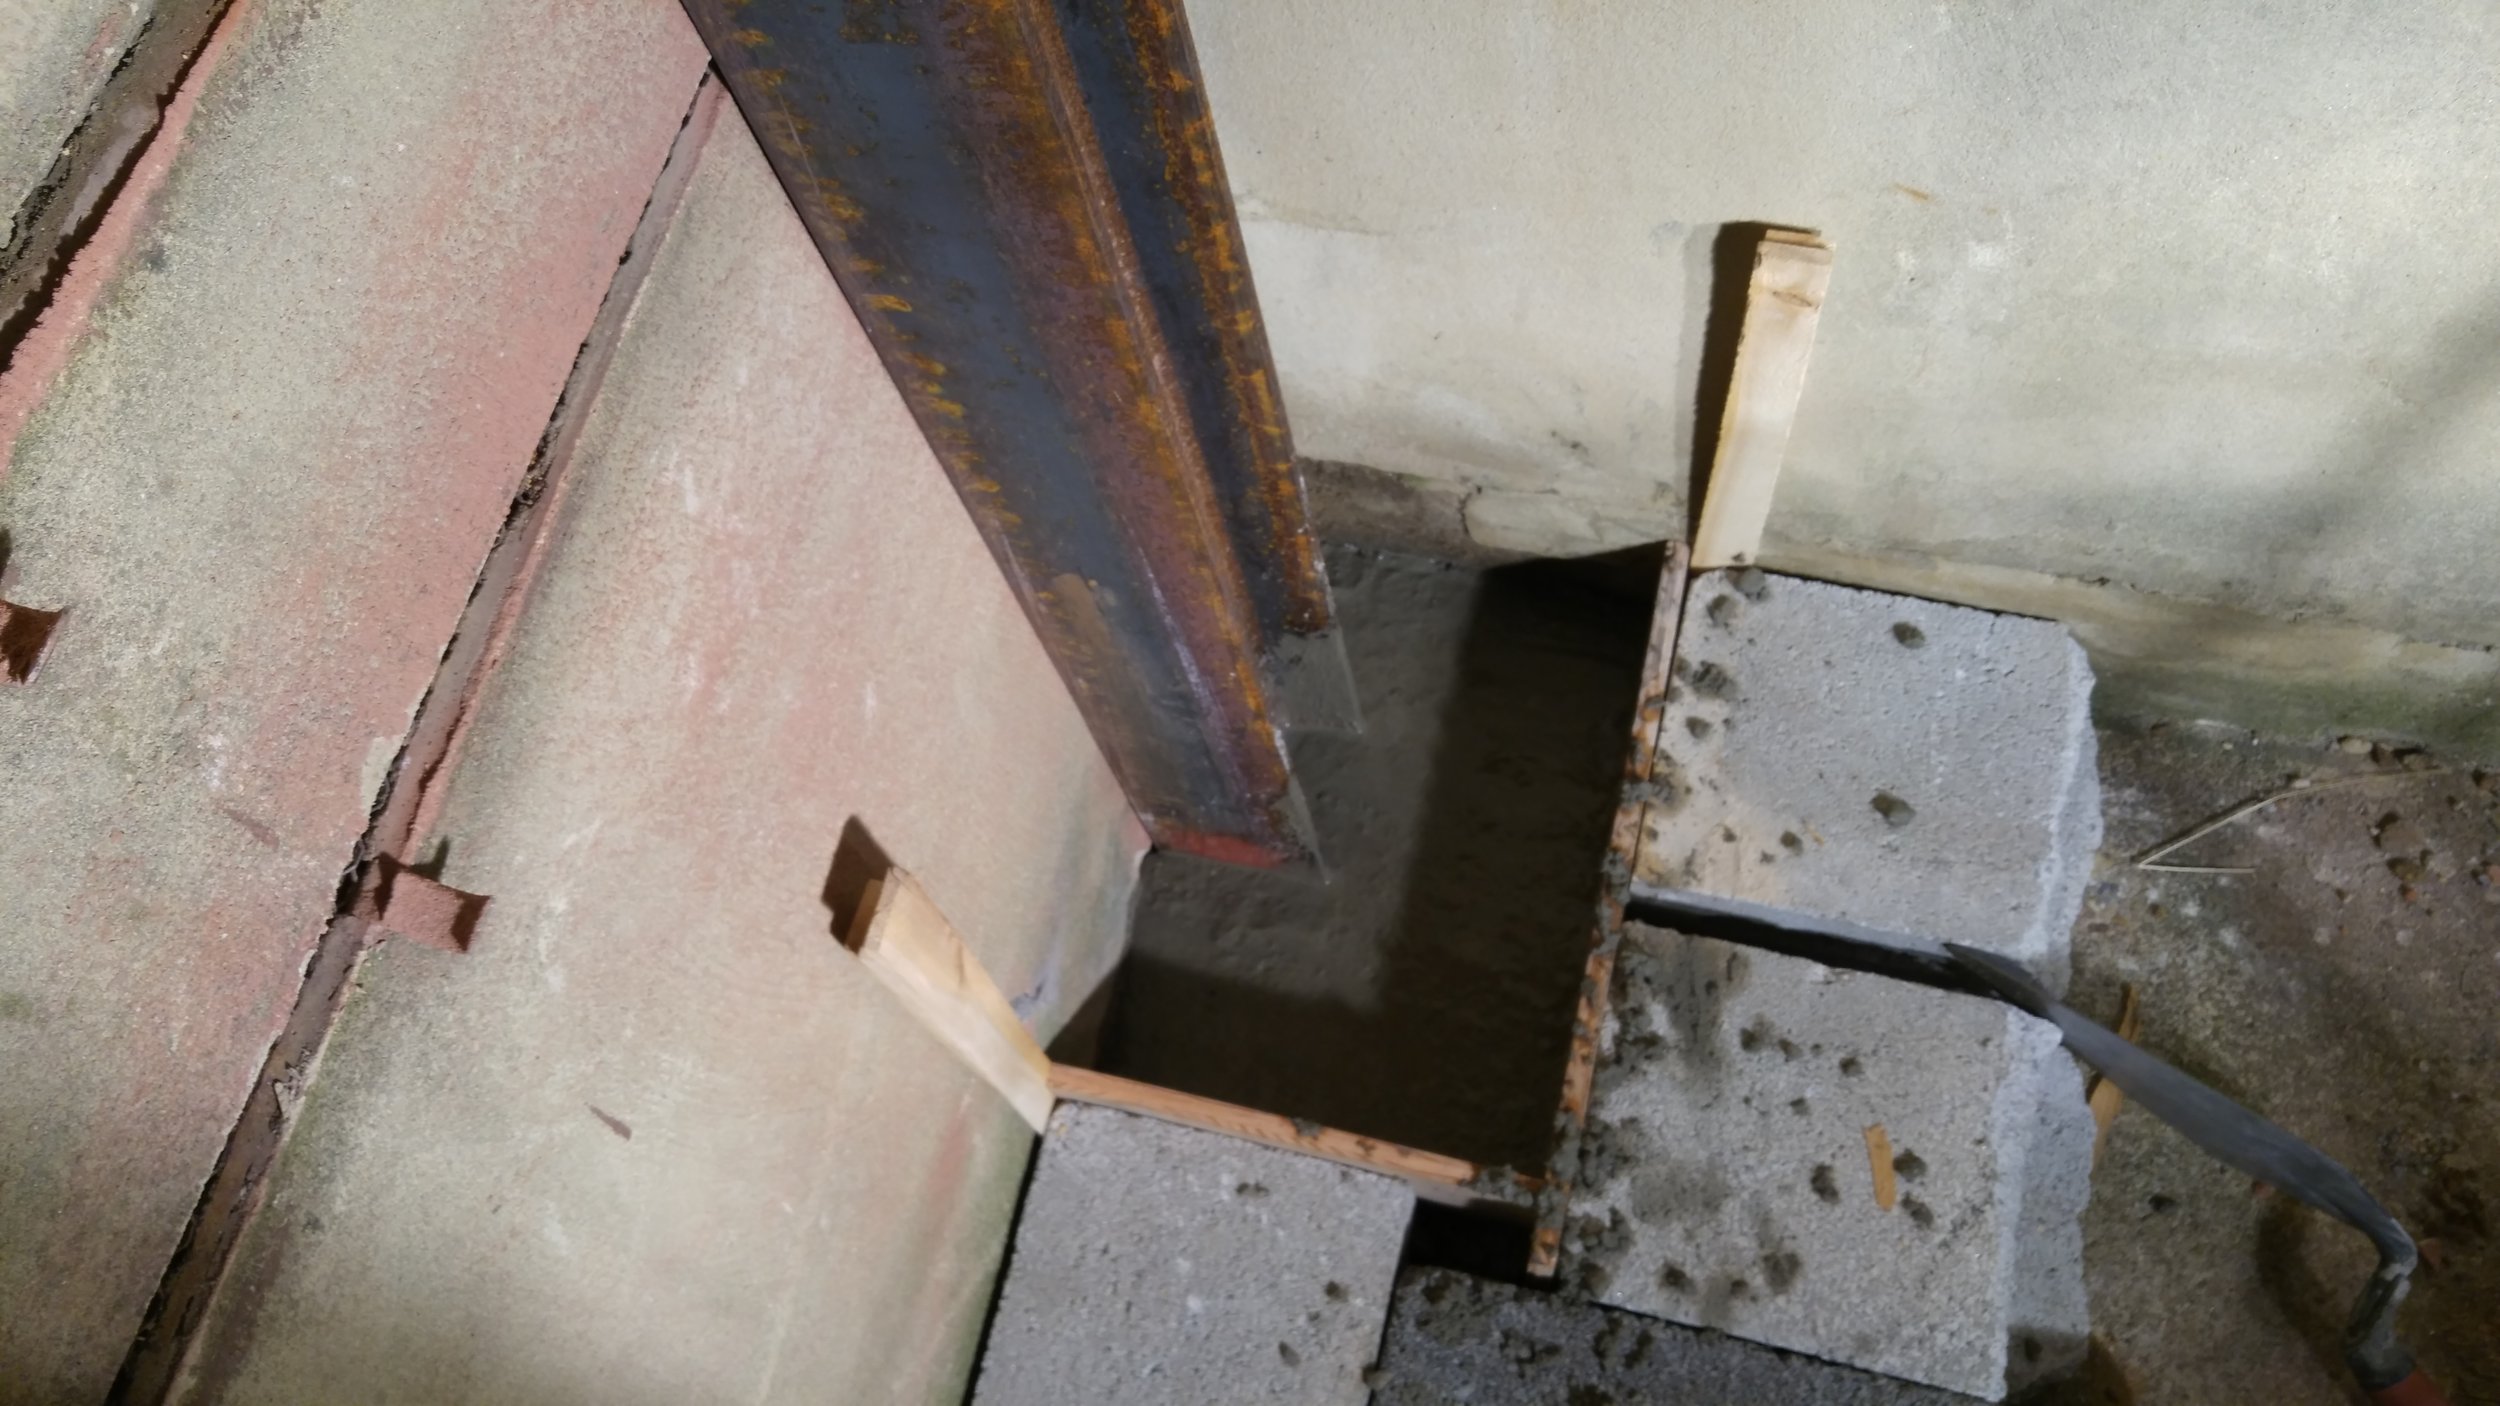
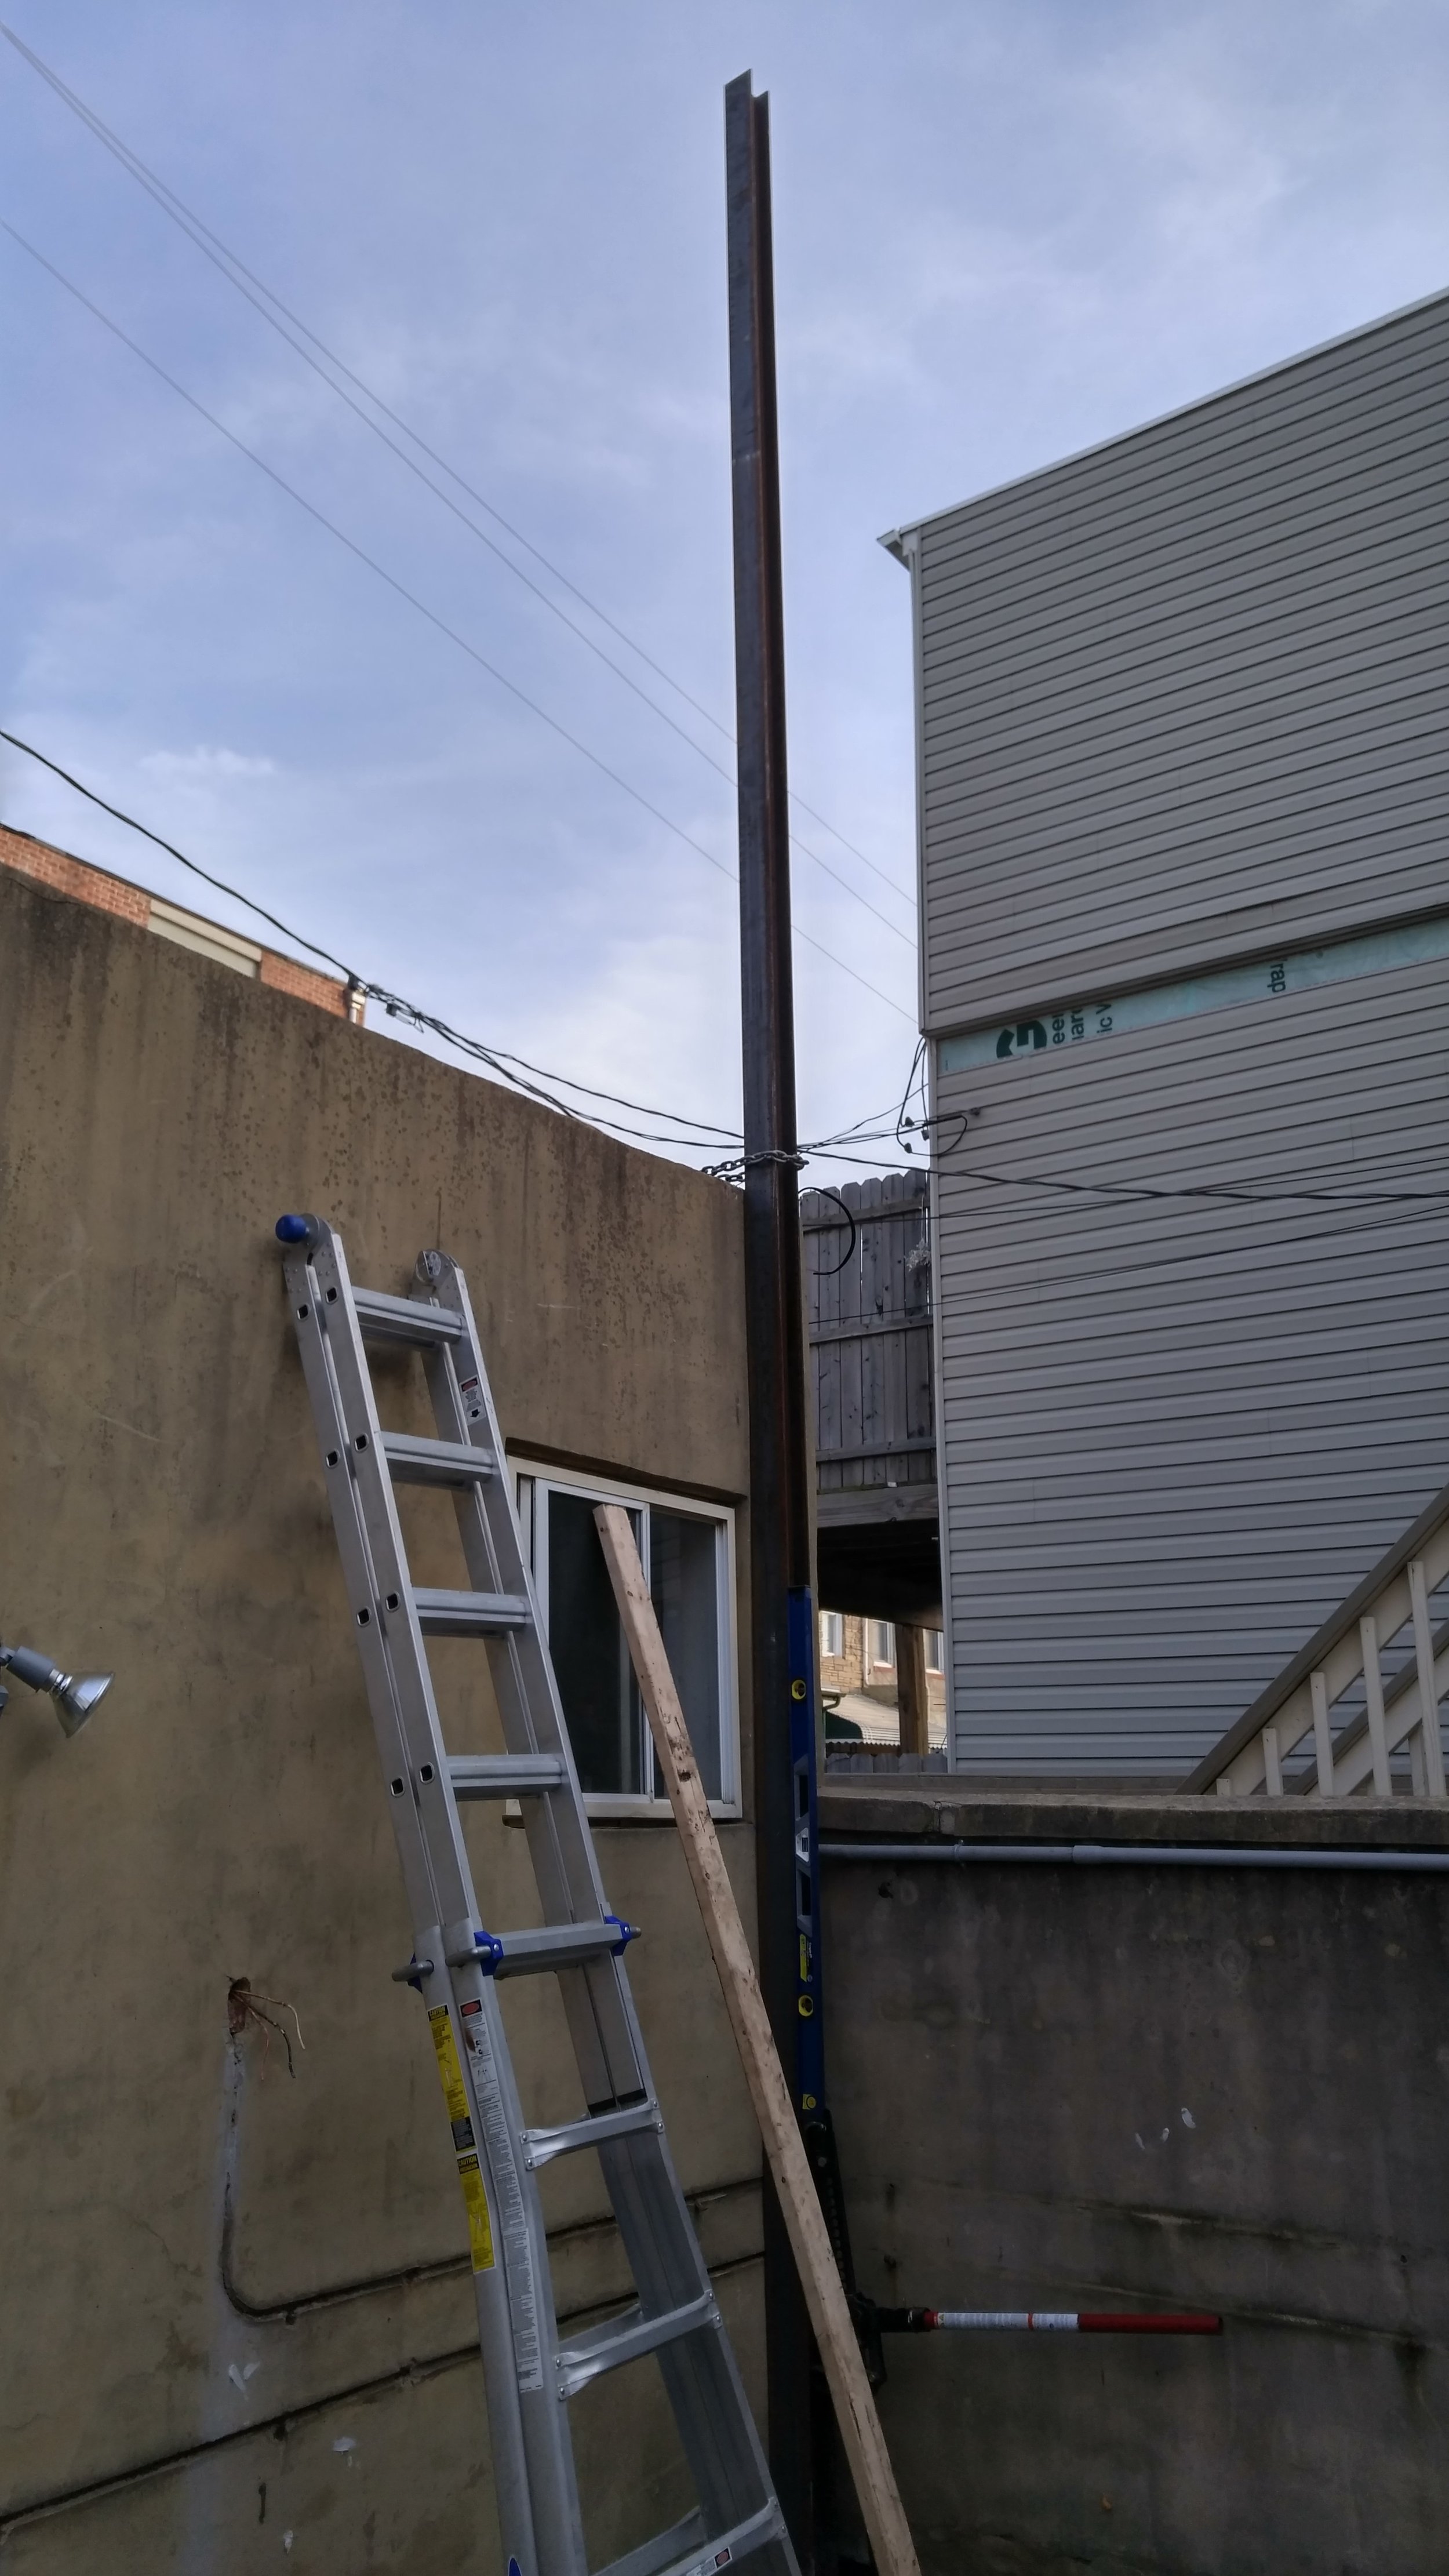
Finally, it dropped into the hole:

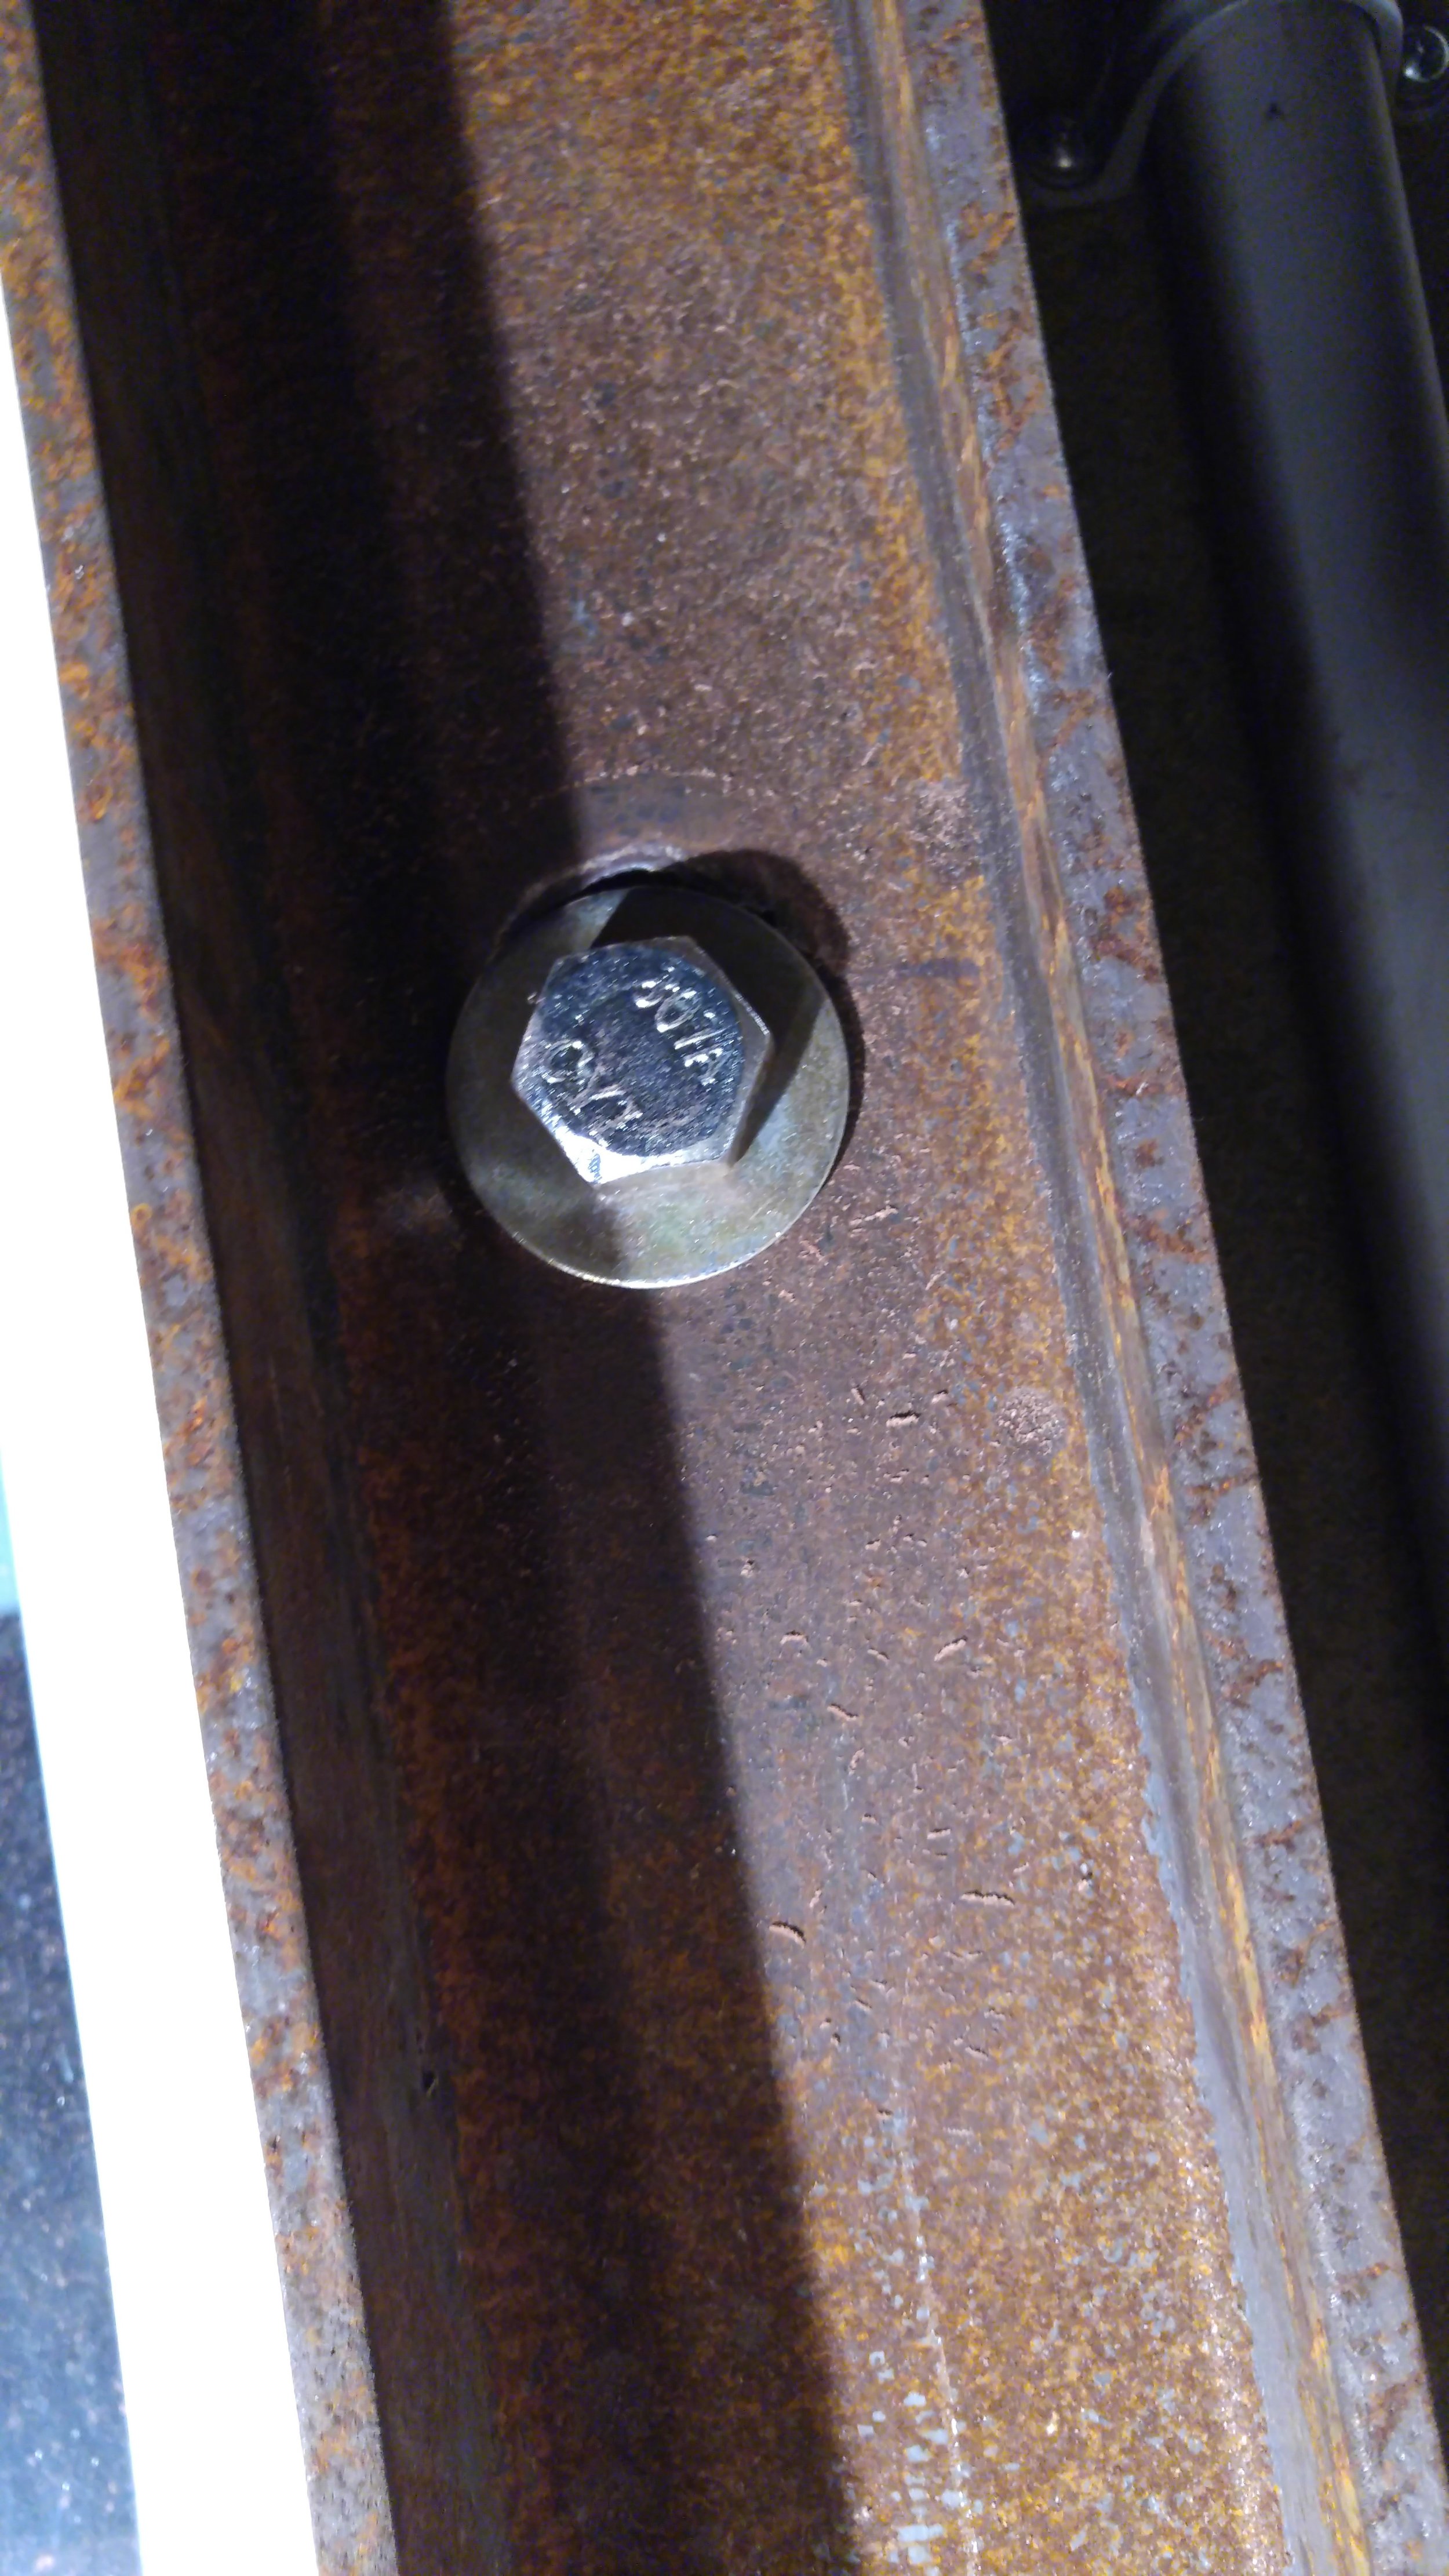
I used the jack to fine tune it's position to upright and plumb, then drilled 4 holes through the brick wall, and through bolted the beam in place:


The hole was backfilled with concrete. Here, you can see the little form built to contain the pour:

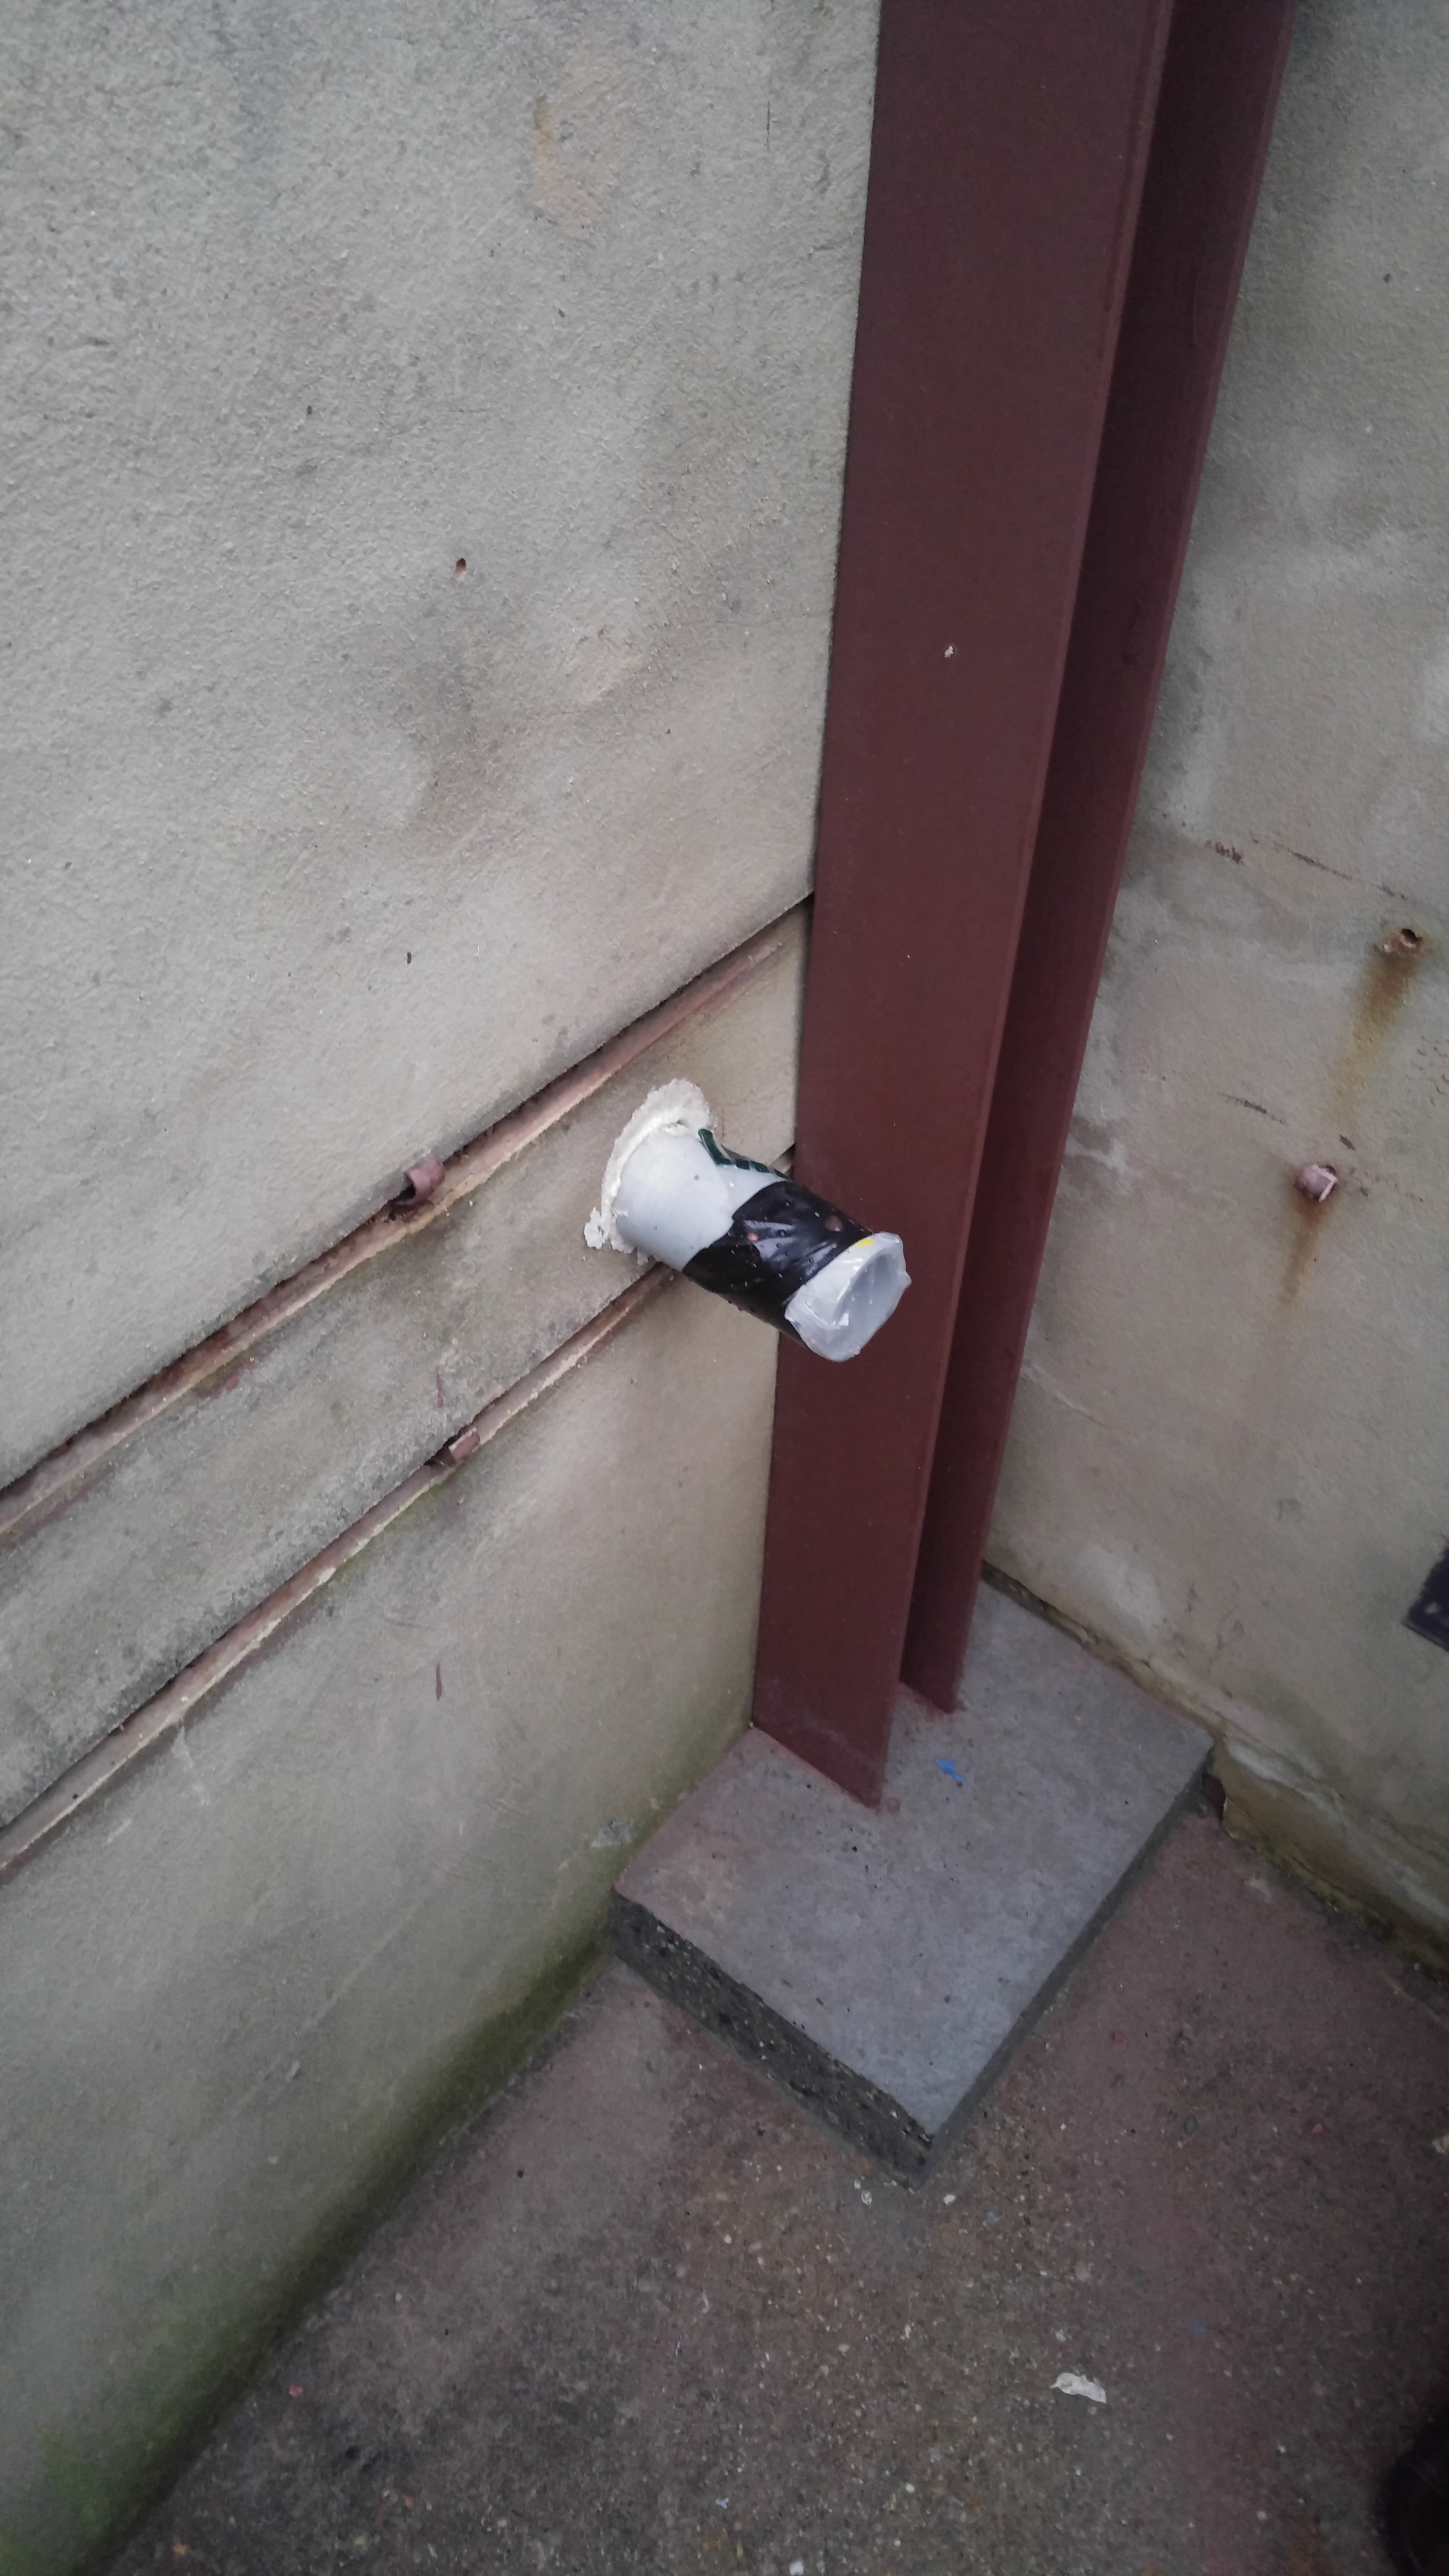
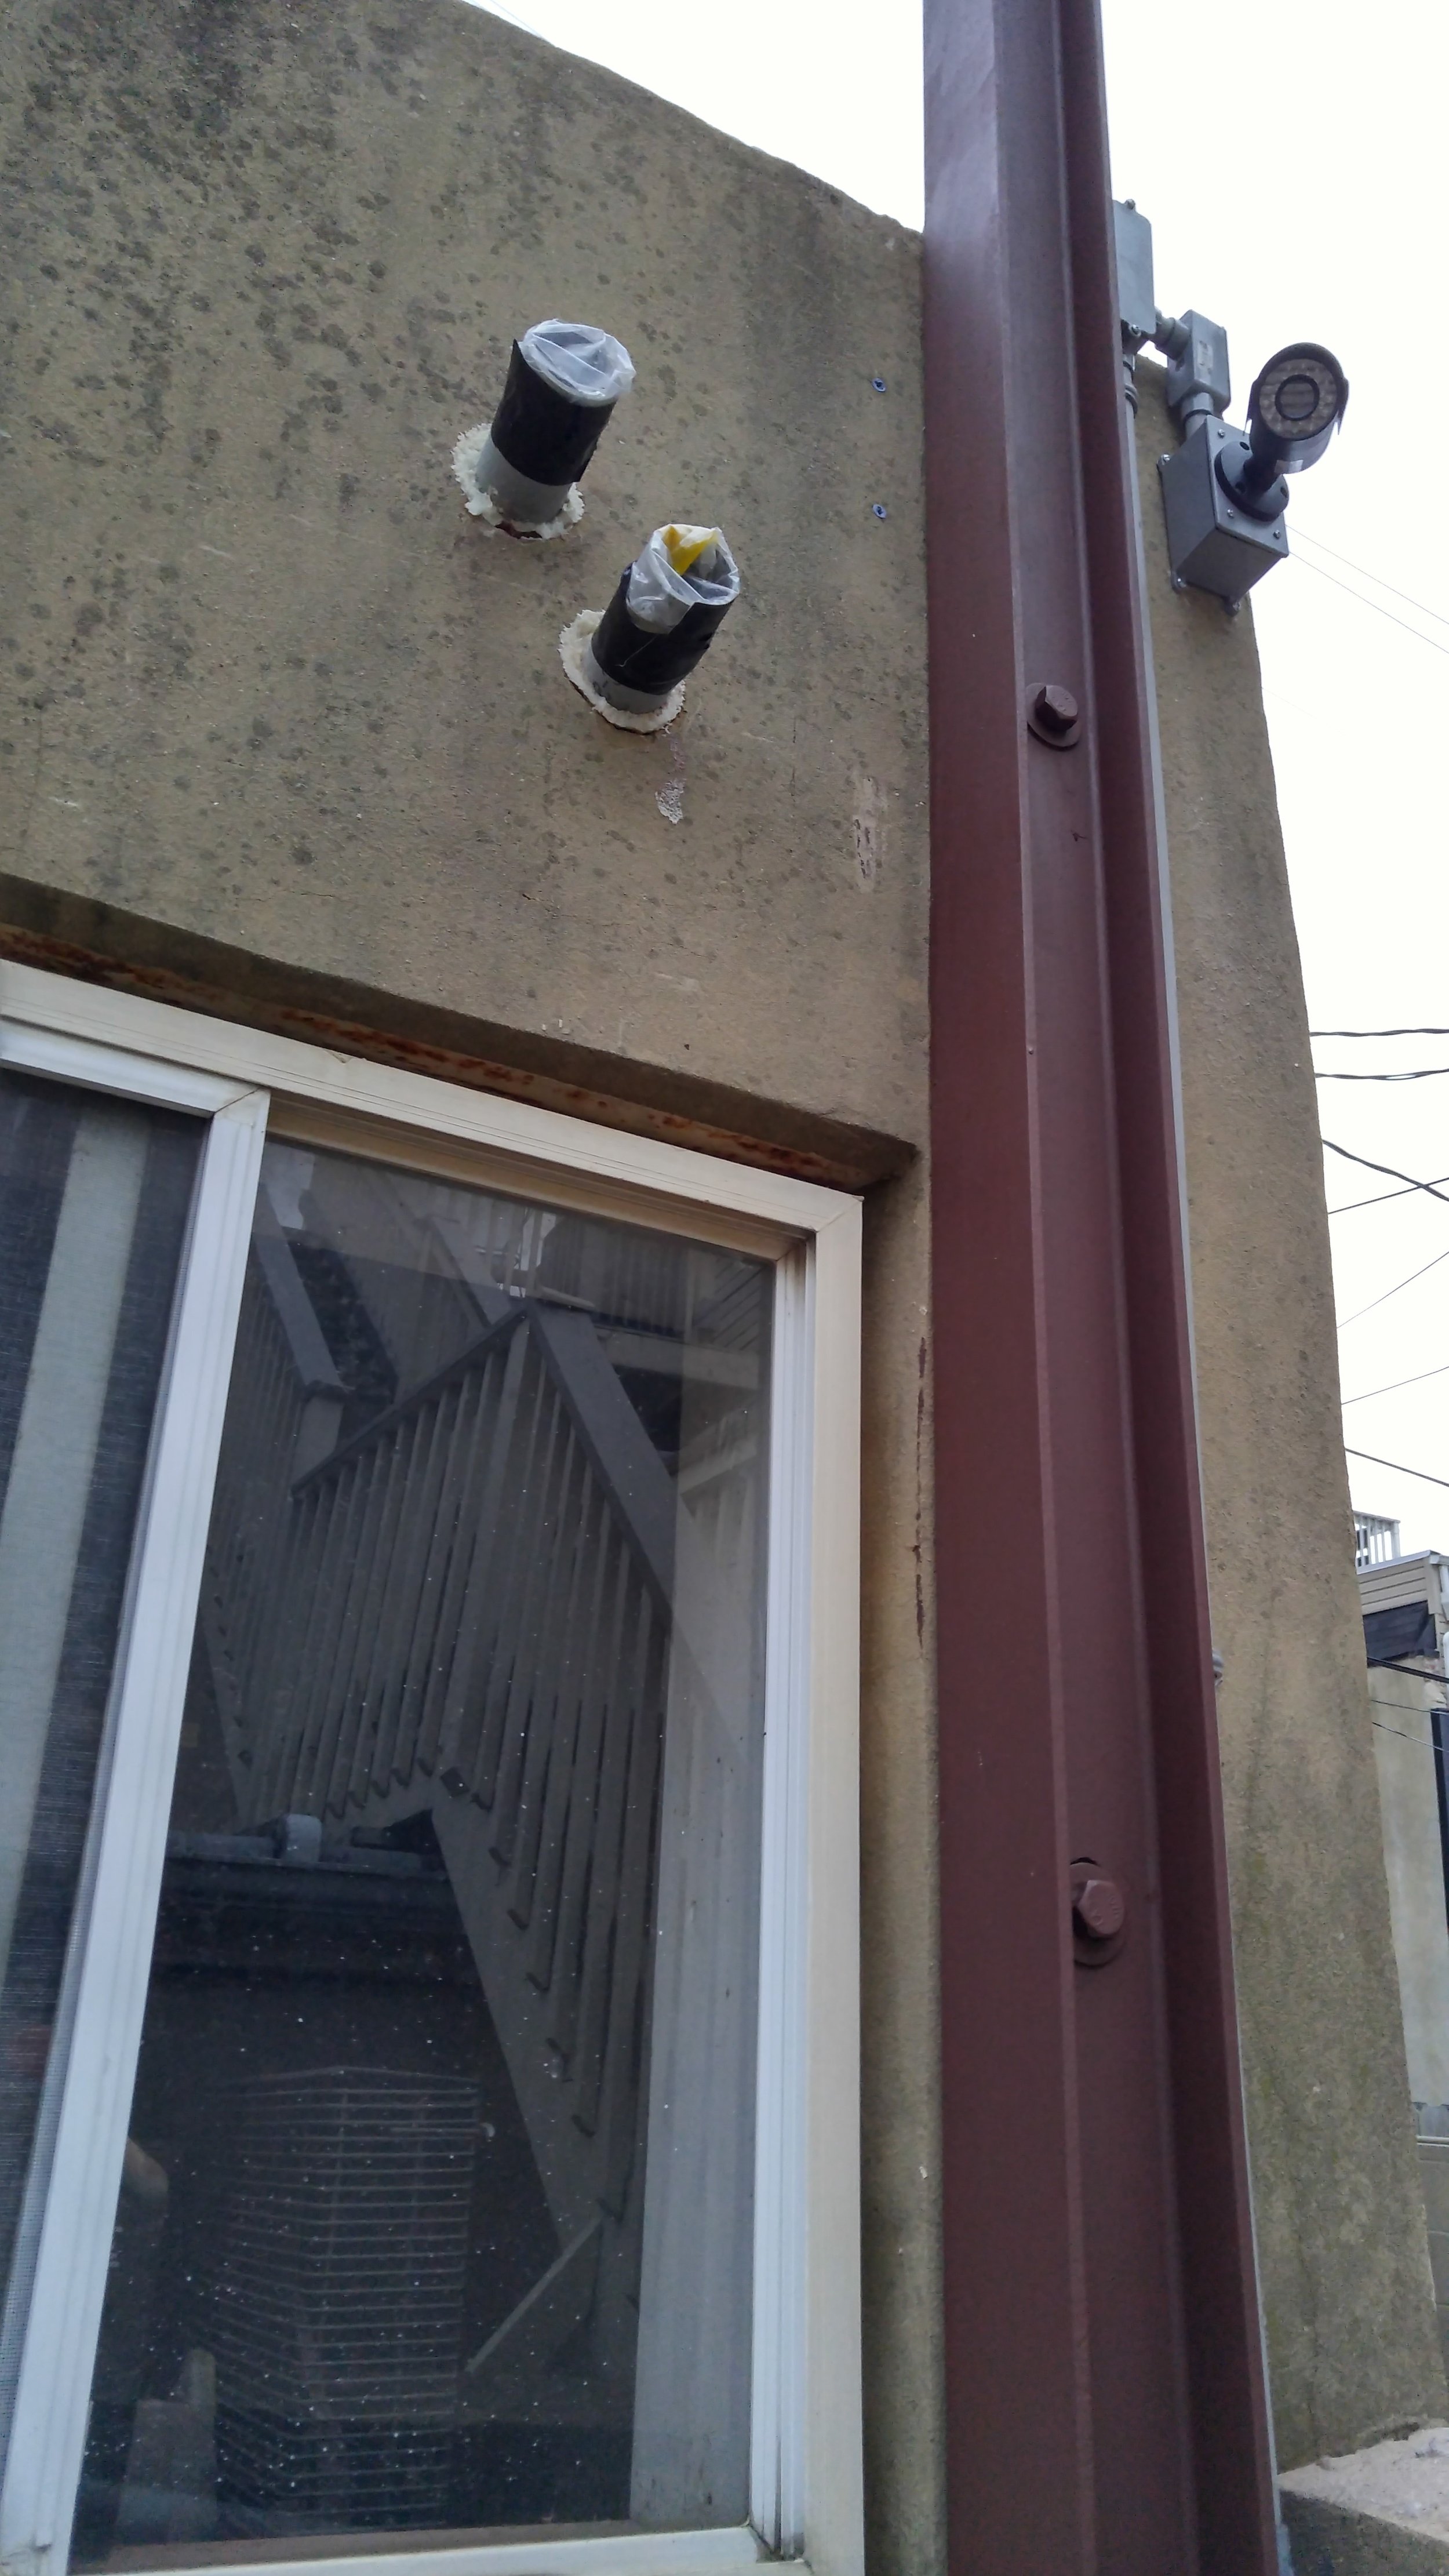
After the mast was largely installed, I used the huge, 3.125" core bit to drill several holes to pass the 2" PVC electrical conduit through the wall in preparation for the electrical service upgrade. These stubs were sealed with expanding foam and plastic to keep out water in the interim. Then, the whole beam was painted in "Rusty Metal Primer".


While it was difficult to install, we still managed to knock it out in just one weekend. The finished beam looks great and now, I'm once step closer to upgraded power.