
Adventures in Pottery, Part One: Beginners Mind
Over the past couple of years, what started out as a small seed in my mind has germinated and taken root. Pottery. It seems inevitable that a crafts-person might dabble in other disciplines, experiment and so forth. The idea of of shaping something from clay, and turning it into a useful object appealed to me. I’ve always admired the traditional pottery of Japan and the rustic beauty captured by the term “wabi-sabi” or “shibui.” Pottery has been calling to me, and why not? What better way to fill the shelves of various wooden creations? Additionally, the speed with which I could create something versus a woodworking project appealed to me. Sometimes it’s nice to have a quick creative outlet, and to have an object of utility at the end even better.
Even though I had lived in the heart of the Bizen ware area of Japan for nearly a year while studying carpentry, I never had had the the time to explore creating pottery. Now back in Colorado, with access to good earth and time, I figured I’d teach myself about pottery. An old anecdote sprang to mind; when a student asked a chair maker, “could you teach me how to make a chair?” The master replied, “first go make a chair, then I will teach you.” I have always found this instructive to push me over any anxiety about trying something new, one must prepare their mind to receive instruction, and to do that you basically have to fail or struggle with concepts so when lessons are given, you have a context in which to place them.
My goal then would be to make a clay from the earth, shape some pots, make a glaze, and fire the pots, all from scratch. What an adventure!
Making the Clay
To make the clay I searched around a rather muddy part of the property for chunks of sun hardened earth, squeezed form beneath tractor tires, or the reddish clay puddles in pot holes. The chunks were quite hard and seemed to have a lot of clay content. Next, I slaked them in buckets of water for a couple of days until the hard chunks dissolved into a slurry. This was then poured through a double layer of window screen to filter out everything but the finest particles. The resulting slurry was then mixed vigorously and after a minute or so, poured again through the screens into a tarp lined wheelbarrow. I poured most of the mixture in, however the minute of settle time allowed larger sand particles to fall out, and these I did not try to pour into the wheel barrow.

After a day or two all the material had fallen out of the water and there was a layer of nearly clear water on the surface in the wheel barrow. I siphoned this off till all that was left was a very wet slip. This was then left in the sun until the remaining water evaporated out. I was looking for a slightly moist mud. At this point I transferred the mud onto a board in a thinner layer to further the decrease in moisture in the sun. Finally that material was moved into a bit of canvas cloth and bound it into a ball, hanging it from a tree to let more moisture evaporate from the clay.

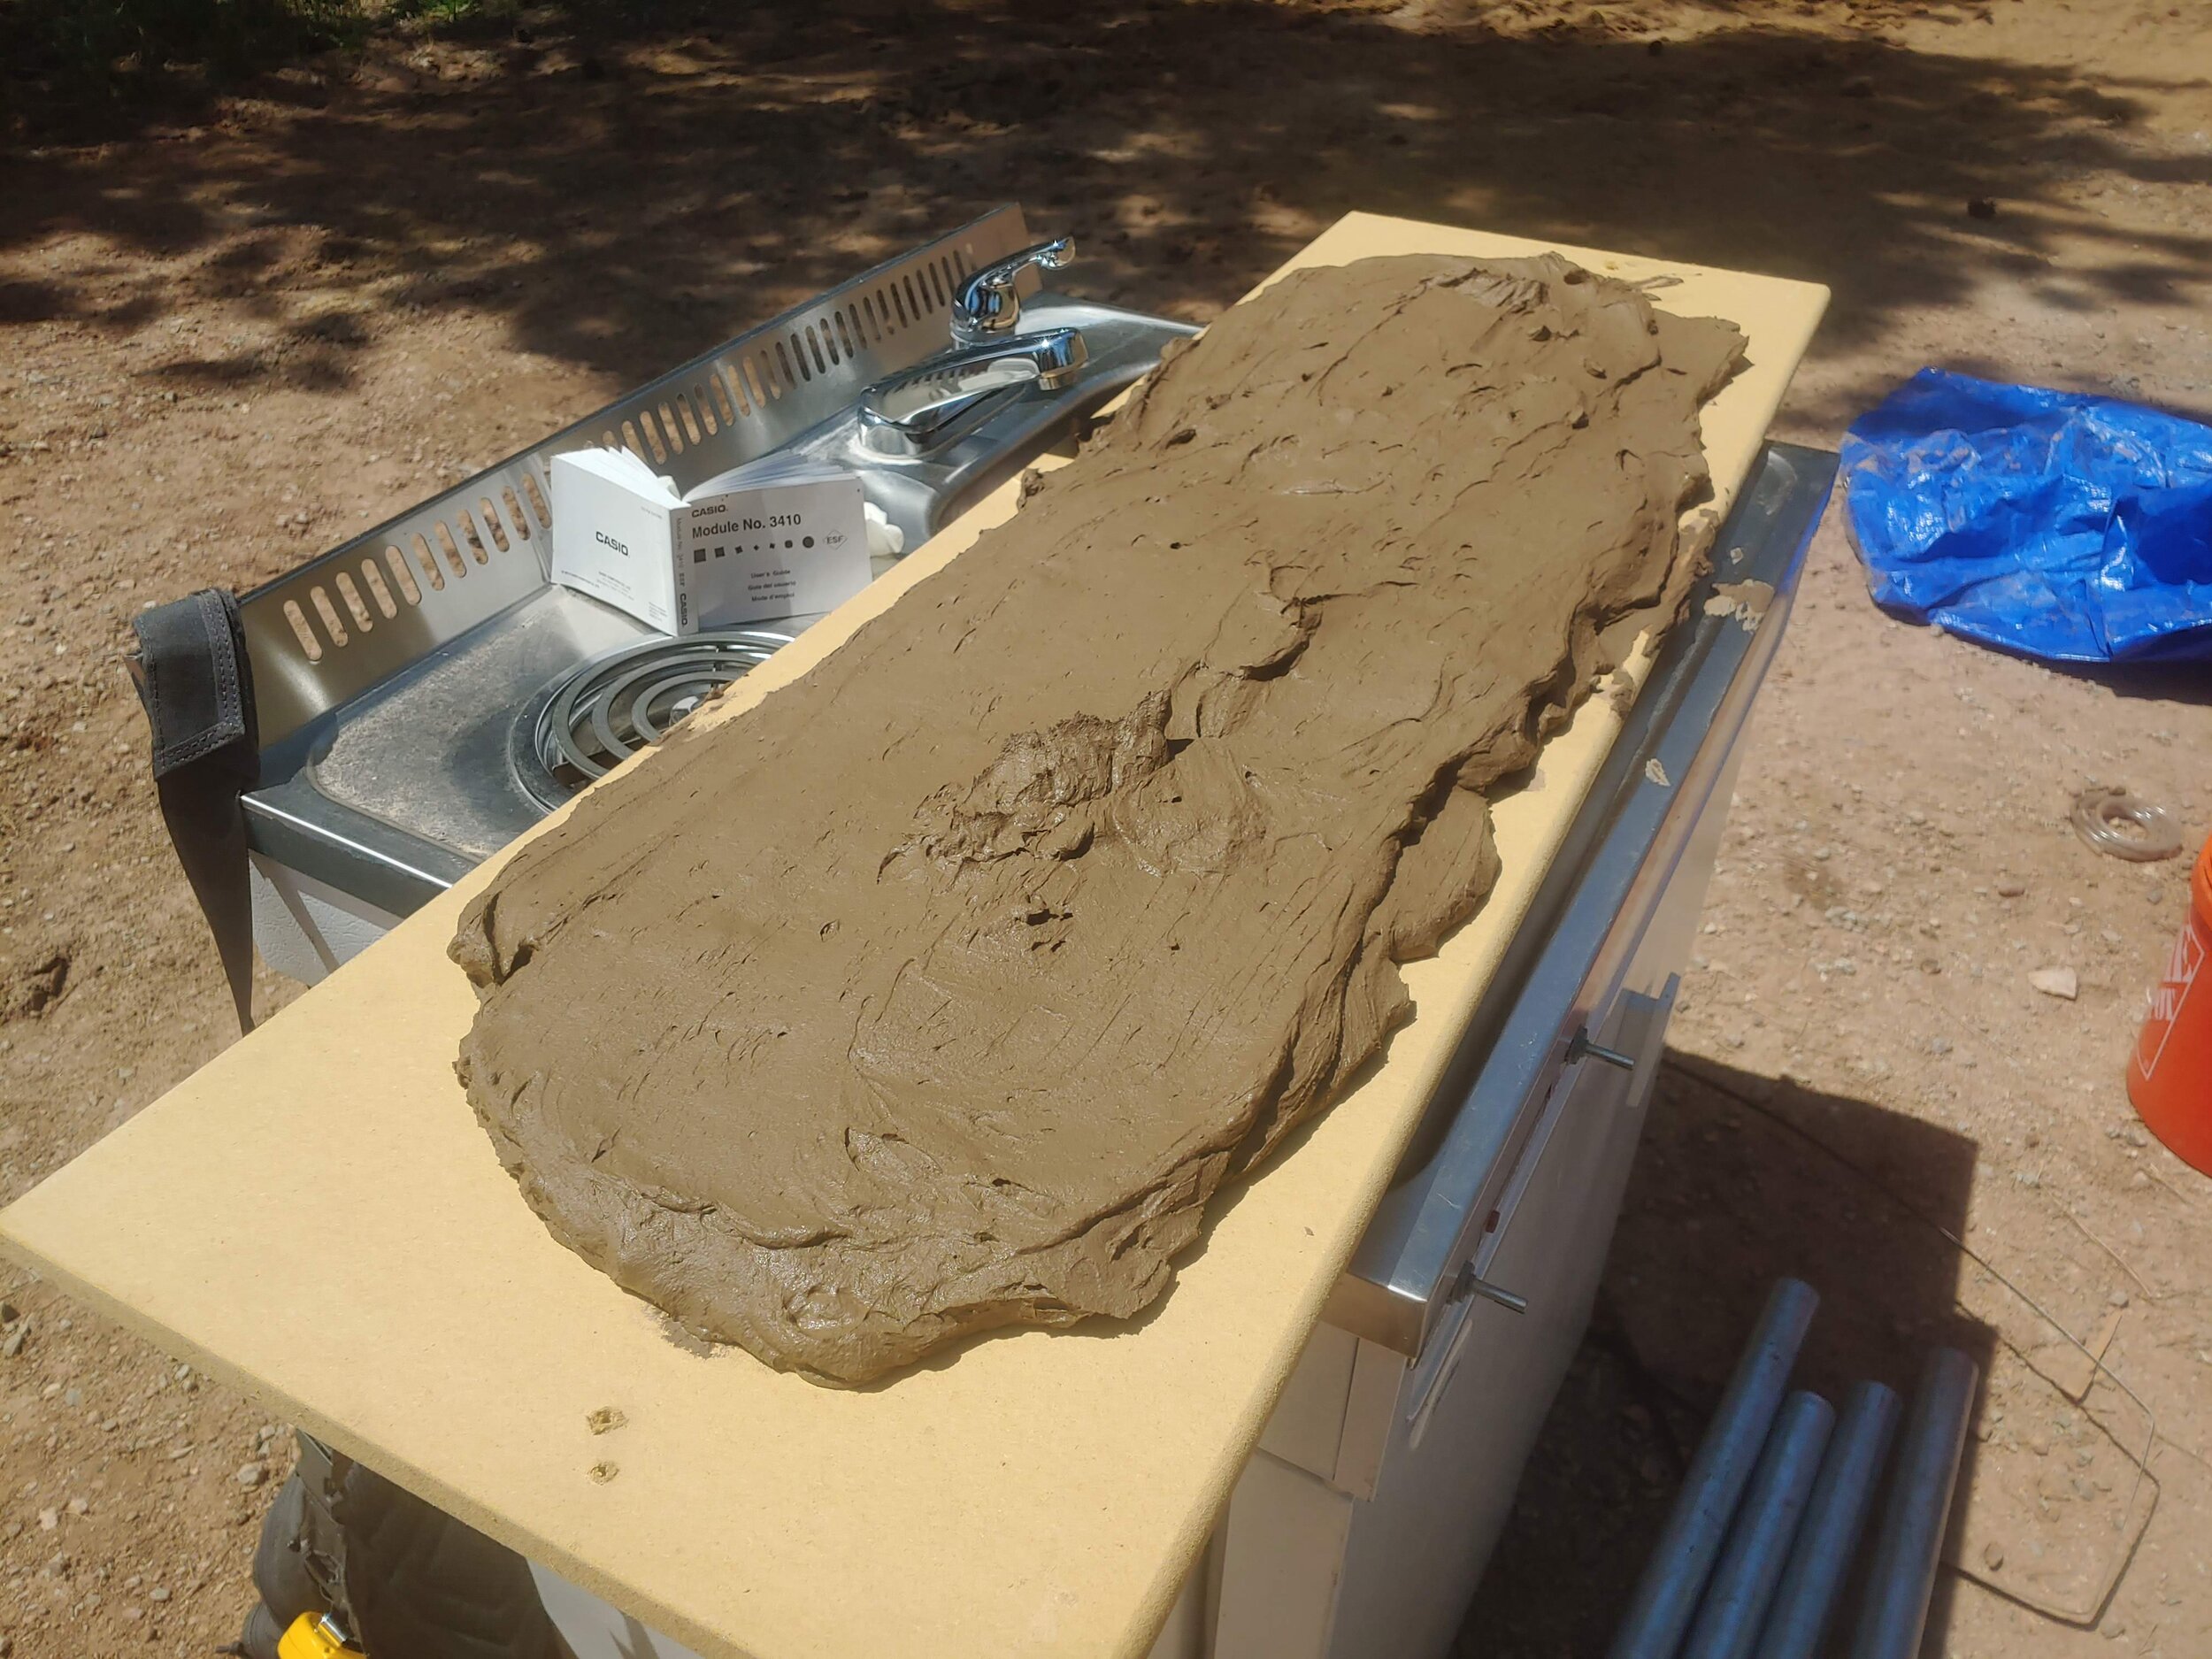

After a few days of continual poking of this bag I figured it was time to test out the clay. I rolled it into these arches to increase the surface area and gave it a few more days to dry. After all this time, it seemed like clay. I could kneed it and roll it, and it seemed ready to be shaped into pots.

Shaping the Clay
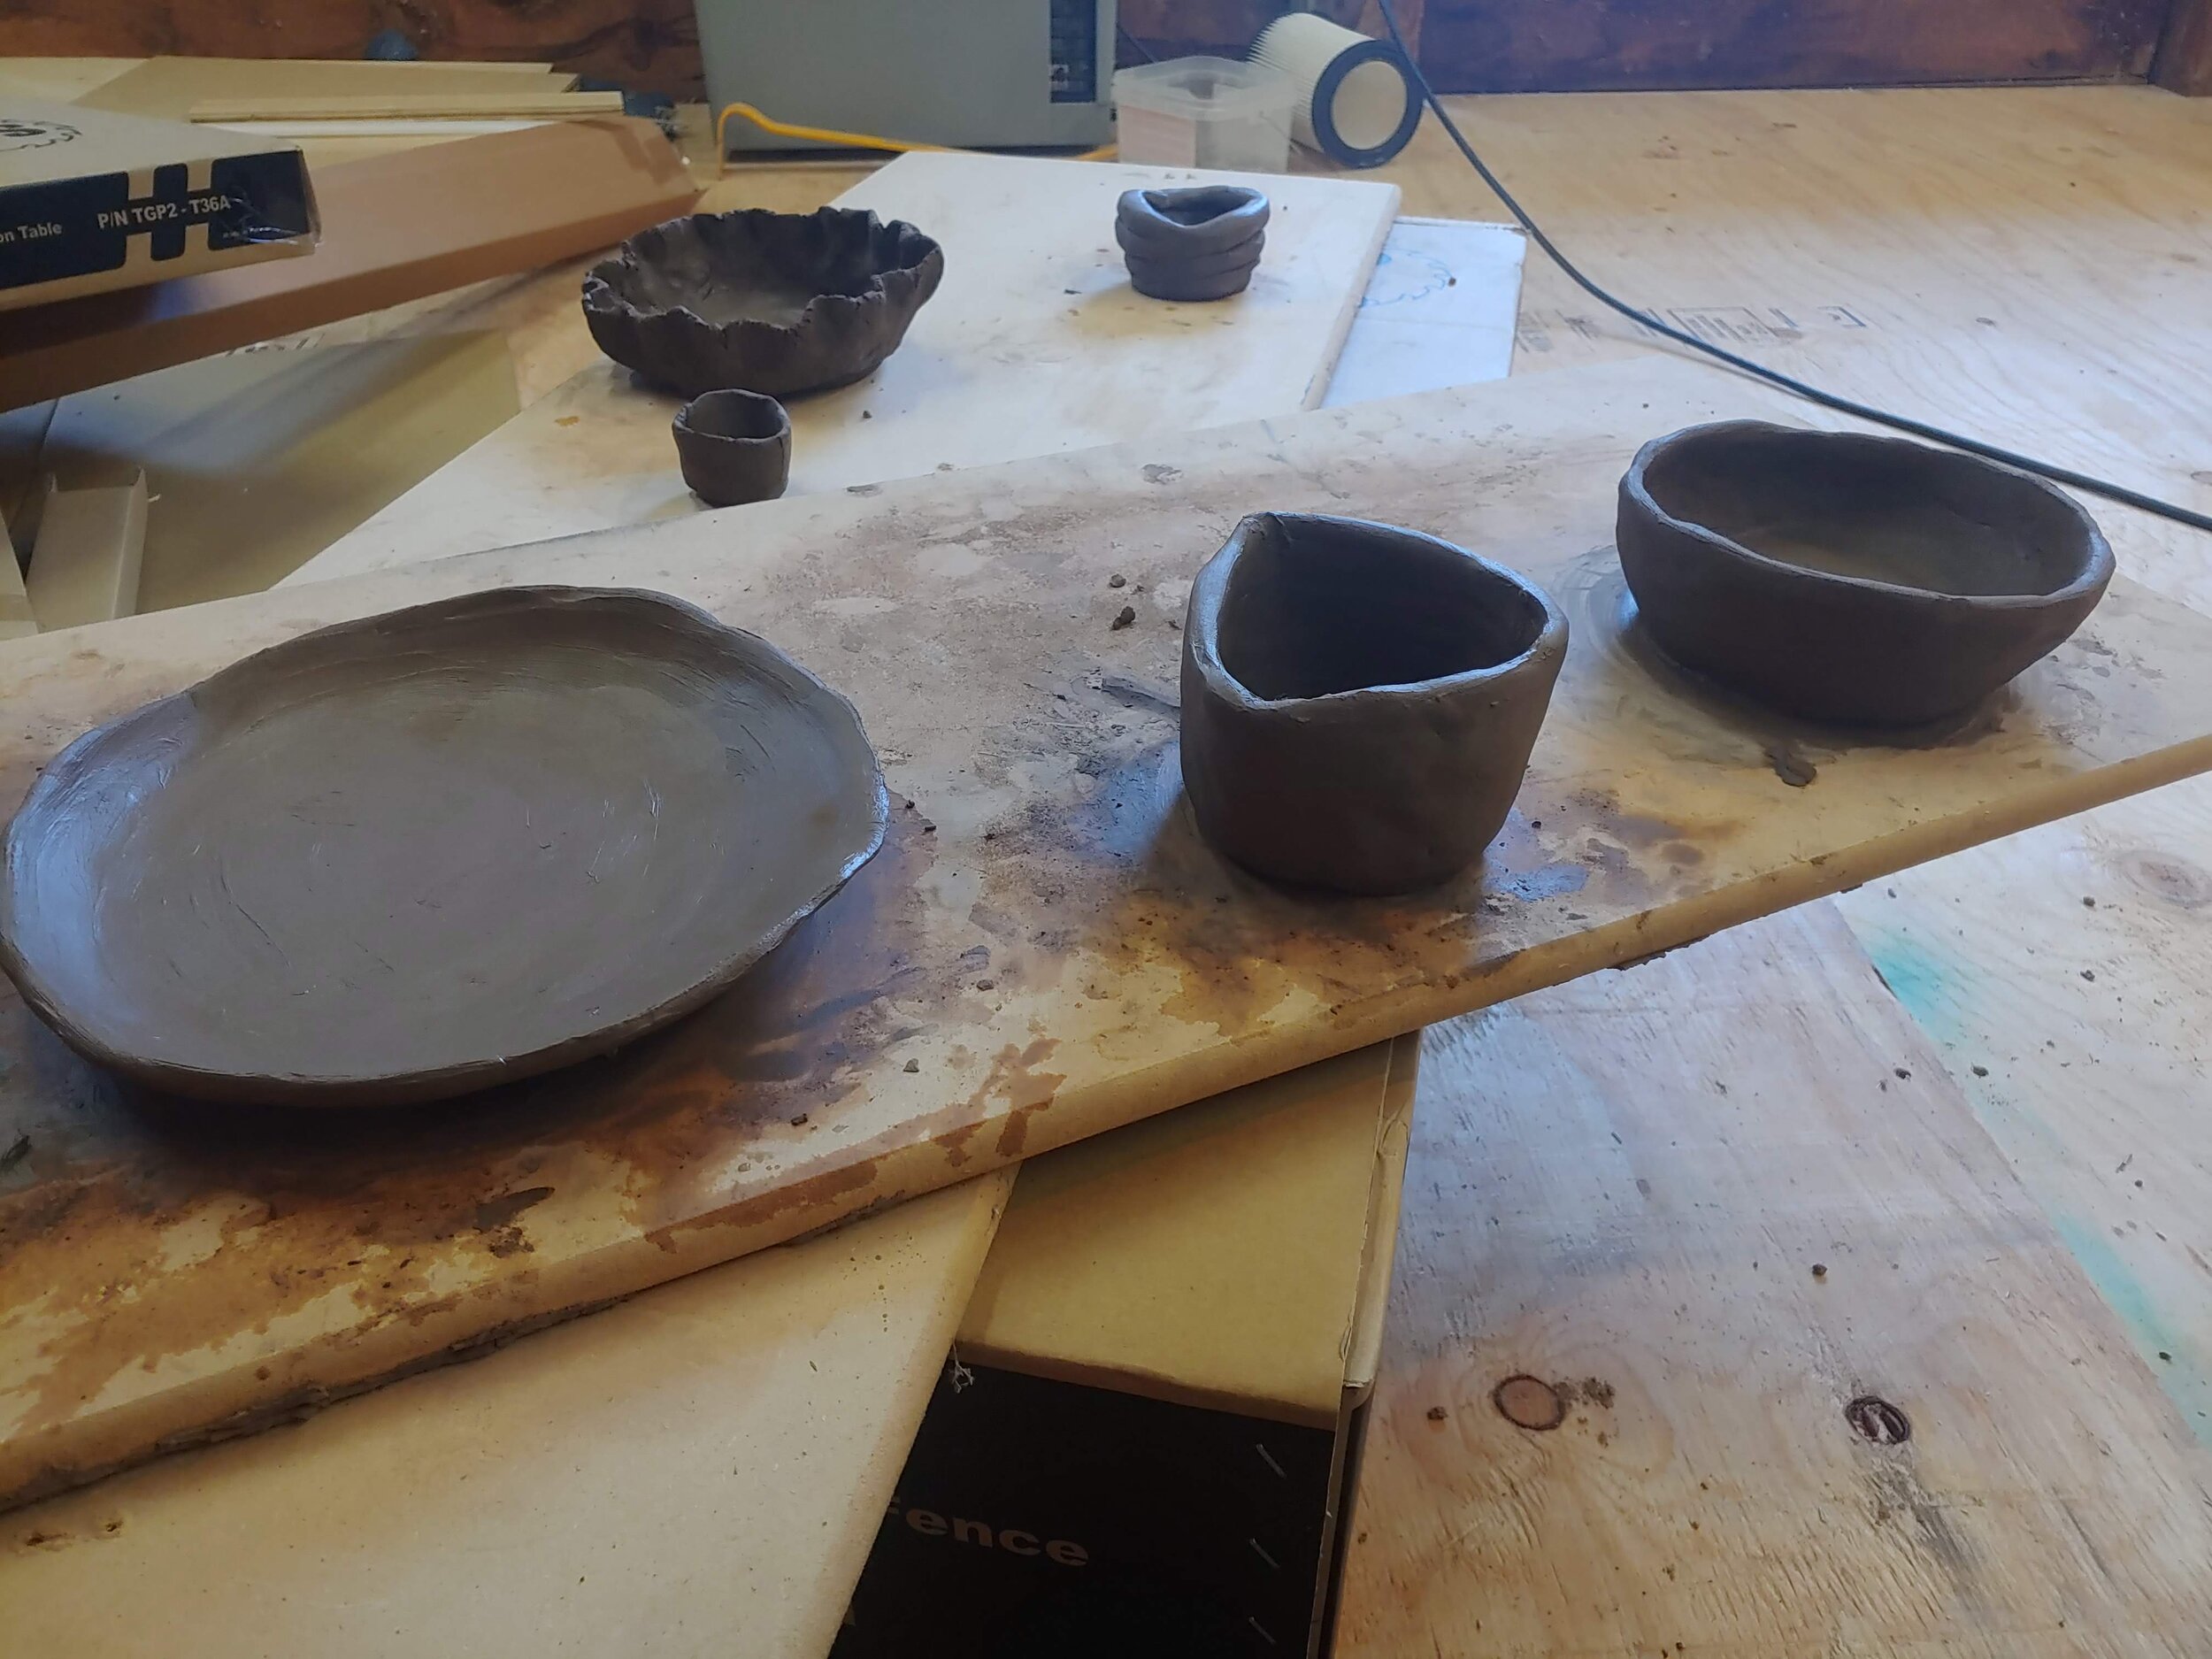
I think the last time I made a clay pot like this was in first grade when we made coils of clay and smoothed them together. I think my skill at this is maybe at the second grade level by now. I used coils and pinching and water and smoothing to try to make a few things that looked like what pottery should look like. It is kind of amazing how much a wheel can make an impact to the ability to shape and form clay. I really don't know if the clay was too moist or too dry at this point but I was able to make a few things. It was difficult to achieve a uniform wall thickness and inconsistencies in how the green ware dried led to a big crack in the plate piece. Lessons learned for next time: obviously get a basic wheel, and figure out a way to dry the green-ware slower to prevent cracking or non uniform drying and shrinkage.
Glazing
After a week of drying I took all the pieces and left them in the oven at 205 degrees Fahrenheit for about 8 hours to bake out all the moisture so that there would not be steam explosions in the kiln. Except for the one crack in the plate, they looked like pottery ready for firing. To make a glaze I sifted the wood fire ash from the fire place and mixed it about 1:1 with some wet clay slip. I massaged and mixed this until it was a uniform slurry, adding water until it felt like what I thought a glaze should feel like. All of this was very experimental, I ready several websites and watched several videos for background information, but really tried to take a first principles approach to everything with this pottery, to maximize learning. I coated the insides and edges of all the pots with the glaze then left these try dry overnight.


Firing
Lacking any kind of proper kiln, but desiring to wood fire the pottery, I started by building a rocket stove out of old chimney pipe lying around. This was a very effective rocket stove, albeit briefly. The heat generated from a pile of old mail alone was enough to crack most of the pipes and I did not want to risk the whole thing crumbling apart during a firing, spewing hot coals all over the ground and crushing the pottery. And so I opted to simply place the pots on a ledge at the bottom of a steel drum and build a roaring barrel fire. I surrounded the steel drum with the flu pipes to act as rough insulators. This is probably the area of most immediate improvement in this rustic pottery process: controlling the heat and shielding the pottery from temperature fluctuation and debris. I stoked the fire for 5 hours, and when I was able to sneak a peak into the embers did see the pots glowing red and yellow hot. At the end of the firing, after much of the coals had died down, I dumped a pile of fresh cut grass over the embers and sealed the air hole and top of the kiln with a wet board to smother the fire. My hope was that the smoldering grass would color the pots in a a Raku ware style.


Results
Who boy. I certainly expected slightly better results, even for a first time. After a night to let the whole thing cool down slowly I pulled some very rough pots from the ashes. What seemed immediately apparent, was that I perhaps allowed the fire to get too hot. I had figured I wouldn’t be able to reach really high temperatures with a simple barrel fire, but it looked like the top edges of most of the pieces melted, flowed and then cracked as they cooled. Coupled with the weight of the embers and wood above, it compressed and deformed the delicate edges of the pottery.
The coloring seemed pretty cool though. The ash glaze worked better than I expected, imparting a white color which contrasted with the very obvious red, iron-oxide influenced clay. The grass, too, may have had an effect as there is quite a bit of blackening on many areas of the pottery. Unfortunately the plate’s crack widened and the small bowl eventually slit in half while cleaning. The triangular bowl did stay intact and will be relegated to hold a succulent or something.


I certainly do not think these are “good” by any stretch of the imagination, however I am grateful for all the lessons that this experiment taught me. It still is pretty wild to go from dirt-in-the-ground to basically a functional flower pot with very little outlay of capital. Based on the results of this first adventure into pottery there are several improvements I’d make for the next batch:
Make more items, of more consistent wall thickness on a potters wheel, dry them slower and more uniformly.
Glaze the whole piece with the ash glaze, I think they will look better.
Use fire bricks to shield the pottery from inconsistent heating and the weight of the combustibles, use a thermocouple or cone to moderate the temperature and put a window of some sort into the firing zone to monitor the pots.
Try to use some sort of salt glaze.
Hoping for better results next time!