
Building my "Ultimate" Sliding Table Saw Sled
I should apologize immediately for succumbing to the popular trend of naming something “ultimate.” YouTube is littered with many things that claim to be the ultimate, its a big turn off. It at once advertises both one’s lack of humility, and willingness to play the search algorithm game. Really? Are you sure we have reached the absolute pinnacle in the design and execution of a router lift? Or a miter saw station? I assure you we have not.
So this notebook entry is about, not “the” ultimate, buy my personal ultimate table saw sled build. It is, I can confidently say, the best I have produced in this area and was conceived to solve certain key design criteria:
Replicated the smoothness and precision of a sliding table saw with regards to cross cutting small furniture frame members.
Have a very long fence with adjustable work stop for repeatable cuts for shoji and door parts, which can be quite long.
Have a flip away work stop, often one needs to quickly trim one end of a piece of stock an arbitrary amount, before flipping it and trimming it to the exact length.
Maintain a very stable and square work stop, so one may rotate square stock to cut tenon shoulders and have the cuts perfectly align all the way around.
The inspiration for this build was a fine sliding table saw I used while apprenticing in Japan. It did not have a super accurate work stop and required checking square, but otherwise it was a very stable and precise tool. I set out to create something similar, but that could be adapted to the common western table saws.
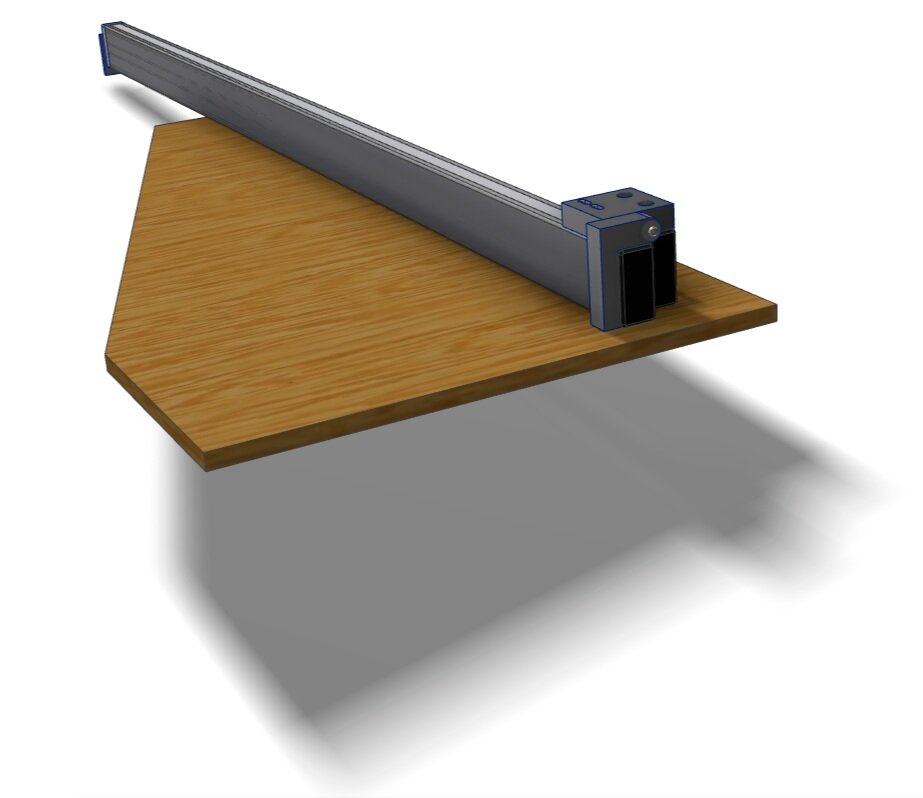
I began by searching for available parts and materials that might achieve these goals. The base would be made from a stable Baltic birch plywood with the zero-play runners salvaged from my smaller, older, water damaged cross cut sled. The fence would be of extruded aluminum, commonly referred to as 80-20, however in this case its 80mm by 40mm. Aluminum would be more dimensionaly stable and these extrusions feature integrated t-slots to which I could attache off the shelf sliding hardware to form the foundation of my sliding work stop. In order to achieve the accuracy and repeatability I would need to machine some parts for the work stop. Once the general plan was nailed down I moved to CAD design of all the components, this let me iterate though the various challenges and produce a clean set of shop drawings.
Building the Sled
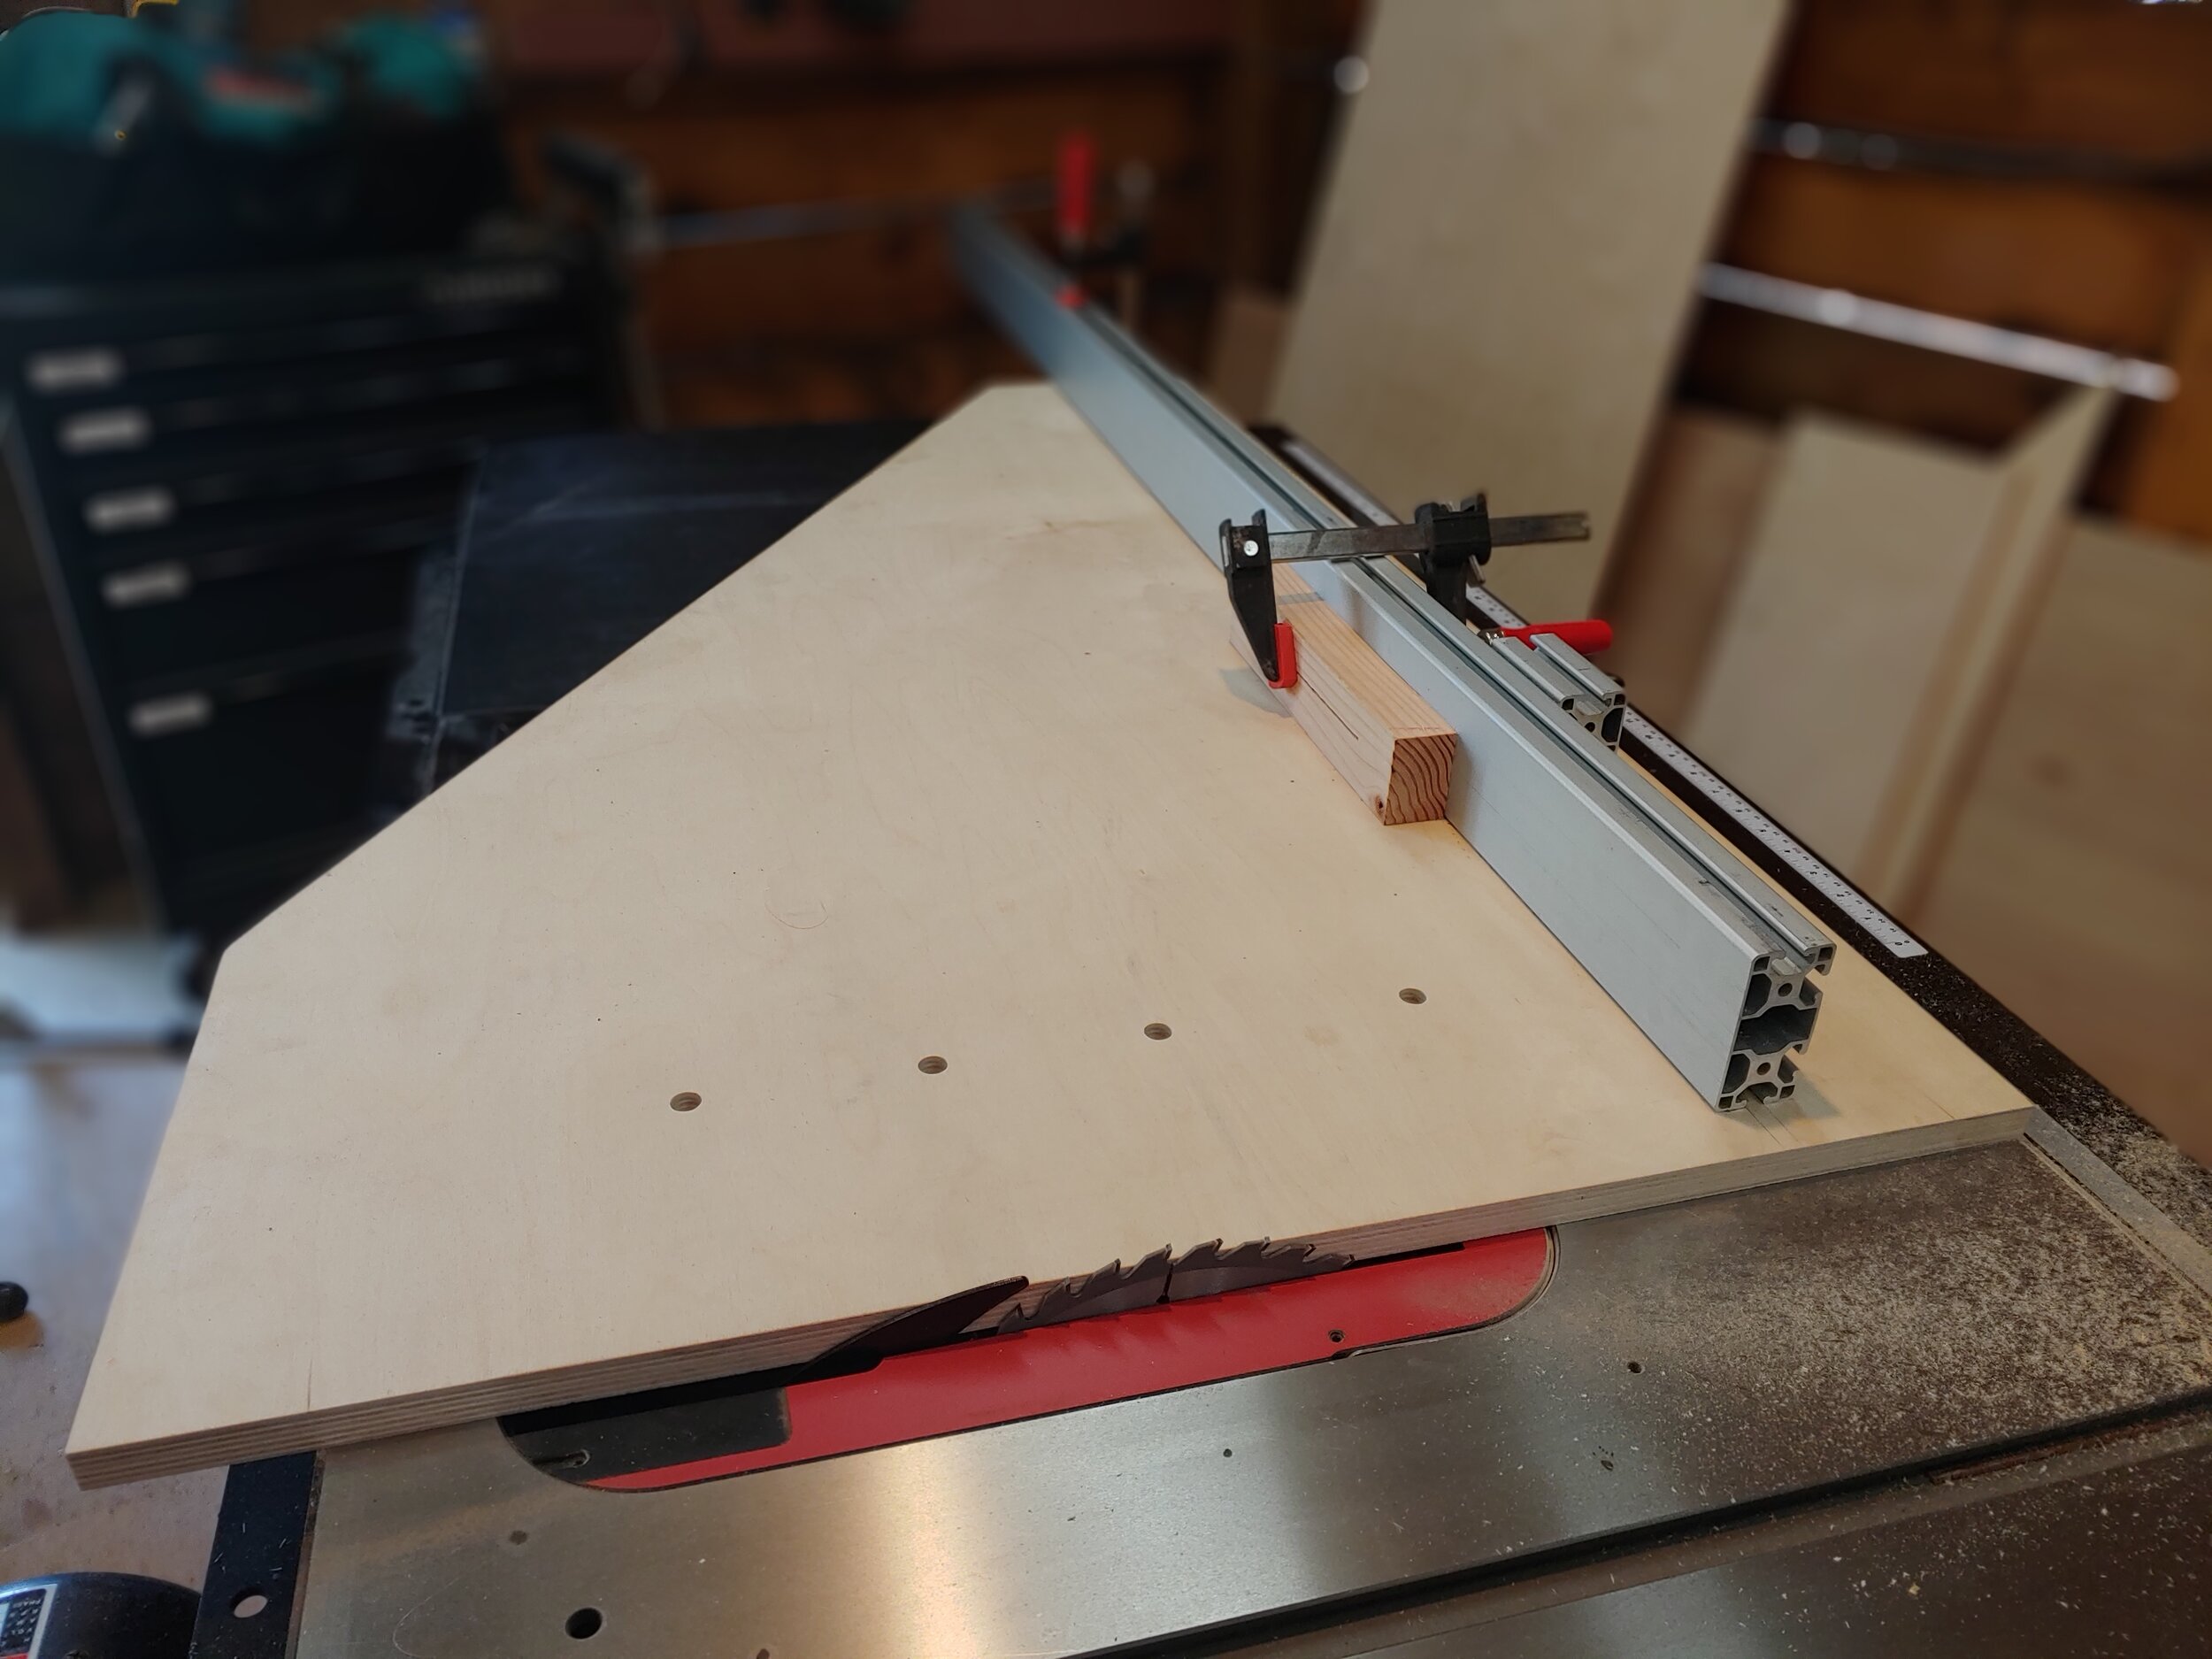
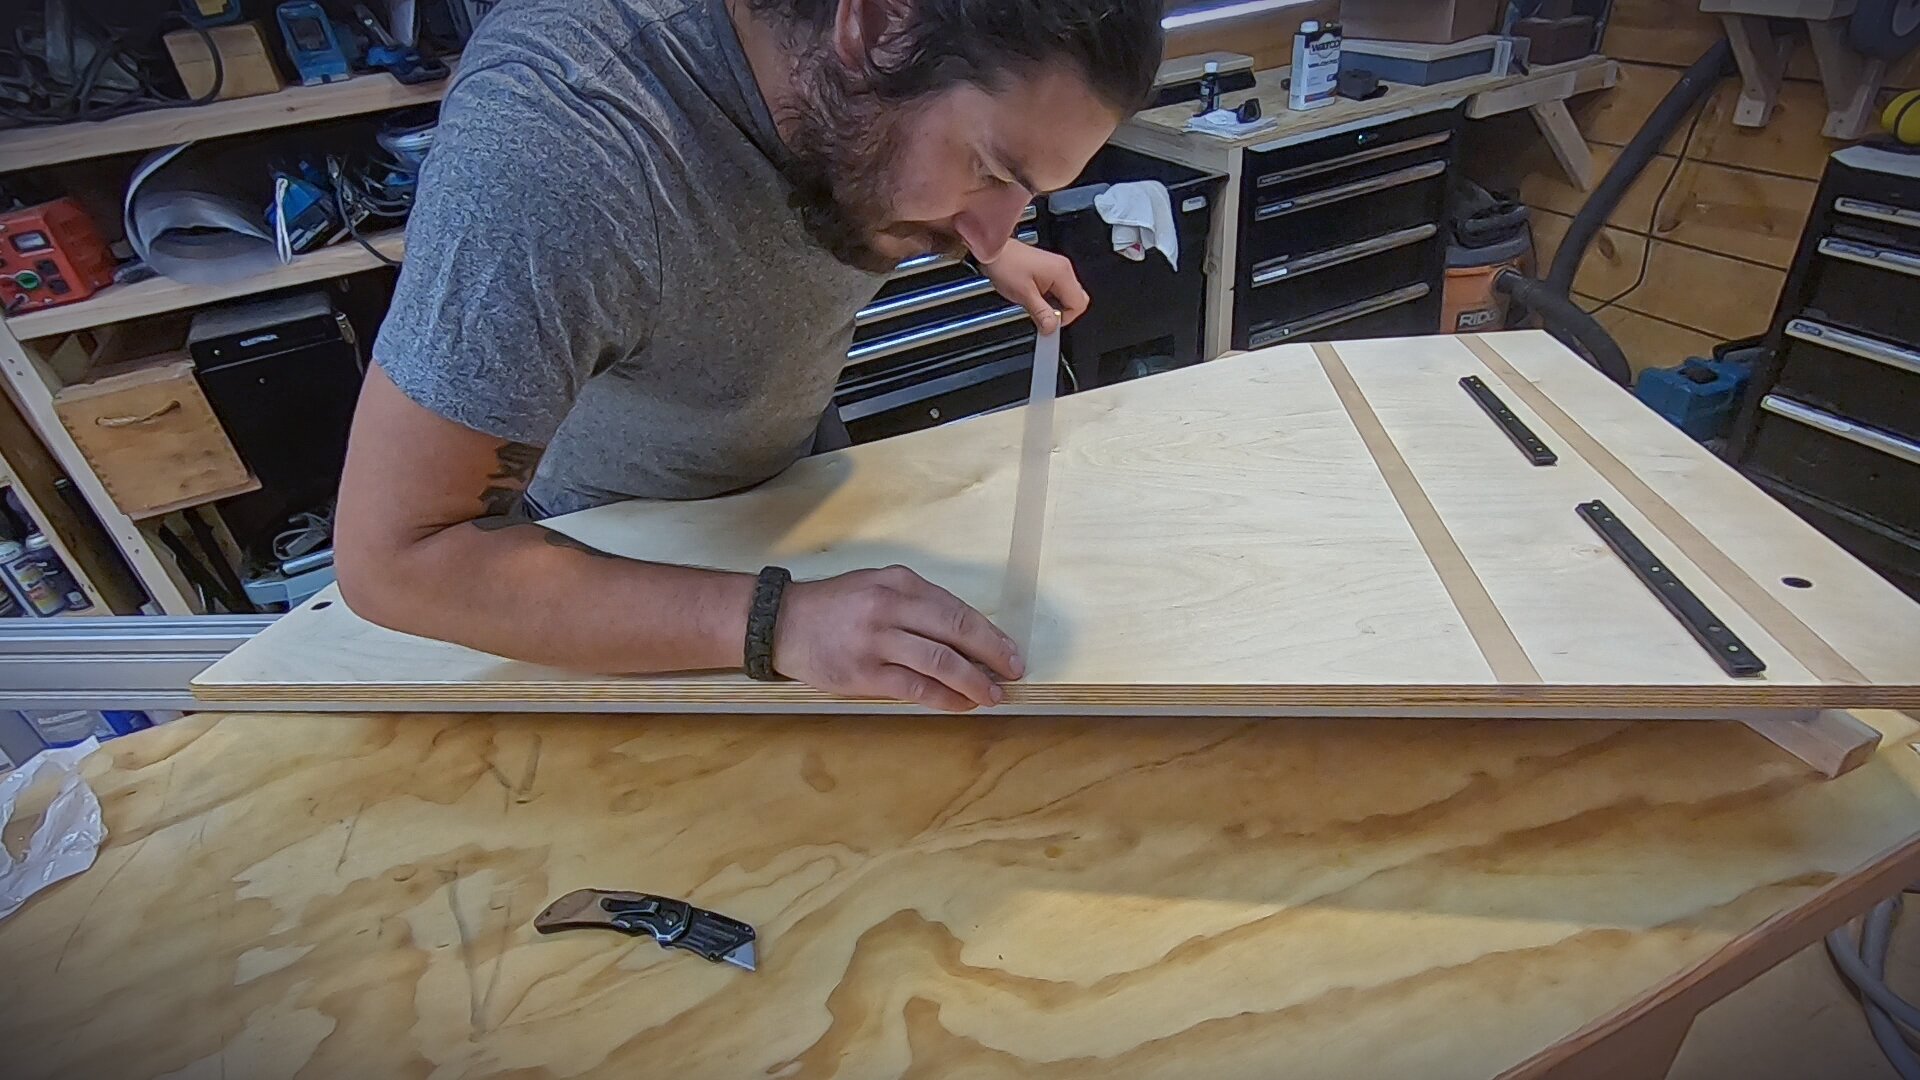
The sled itself was not all that difficult to build, nor very different from other sleds. I cut a large piece of high quality plywood to shape, positioned the sliding rails on washers, and used super glue to temporarily affix the rails to the under side of the board. Some holes and counter bores and the rails were attached. The fence is attached with t-nuts designed for this type of extrusion. There are only two points of attachment, this allowed me to start with the point closest to the blade, and use the other point to adjust the fit during square up. I got it nearly there, clamped it in place, drilled the second hole, and then fine tuned with the hardware in. There is a tiny bit of play in the hardware that lets me pivot the fence ever so slightly to ensure it is completely perpendicular to the blade.

I sanded and finished the table with a few coats of wipe on poly urethane to protect the wood and give it some resistance to moisture movement. I’d have liked to use phenolic plywood for the sled, but could not find any locally. The last step here was to attach some strips of PTFE tape to the underside of the sled to reduce friction.
Machining Fence Parts
The big item that sets this fence apart from the competition is the machined sliding carriage mounted to a pieces of 80/40 with its slide hardware. Not having access to a CNC machine at the moment I did not go overboard with curves and optimization; these are basically blocks with some holes in them. The main carriage block holds a ground steel dowel, tapped on one end, which in turn supports the flip away stop. The stop is a block of aluminum machined into an L shape and fitted with plastic bearings. The whole set up is very smooth and eliminates wiggle and slop that is common to off the shelf fence stops like the Kreg model.

Slop is the enemy when making tenon shoulders as you rotate the stock around to cut four sides, and any wobble or out of squareness of the end stop will show up as a misaligned cut when you come back around to the first one. This is even more apparent on rectangular stock where the bottom of the end stop might be closer to the blade than the top, which changes the effective length depending on if the stock is “laying down” or “standing up.”

The last machined feature of the carriage is an adjustable sight line gauge. A clear piece of plastic with an ink filled scratch is used to line up the carriage position with a measuring tap attached to the top of the fence. It is a small hair line and if I wanted I could get 1/4 mm accuracy. It is very apparent when the line is between the mm markings and I have been able to make very repeatable cross cuts without worrying about changing the carriage for other cuts. As of this writing I’ve cut the shoulders on a over a hundred furniture frame parts and have clean on square shoulders on all of them.

On the opposite end of the fence is a machined part that clamps an extension rod. The rod itself slides inside the extrusion on a little cylinder screwed to the end. This lets me have an end stop for extremely long parts. This would be useful in dimensioning door stiles, for example. The compromise here is between accurate adjustability and not having a massive 8 foot sled to push around. In the less common event that I’ll need to cut very long pieces, it will be sufficient to extend the sliding end stop and dial in my dimension. Were I to do this project again, I likely would have put another plastic bearing inside the cap, and make the rod cylinder also out of plastic for a smoother sliding action.

Assembly
After all the parts were machined I assembled the flip away slide hardware and screwed all the parts to the carriage and fence. The critical step in the assembly was to ensure everything was square. You basically want the face of the work stop to be co-planer to the blade. Where necessary I used a layer or two of electrical tape between mating parts to shim everything into place.


After assembly it was time to calibrate the measurement system. I started by marking a block of wood at as precise a five inches as I could get. I lined it up so that my mark touched the right side of the blade, and the work stop touched the other end of the stock. I made my cut, then checked the dimension. It was slightly over five inches, but within a few thousandths. I slide the measuring tape under the carriage and lined up the gauge with 5” and carefully removed the backing paper to stick it down from the far end so I could move the carriage out of the way later and maintain the tape position. Then I made another cut, and used this cut to slightly adjust the sight gauge to bring the dimension spot on. When all was calibrated I could pretty much hit exactly the dimension I was after.

Performance
I built this sled because I have two pieces of furniture to build and figured that it would be a good excuse to force me to take a little more time up-front to save a lot of time down the line. As soon as I was done with the project I ran lots of shoulder and length cuts and couldn’t be happier with the performance. I did spray some dry lube on the table saw to help with the sliding, and super glued a little block of wood to blade side of the fence to act as a zero clearance backer and prevent chip out. I probably will fabricated a dedicated block of hardwood for the purpose with counter bored screws to attach to the fence, but for now the little block does just fine.

I made a video about the build process, linked at the bottom of this page, and if you’d like to take a crack at making one of these sleds for yourself I have a set of plans available on the store here:

When critical length dimensions for long frame parts are required, you need a serious cross cut fence. Turn your table saw into a hybrid sliding table saw with this large fence. 60” of travel for a precise machined carriage with flip away work stop. Internal sliding end stop can support up to 10 feet of length for repeatable cuts.
A set of shop drawings and assembly instructions used to make this sled. Check out a preview of the plans below. All machined and modified parts included fully dimensioned drawings. Bill of materials list with all hardware.
It is recommended to machine the parts for highest quality performance, however I’ve included STL files of the custom parts should you want to 3D print them.
You’ll be able to download a ZIP of the plans and files after purchasing!